Panasonic G9II vs OMDS OM-1 compared for bird shooting
.
Table of Contents
Dynamic range and High ISO comparison
Focus testing I: Focus acquisition (speed and accuracy)
Focus testing II: Focus tracking
High-speed shooting I: Shooting at high frame rates
High-speed shooting II: Write speeds
High-speed shooting III: Rolling shutter
Things I particularly like/dislike about the G9II from a bird shooter’s perspective, sorted in order of importance to me
The Monkey Wrench: What’s my initial take on the OM-1II?
.
“Too Long; Didn’t Read”: Summary
The Panasonic G9II has quite a number of things going for itself that make it attractive for many types of subjects, from its sensor resolution and overall IQ to the good AF performance in low light, excellent video performance (which is not a subject of my mini-series but has received much praise elsewhere), and more. Unfortunately, these strengths come together with a few weaknesses that give it less appeal when it comes to the specific needs of photographers passionate about shooting birds.
While not without flaws of its own, the OM-1 performs better overall when it comes to focus acquisition and focus tracking (with Subject ID employed). The OMDS body also features better ergonomics for high-speed bird shooting, owing to the fact that its custom modes affect ALL camera settings, where the Panasonic still requires operating multiple difficult-to-reach control elements. Overall, the OM-1 caters to the needs of bird photographers better than the G9II does. On the other hand, the latter shines in a few areas where the OM-1 performs less well, and is a great tool for general-purpose (and also video) shooting.
Introduction
A long-time Nikon shooter (>20 years) and avid bird photographer, I started looking at other systems back when I realized that my Nikon’s Z7II did not offer the kind of AF performance I was looking for in a mirrorless body. The Z9 was still a long way in the making, plus it was predictably going to be too large and heavy for my needs anyway. I often shoot “on my feet” rather than with a tripod, plus I like shooting small birds, so my ideal photographic gear combines good image quality and AF performance with long reach and good portability.
After an interim period that had me using Canon’s R5 and RF 100-500 lens, which I still own, I got interested in the MFT system and ended up using the OM-1 with the Olympus 150-400 TC lens as my primary rig for bird shooting. I got my first OM-1 about 18 months ago and used it a lot since. The camera body is good, though not perfect, while the Olympus is my dream lens, as it combines prime-like image quality with a 1,000mm effective field of view (with the teleconverter engaged) and a weight/size that still allow me to shoot it hand-held for a long time.
Then, Panasonic announced the G9II, which immediately drew my attention. While I like the OM-1, of which I own two, it has its limitations: its AF tends to struggle a bit when twigs interfere with birds, which makes it difficult to get solid focus with a bird sitting in the middle of a bush, and it has a tendency to hunt in certain scenarios. Neither is a huge issue, but a body that offers consistent AF closer to the R5, which is my yardstick here, holds appeal for me. Initial reviews of the Panasonic indicated a more reliable autofocus, though most of them were rather vague as to what this meant. In addition, while the 25 vs 20 MP difference is not substantial, it is advantageous. This is because the subjects I love shooting most are small birds. Some of them are minute and shy, rarely letting me get close. As a result, I won’t be able to fill the frame, even with a long lens. When you crop a lot, every pixel matters, which added to my interest in the Panasonic.
In short, I decided to buy a G9II and compare it with the OM-1 myself. This report summarizes my findings over the course of more than two months, during which time I conducted all kinds of testing and did shoot a lot in the field while in Colombia, the country with the highest number of bird species in the world, and around the Galapagos Islands.
My test gear consisted of the two bodies plus three tele lenses, the Olympus 150-400 f/4.5 TC, the Panasonic Leica 100-400 f/4-6.3 (the “old” version), and the OMDS 40-150 f/4. The latter was included only because it occasionally offers a sanity check when comparing results with the other two. Naturally, each new body comes with a learning curve. I believe that the more than two months I spent with the G9II gave me enough competence in handling it to allow for a true comparison. (Note: The PL 100-400 did not come along on my trip to Latin America, so that part of my evaluation is largely based on the Olympus 150-400.)
Just before wrapping up my report, the OM-1II appeared on the horizon. It wasn’t part of my testing and will not receive attention except for at the very end of this report.
To manage expectations: this report is mostly about bird shooting. I believe those interested in using the G9II for other types of photography will still find value in reading it, but they need to keep in mind that this body also offers plenty of functionality I am completely ignoring in this write-up. Sorry for that. I do not shoot video at all and have no interest in it whatsoever. This report is therefore only about stills shooting. Furthermore, I shoot RAW, and RAW only. I’ve stopped shooting JPEGs 15 or so years ago. That is because image editing is an important part of my passion for photography, and JPEGs are a lousy base for that.
Lastly, I should mention that over the more than two months of me testing these bodies, I updated the firmware of the G9II to V2.0 and of the 150-400 TC lens to V1.1 during my testing when each became available. I did not notice any substantial changes.
Controls and ergonomics
The G9II feels a bit larger and chunkier than it really is, mostly because its thicker body ‘fills my hand’ [medium-sized] more, while leaving less depth for my fingers around the grip. This could be an issue for folks with long fingers. Both bodies feel comfortable when shooting. Neither feels large when comparing them to any of my past DSLRs.
I actually prefer the G9II when carrying gear by the grip, since the OM-1’s less accentuated grip edge often gives me the sensation that it might slip out of my hand. (To be honest, it never did in my 1.5 years of using two of these bodies.)
As far as other controls go, neither body is perfect, but both are good. The G9II’s three small buttons (WB, ISO, ExpComp) just to the rear of the shutter button offer plenty of customization options. Its joystick is better placed than the OM-1s, which I always felt sits a little low. On the flip side, the G9IIs AF-On button is too far to the right for my taste, because operating it leaves me with less of a firm hold of the camera compared to the OM-1. Similarly, the rotating dial on the rear is placed too low on the G9II for what I am comfortable with. Placing the Q button below it, instead of above, would have been a better choice, since that would regularly require less thumb movement.
In their initial review, PetaPixel’s Chris Nicholls complained about the Panasonics drive selector dial moving accidentally. He said he liked the OM-1’s much better since it is lockable. I feel the exact opposite way: I view both bodies’ dials as sturdy enough to make it unlikely to move one accidentally. What happened to me more than once, however, was that I found that dial accidentally locked on the OM-1. As Murphy will have it, this sometimes happened in a critical shooting situation where I wanted to change the drive mode but was unable to. A nuisance, though not a major advantage for either body.
As always, the above observations depend on individual hand sizes and preferences, so “your mileage may vary”.
Camera start-up times are similar. Both are fast enough for the vast majority of shooting situations. Well, sort of: the Panasonic takes about three seconds from initial start-up to being ready. It does not need that much time when turned on again later that day. Wake-up from sleep mode is equally fast with both bodies, so no issues here.
EVF performance: after the first few days of playing around with the new body, and again now, having used both of them a lot, I still find only minimal differences between the two bodies as far as the EVF is concerned. The lower resolution of the Panasonic’s doesn’t really bother me. With my eyesight (I wear glasses to correct far sight, though fairly thin ones), I generally didn’t find the differences between the OM-1’s 5.76MP and the G9II’s 3.86MP EVF to be pronounced. Both are OLED types and deliver a good, clear image. Going back and forth a lot, they just kept feeling about the same, in spite of the resolution difference. Actually, the G9II’s still feels marginally better as it seems to have slightly more contrast. Don’t get carried away over spec differences.
One aspect that is mildly irritating about the Panasonic’s is that the EVF image occasionally freezes for a fraction of a second. This was especially noticeable when shooting in low light, where the image in the viewfinder was at times a bit jerky. Not something that would keep me from getting the shot I want, but a surprise after having shot with the OM-1 for a while, which shows no such issue. (I’ll have a few more things to say about this when discussing AF tracking.) Viewfinder blackout when shooting single images is also briefer on the OM-1 than it is on the G9II, which I prefer. After all, its sole purpose is to signal that the image has been taken. This may be a matter of getting used to, but I think I’ll keep finding the G9II’s long blackout slightly irritating. It serves no purpose as far as I can see.
The thin plastic door over the G9II’s card slot feels much flimsier than the OM-1’s. When open, I always fear I might accidentally break it off. It also opened inadvertently several times when putting the body into a narrow bag compartment, which never happened to me with the OM-1.
Setup and customization
The OM-1 shows four selectable custom modes on its Mode dial, the G9II only three. Yet, the Panasonic’s C3 mode allows you to set up and choose from up to 10 different custom modes, bringing the total up to 12. You can give them custom names, so you won’t have to wonder which was which. The additional step to select which of the extra 10 you want to use is an inconvenience, but the flexibility offered here is nevertheless appealing since this also allows you to set up custom modes for HHHR, tripod HR, starry sky shooting, focus bracketing, or whatever else it is you fancy. Well done so far, Panasonic!
Yet, the customization philosophies of these two bodies are quite different. While the OM-1 uses a rather exotic arrangement of control elements, one that long-term Olympus users are familiar with but most others are not, Panasonic gave the G9II pretty much the same control layout most comparable bodies had in the past. This includes dedicated dials or levers for Drive mode and Focus mode, something that other brands, such as Canon, and Nikon, used back in the DSLR days but at least partly abandoned on their newer mirrorless bodies.
In my view, Panasonic would have done well in re-thinking that control layout, too. Dedicated Drive and Focus mode dials/levers mean you always have to set them individually and cannot program these as part of a custom mode.
I regularly shoot birds on a perch. Once I got the shot I want, I often switch to ProCap/Pre-burst in hopes of getting a few nice shots when the bird is taking off. With small birds, I may be lucky if it gives me three to five seconds from landing on a spot to taking off again. In most cases, I get less, even far less than this, so switching modes as fast as possible is paramount. The OM-1 allows me to configure one of its custom modes such that everything, including drive and focus modes, is set up as I want it after rotating a single dial or pushing a single button. With this body, it takes a fraction of a second to change from shooting a perched bird in S-AF, at a slow shutter speed and in single shooting, to shooting that same bird taking off, at a much higher shutter speed and at SH50 using Pro-Cap.
On the G9II, that same transition from one shooting mode to the other requires using TWO, sometimes THREE control elements: I have to turn the dial on the upper left of the camera to switch between single shooting, SH and PreSH modes, while I also need to turn the dial on the upper right to switch to another custom mode in order to adjust shutter speeds and several other settings. In addition, I may have to move the AF selector between S-AF and C-AF. No matter how much you practice this, it takes way longer than it does on the OM-1, since you need to use both hands and take your gear down in order to rotate both dials. Those who have been using Panasonic bodies for a long time may be used to all this, but please realize that this kind of control design is a carryover from the DSLR days, actually from the film days, that should have no place in modern mirrorless cameras. It slows down what could be a much faster action.
Shooting with the 150-400, or the even heavier new 150-600, you cannot merely keep the camera in its normal shooting position, as in doing so, you won’t be able to support it any longer and the lens’ full weight would be pressing on the bayonet. (I once cracked a bayonet by accidentally doing this. Won’t do it again.) If you use one of the lighter MFT lenses, this may strike you as a minor issue, but with the big lenses, a change that takes far less than one second on the OMDS takes several seconds with the Panasonic, so you end up losing shots. This has happened to me several times during my testing. Because I am no longer used to having to set all these control elements separately, I also lost burst shots with the G9II here and there because I failed to realize it was still set to single shot. That’s obviously part of my learning curve, but once you got used to the convenience the OM-1 offers, it becomes hard to go back.
To be fair, I should mention that the G9II allows you to map the burst mode setting on a button, as well as to set it via the Q menu. Configuring your camera this way will cut down the time a bit. It still takes more time than I like, a lot more than with the OM-1. On top of that, you can train yourself to do the custom mode change on the OM-1 almost instinctively, since all it takes it a short twist with the index finger. Regardless of which method you use on the G9II, you still need to execute a series of control changes that distract for a while, meaning that you have to concentrate on the EVF display rather than the bird. That in itself already takes more time, plus it means you may have to ‘reacquire’ the bird in the viewfinder, which at long FLs and with small birds can be tricky and add a further delay.
This issue set aside, both bodies offer plenty of customizable buttons and other control elements. Most control elements can be assigned other functions, which gives ample room to accommodate personal preferences. Here are four customizations I particularly recommend on the G9II:
1) Use the Control dial on the rear to change the AF area size. (Settings menu -> Operation 1 -> Dial Set -> Control Dial Assignment -> select Focus Frame Size). Once you set this, the chosen AF Mode can be modified by rotating the rear dial as follows:
- Pinpoint: changes the size of the magnification zone between three options.
- 1-Area: changes the area sequentially between nine different size options, from single point all the way to a large square box that covers most of the screen.
- 1-Area+: toggles between the inner box of the default 1-Area+ and its outer default box. Not a substantial change.
- Zone: changes the width of the zone oval between three options. Not a substantial change.
- Zone (hor./vert.): no effect.
- Full: no effect.
- Tracking: no effect.
As you can see from the list, the dial is most useful in 1-Area mode. Rotating it in that mode allows me to cover pretty much everything I’d ever need as far as AF sizes go. As a consequence, I now hid Pinpoint, 1-Area+ and Zone from all of my custom modes, since I feel they do not offer anything to me that the customized 1-Area mode does not. Even if you are not prepared to do the latter, I highly recommend assigning the Control dial as described. This allows for a significantly faster AND more flexible change of AF areas than the AF Area menu itself does.
Speaking of Pinpoint: a Panasonic employee made me aware that this AF area is a carry-over from the DFD-only days, which between the lines indicated that it does not offer much value anymore, anyway.
[Note: You can achieve the same changes in AF area size by assigning “Focus Area Set” to a function button. However, taking this route means that changing the size takes longer: with this method, you first need to press the assigned button before being able to change the AF area size via a dial, whereas using the rear dial allows instant changes.]
2) Assign “AF-Point Scope” to a function button. (I use Fn3.) When pressed, the center area of the EVF gets enlarged, allowing you to check focus and image sharpness with greater accuracy.
3) Set up two function buttons for “AF-ON Far” and “AF-ON Near”. (I use Fn9 and Fn11, the up/down buttons on the rear dial.) When the body focuses on the wrong thing, for example a twig or a fence rather than a bird that sits elsewhere, using the appropriate one of these buttons instantly gets the body to leave the current plane of focus and look in front of respectively behind it. The change this triggers is pretty large, which means that these functions aren’t of much use when there is only a focus near miss. However, they are very useful when the camera simply focuses on the wrong place.
4) Change the function of the WB/ISO/ExpComp buttons from their default setting of “After pressing 2” to “While pressing” (Settings menu -> Operation 1 -> WB/ISO/Expo. Button). The default way requires you to first press and release the button, then rotate a dial to change the setting, then press again. The change I recommend means you now press the button and immediately start rotating the dial to change the setting, which is set when you release the button. This is much faster.
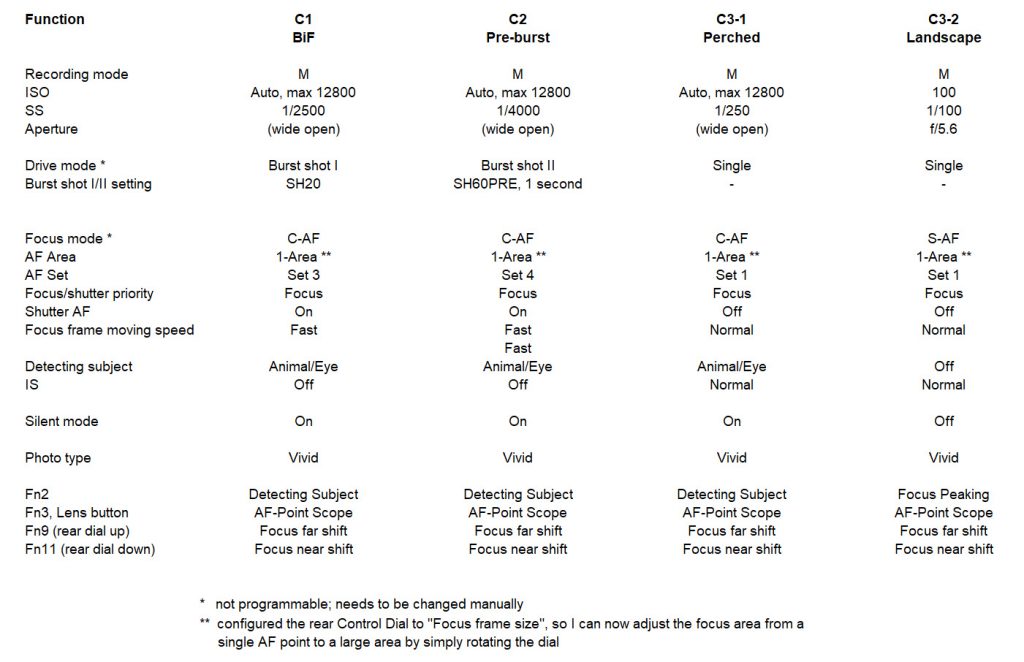
In case anyone cares, here’s an overview of my current G9II camera settings & customization. They mostly duplicate the way I have my OM-1s set up but might still change over time.
Neither body has what I still miss from my Canon R5, namely two buttons next to the AF-On one that can be used to quickly switch AF settings with one button press instead of having to pull up a menu. Well, you can’t have it all…
A few related side notes:
- I struggle to understand why Panasonic leaves so much of the G9II’s functionality “hidden” in its default settings. Settings 1), 2) and 3), for example, do not have any adverse implications I am able to see but would make for a nicer out-of-the-box experience. Those who prefer their body to be configure differently would still have the option to do so.
- Not being able to assign HHHR to a custom button is another pity on the G9II. (You can only do that by calling up the drive menu.) The OM-1 does this one better.
- It didn’t occur to me until I specifically looked for it that while the OM-1 includes subject distance in the image metadata, the G9II does not. This can be quite handy sometimes, so bummer on the latter.
- An often discussed OM-1 characteristic should be mentioned here for completeness: don’t use Subject Detection in combination with CAF+Tracking on the OM-1. They don’t collaborate well. For my part, I altogether ignore CAF+Tracking when shooting birds.
As an aside, someone raised the question whether Olympus teleconverters would work properly on the G9II, so I checked that on my 150-400 with the MC-14: it works fine. As we know, a Panasonic TC with an Olympus lens won’t work in this case, so make sure to get a TC of the same brand as the lens.
Dynamic range and High ISO comparison
Bill Claff runs a website called PhotonsToPhotos.net. On it, he published some interesting findings on the differences between using mechanical and electronic shutter on the G9II. (Here’s a link to a comparison between these two and the OM-1: https://www.photonstophotos.net/Charts/PDR.htm#Olympus%20System%20OM-1,Panasonic%20Lumix%20DC-G9M2,Panasonic%20Lumix%20DC-G9M2(ES)). These curves have been hotly debated, and triggered much speculation about the G9II’s sensor performance.
In a nutshell, the G9II has a fairly limited range up to about ISO800 when shooting with electronic shutter in one of the high-speed SH burst modes. This is because Panasonic’s Dual Gain feature, the parallel readout of two sensor signals with different gain levels, is only usable in combination with the mechanical shutter or when shooting electronic shutter in L/M/H burst modes, which is probably because it increases the sensor readout time. With Dual Gain (the upper of the two G9II curves, the camera performs remarkably well when compared to the OM-1, especially given its higher sensor resolution.
The big question this triggers is whether SH shooting would produce inferior results from an IQ perspective.
My short answer is ‘no’. Ok, shots taken at high ISOs need more post-processing, but I’ve taken plenty of single shots at something like 1/250s, followed by pre-burst shots at 1/2500s or so, of the same bird taking off, where I am hard pressed to tell one from the other if IQ is the determining factor. Even when shooting below at or below ISO 800, the body’s dynamic range is plenty good enough to get excellent results when shooting birds. Overall, I am very happy with the IQ the Panasonic delivers, and I like the colors it produces when shooting RAW and converting in DxO or LR a bit better than the OM-1’s. Not a huge difference, though, and one that is easy to level in post.
For bird shooting, the G9II’s IQ is perfectly fine for me, almost independent of ISO levels. Following other threads that discussed the same subject on this forum, I can’t help the feeling that some people obsess too much over it.
Below follows a series of shots taken under identical conditions (same lens, same camera settings) in artificial LED light and ranging from ISO800 to 12800. Noise reduction was turned off in all cases. I am sharing 1600x1600px crops from full images, after converting RAWs to JPGs in Adobe’s RAW Converter, using the Adobe Standard profile without any other changes.
No surprises here: the noise comparison looks pretty much as I would have expected it to, with the G9II showing slightly more of it, owing to its smaller pixels. While to me it seems that it has a little more luminance noise, chroma noise, always more pronounced on the OM-1 if ISOs are high, strikes me as more subtle on the Panasonic. Overall, I consider its noise performance as almost as good as the OM-1’s, in spite of the 25% higher pixel count, which is good news.
Colors are slightly different between the two bodies, with the OM-1 appearing a bit warmer while the G9II seems to have a slight magenta-ish cast. Neither of them strikes me as better. I did not notice any color issues that would have me worried and am comfortable shooting using ISO6400. If shutter speeds demand it, I will even go up to ISO12800. With proper noise reduction, sharpening, and some color adjustments, those images still look pretty good.
ISO 800 (G9II on left, OM-1 on right)
ISO 1600

ISO 3200
ISO 6400
ISO 12800
Image stabilization (IS)
<<<START OF RANT>>> For bird photography, ANY image stabilization system will do. Folks who won’t let a Panasonic body get near their Olympus 150-400 lens because they do not want to lose Dual Sync IS need to brush up on their knowledge about how IS works. <<<END OF RANT>>>
Make no mistake: I enjoy shooting landscapes and love the fact that I can shoot MFT handheld in poor light without even giving that a second thought. It is amazing what several MFT bodies are able to do because of the system’s excellent IS. Yet, bird shooting is an area where this rarely matters. IS helps when trying to find a bird in the viewfinder. However, you do not need the image stabilization to perform particularly well to get a good shot of that bird. Here is why:
When shooting Birds in Flight (BiF), if your shutter speeds aren’t in a range where IS is essentially dysfunctional anyway, which with this long lens means > 1/1000s, you’re likely doing something wrong. Truly sharp shots require your shutter speed to be at least that fast, and usually much faster than that, in order to avoid motion blur.
Shooting perched birds, I normally start at 1/500s. I may be willing to go down to, say, a minimum of 1/100s, maybe even 1/50s if the light is dismal. Any lower than this, the risk of motion blur goes up disproportionately, since most birds, especially the small ones I like best, are constantly moving. If a bird is half asleep, I might be able to go even lower, but that won’t give me an interesting shot anyway, so I usually pass.
Even with the TC engaged on my Big White Oly, for a full-frame (FF) equivalent Field of View (FOV) of 1000mm, 1/50s represents only a little more than 4 stops of image stabilization versus what the golden “reciprocity rule” (“Always shoot at shutter speeds that are at least as high as the inverse of your focal length”) prescribes. Any semi-decent IS system should get you there just fine. No sync’ing between body and lens is needed for that.
The main point I am making with this is that unless someone invents a subject stabilization system that will keep the animal frozen in place until I got the shot (I like that idea… ), bird photography has few scenarios where high IS performance would make any difference. Be careful not to bark up this tree too much.
Testing IS performance is difficult. Most people I know judge IS performance by how stable the image is in the viewfinder. That might give a hint, but is not overly relevant. What you really want to know is how much more accurate your focus is with IS than without it.
Allow me to digress for a moment: an often misleading aspect with IS is that manufacturers tend to make it sound like until you reached the upper IS limit, you will always get perfectly sharp images. In case of these bodies, that would be something like “Shooting at 8 stops below the reciprocity rule is fine. At 9 stops, you’re going to get lots of crap shots.” With my 1000mm (FF equivalent FoV) lens, 8 stops should give me perfectly well focused pics down to as shutter speed of 1/4s, right? Well, checking the reality of this, which I have done quite a few times, makes you realize that even well within the range of IS stops that are supposed to yield good results, the percentage of excellent or good shots already drops significantly as you lower the shutter speed, while the percentage of poor or inacceptable shots inches up at the same pace. Shooting a Nikon D500 with a 500mm PF lens, for example, a combo Nikon specifies as having between 5 and 5.5 stops of image stabilization, already dropped down to only about 50% excellent or good shots within 4 stops in my own tests.
I conducted the same test here that I used years ago to get an idea of the Nikon’s performance, one I used with many other bodies and lenses in the past, so I understand it fairly well: I shot both bodies, G9II and OM-1, alternatingly with the 150-400 and its TC engaged, at a focal length of 500mm. Shutter speeds were 1/25s, well below what I normally use and about the lowest I was able to go with the available light on this fall day. The test object, a small white sheet with print on it, in this case is about 25 meters away, a distance I often shoot from in the field. (Think of it as taking pics of a Great Egret from a distance.) I took 50 shots with each combo. For good measure and to give folks who prefer to shoot with mechanical shutter at least some data (I shoot 100% electronic), I shot the Panasonic with both, MS and ES.
Let’s keep in mind that the results are impacted by
- how well the camera’s and/or lens IS works,
- how well the camera’s AF works, AND
- how well >>>I<<< work in keeping the gear steady while shooting.
Conducting this test is quite cumbersome. In order to minimize the impact my handling of the gear has on the results, I shoot like I’d do when shooting birds: solid body stance, elbow brace for added stabilization, camera firmly against the cheek, holding my breath while shooting. I always take these shots by refocusing on another target after every other shot, such that the focusing system keeps having to prove itself. This makes it pretty comparable to real life bird shooting.
Next, I sorted each of the images into one of four focus categories: excellent, good, poor, and unacceptable. (Yet another task I highly recommend to anyone who isn’t bored enough just yet… ) The differences between excellent and good are minimal and visible only at 100%. Even a ‘poor’ one still looks alright if viewed as a full image on my 27” monitor.
1/25s on the Big White Oly is now more of a challenge, inasmuch as it requires almost 5.5 steps of image stabilization. Let’s see what I got, then, out of the 50 shots in each series:
What’s this telling us? Well, for starters, don’t go overboard on these small variances. I was likely a little more casual when shooting with the OM-1, so its results came in slightly worse than the Pana’s. In my experience, these small differences are well within the variances that >>>I<<< cause, so they tell us nothing about the two bodies. All I can conclude from this data is this:
- Using the Oly lens on the Pana body does not come with a price, at least not from an IS perspective.
- Both bodies focused equally well. (Not much of a challenge with the clearly visible target, really).
- IS did an excellent job at this low shutter speed. (Which, again, is below anything I’d ever use in my shooting).
(If you managed to get a bird shot taken at 1/10s or whatever, please realize that this does not prove me wrong on the last point. I know this is possible. However, while you managed to get this shot, you probably had to cull 20 or more others.)
I would love to be able to demonstrate to you how much impact the lens IS respectively IBIS really had here, but neither body allows me to turn IBIS off while keeping lens IS on. Again, I am convinced that the strong performance we see here (~80 percent good shots with 1000mm at 1/25s is excellent) is little else than testimony to the Big White Oly’s great image stabilizer.
Ok, so how DOES the image stabilization look in the viewfinder of each body? (Hey, did I really just fill one whole block of part II without giving you any REAL information?)
- When shooting with the Olympus 150-400 @ 500mm, the EVF image is noticeably more stable with the OM-1. The G9II’s EVF is quite a bit jumpier with this lens.
- When shooting with the PanaLeica 100-400 @ 400mm, the EVF image is now slightly more stable with the G9II. Not a big difference between the bodies here.
- When shooting with the OMDS 40-150 @ 150mm, the EVF image is very smooth with either body.
Image stabilization: had a few additional findings regarding IS, which I discussed in Part II: since it remained unclear when/whether the G9II uses IBIS or lens IS with non-Panasonic lenses, I took a few test shots and then checked the EXIF data:
- PanaLeica 100-400: G9II reports “On, Dual2IS” for all focal lengths in the Makerdata section.
- OMDS 40-150 f/4: G9II reports “On, Body only” for all focal lengths.
- Olympus 150-400 TC: G9II reports “On, Optical” for all focal lengths.
In other words, Dual IS is used on the G9II with Panasonic lenses. With other lens makes, the camera uses IBIS if the lens has no IS. If it has IS, I am not sure whether the G9II always uses it or decides individually, which would make some sense given that IBIS becomes more effective with wide lenses and less so with tele ones.
Focus testing
If you are even remotely like me, how well the G9II focuses will be what interests you most in this new body. (“Don’t give me all that crap about noise and colors, just tell me how well it focuses”.) AF performance is the name of the game. That’s not AF-S with static or mostly static subjects, it is usually AF-C, with birds that give you little time to get the focus right, either because they move around all the time or because they keep taking off, flying, landing. Shooting a sitting eagle, or an eagle in flight against the sky, isn’t much of a challenge. Lots of bodies will do a good job in this case. I have no doubt that the G9II can do a fine job here, too.
Shooting an American Pygmy Kingfisher, a Golden-browed Chlorophonia, a Blue Rock Thrush, a Gouldian Finch or any others of the many small birds that enrich this planet’s beauty, however, belongs to the narrow category of photo shots where top notch AF performance often makes the difference between getting a nice shot of the bird and getting a nice shot of the place where the bird just sat. This is why I bought the G9II: I was hoping that it would get me closer to the R5’s performance, ideally in focusing speed and accuracy, as well as AF tracking, without requiring excessive sacrifices in other areas.
Well, that, plus the resolution gain: while the 25 vs 20 MP difference is pretty small, it means a few more pixels. Many small birds are and quite shy, so they rarely let me get close. Accordingly, even with lens plus TC at 500mm, they won’t usually fill the frame. When you crop a lot, even a few more pixels matter.
Back to focusing. I will start with a few general observations, then split the discussion between focus acquisition (speed and accuracy), for which I share results from my initial testing in November-ish Berlin, Germany, three weeks in the Colombian summer, and a week around Galapagos, plus focus tracking, which I tested only in Colombia and Galapagos, as only those gave me the real-world shooting opportunities that matter most.
For starters, I LOVE the Panasonic’s picture-in-picture option (“AF-Point Scope”) when zooming. I mentioned it already under “Setup and customization”: much of the image in the viewfinder remains unchanged, while the center area is enlarged, allowing me to verify focus accuracy. This way, I won’t lose sight of my overall subject while being able to clearly check whether the focus is accurate. Excellent idea and implementation.
The OM-1 allows focus peaking when using manual override. In other words, you can keep the body in AF-C mode and still use the lens’ focusing ring to adjust the focus while getting focus peaking in the viewfinder. This is very helpful when a bird’s perch is partly hidden behind branches, for example, and the camera insists on focusing on the latter. The G9II only allows the use of focus peaking with MF and AF-S, but not with AF-C, which I consider a bummer.
Speaking of focus peaking, the respective implementation strikes me as considerably better on the OM-1. On that body, assessing your focus accuracy is a snap. It also gives you a good idea of your Depth-of-Field (DoF) zone. I had to crank the sensitivity up to +2 on the G9II to get a visible effect, but it is not as easy to make out.
Focus testing I: Focus acquisition (speed and accuracy)
I initially ran a few tests in order to compare how quickly and reliably each body acquires focus in certain situations. Each test had the cameras shooting in P or A modes, going back and forth between two different focus targets, using a medium size AF area, with subject detection turned off. The OMDS 40-150 f/4, Panasonic Leica 100-400 (version 1) and Olympus 150-400 TC served as test vehicles, as I also wanted to find out whether the focusing performance was consistent across different lenses and lens makes. In addition, I tested the two latter lenses at their short and long ends. I repeated each test several times.
Both tests created unusual focusing situations that do not resemble normal bird shooting scenarios. I used them to get a read on how well each body handles the particular challenges, not to get an overall idea of their focusing performance, so let’s be careful not to jump to conclusions too quickly.
Test A. In decent light, I used a window corner (about 2m away) as the near target, and a colorfully painted house wall (about 25m away) as the far one. The latter was shot through a window that has several dirt spots. This wall has some featureless areas, presenting more of a focus challenge, but these still show quite a bit of structure once the focus is accurate.
- OMDS 40-150 f/4 @ 150mm: The G9II focused slightly faster and more reliably. The OM-1 was a bit slower and occasionally hunted before acquiring focus, or focused on the window pane rather than the distant wall.
- PL 100-400 @ 100mm: The G9II focused reliably, though this time noticeably slower than the OM-1. However, the latter occasionally focused on the window pane rather than the distant wall.
- Oly 150-400 @ 150mm: No big differences between the two bodies. The G9II seemed a bit slower than the OM-1, but this could only be my perception.
- PL 100-400 @ 400mm: The G9II focused slightly faster and more reliably. More than once, the OM-1 struggled to find the wall and got nothing in focus, whereas the G9II found its target every time.
- Oly 150-400 @ 400mm: Focusing speed was about the same between both bodies, maybe with a slight edge for the OM-1. More than once, however, the OM-1 struggled to find the wall, getting nothing in focus. The G9II found its targets every time, without exception.
No big revelations so far. The G9II did marginally better overall, but both performed well enough. Shooting through glass can create all kinds of issues, so the fluke with the OM-1 on the 150-400 @ 400mm may be just that: a fluke.
Test B. At nighttime, I used a brightly LED-lit near target that had plenty of detail and contrast, about 1.5 meters / 5 ft away (=above each lens’ MFD), and a poorly lit bookshelf, about 4 meters / 17ft away.
- OMDS 40-150 f/4 @ 150mm: The OM-1 was slightly faster than the G9II in the bright area, but notably slower in the dark one.
- PL 100-400 @ 100mm: Same as above.
- Oly 150-400 @ 150mm: The G9II was relatively slow and occasionally hunted in the dark area but ultimately found the target every time. The OM-1 hit the bright target well and did ok in the dark area.
- PL 100-400 @ 400mm: The G9II was now faster in both areas, particularly in the dark area. Surprisingly, the OM-1 would often not acquire focus at all on brighty near target. [NOTE: changing the size of the AF area on the OM-1 did not have an impact – it kept struggling.]
- Oly 150-400 @ 400mm: G9II showed much better performance with both targets, though it occasionally failed to bring the near target into focus. The OM-1 struggled substantially with the bright near target, unable to bring it into focus most of the time. It was VERY slow, but more reliable, with the low-light target.
Here, things got more interesting. Let’s keep in mind that the focusing distances weren’t anything like what I’d have in normal shooting. How much better the Panasonic performed in low light, in both speed and accuracy, was nevertheless a surprise to me. I am curious to see whether that pattern repeats itself when shooting birds in low light. My real-world experience with the OM- 1 is that it sometimes needs too much time to get a bird in focus in low light, so I am encouraged by what I the G9II’s showing in this test. The fact that the G9II seems to focus a bit more slowly in good light doesn’t bother me much, as I don’t consider the observed differences to be significant enough.
The differences in focus accuracy were striking across the board. I want to be careful not to make the OM-1 sound like a slouch here, because it isn’t. In my experience, it does misfocus every so often, though, which so far seems less of an issue with the G9II. The true test is obviously how both of them perform in the field.
Why the G9II would perform relatively better at the long end of both 400mm lenses than on the short one beats me. In any case, this does not give me much heartburn, partly because I use the long end most of the time anyway and partly because the differences strike me as tolerable.
Generally, the Panasonic shows a different focusing characteristic: it often “takes a moment to think” before the focus starts to change notably, while changing quickly thereafter. In contrast, the OM-1 shows a more continuous focus point transition. More on that below.
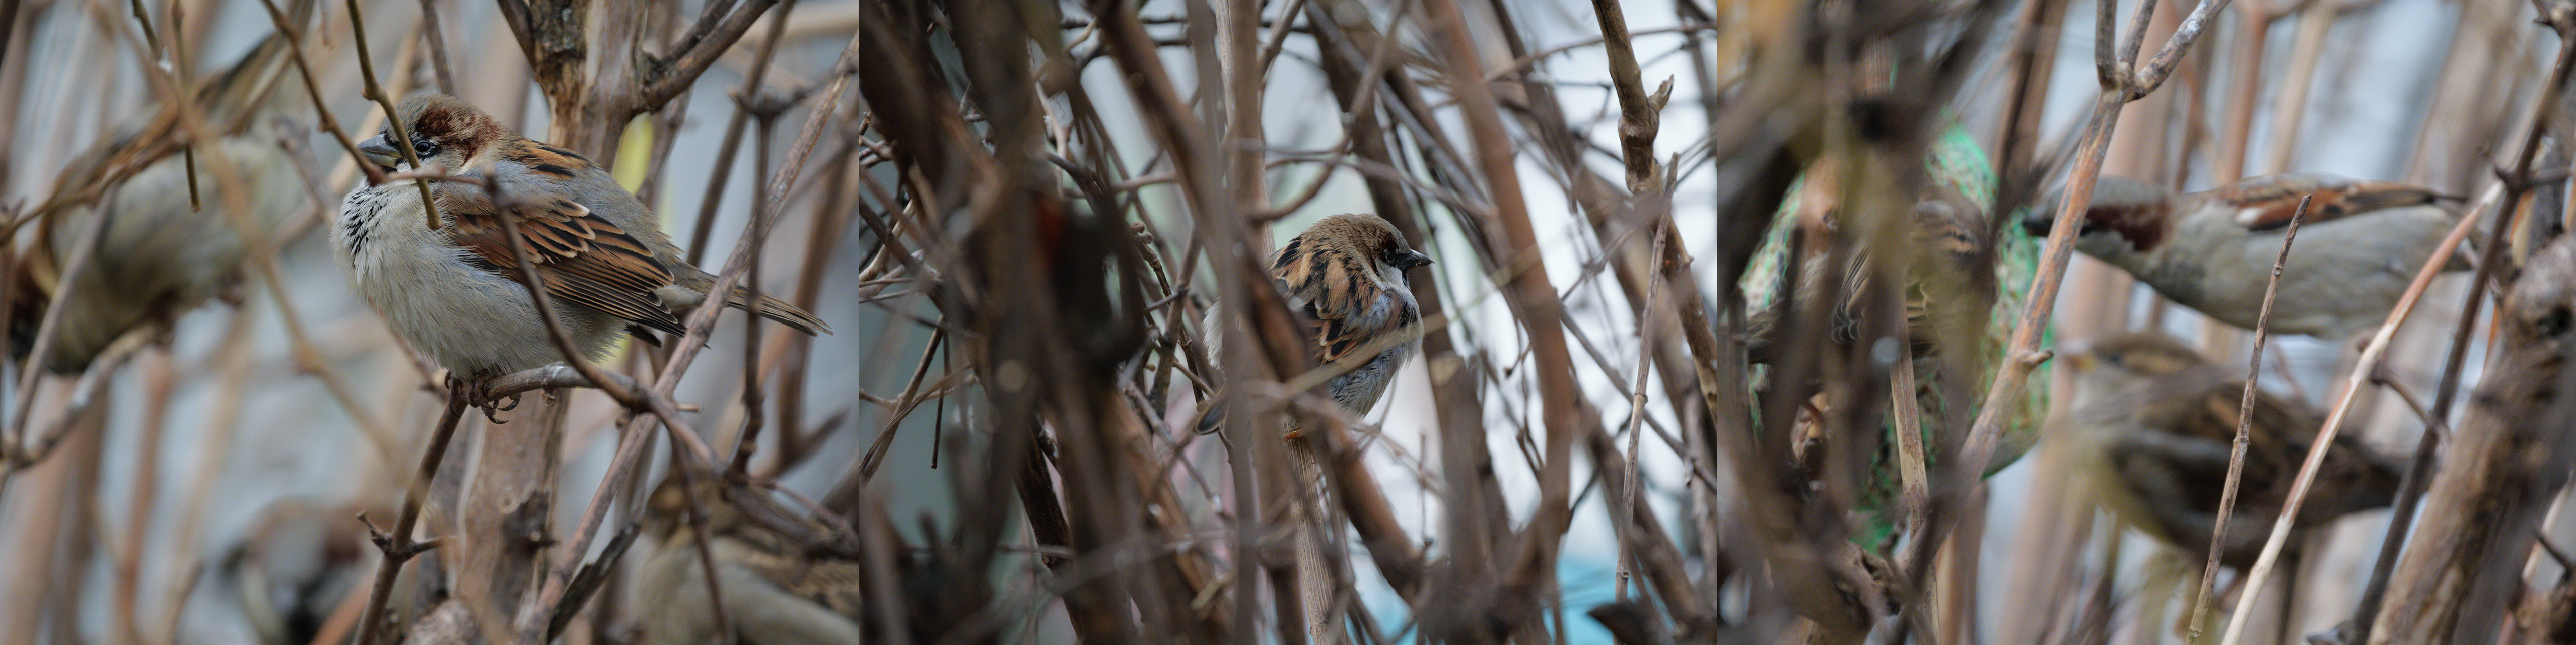
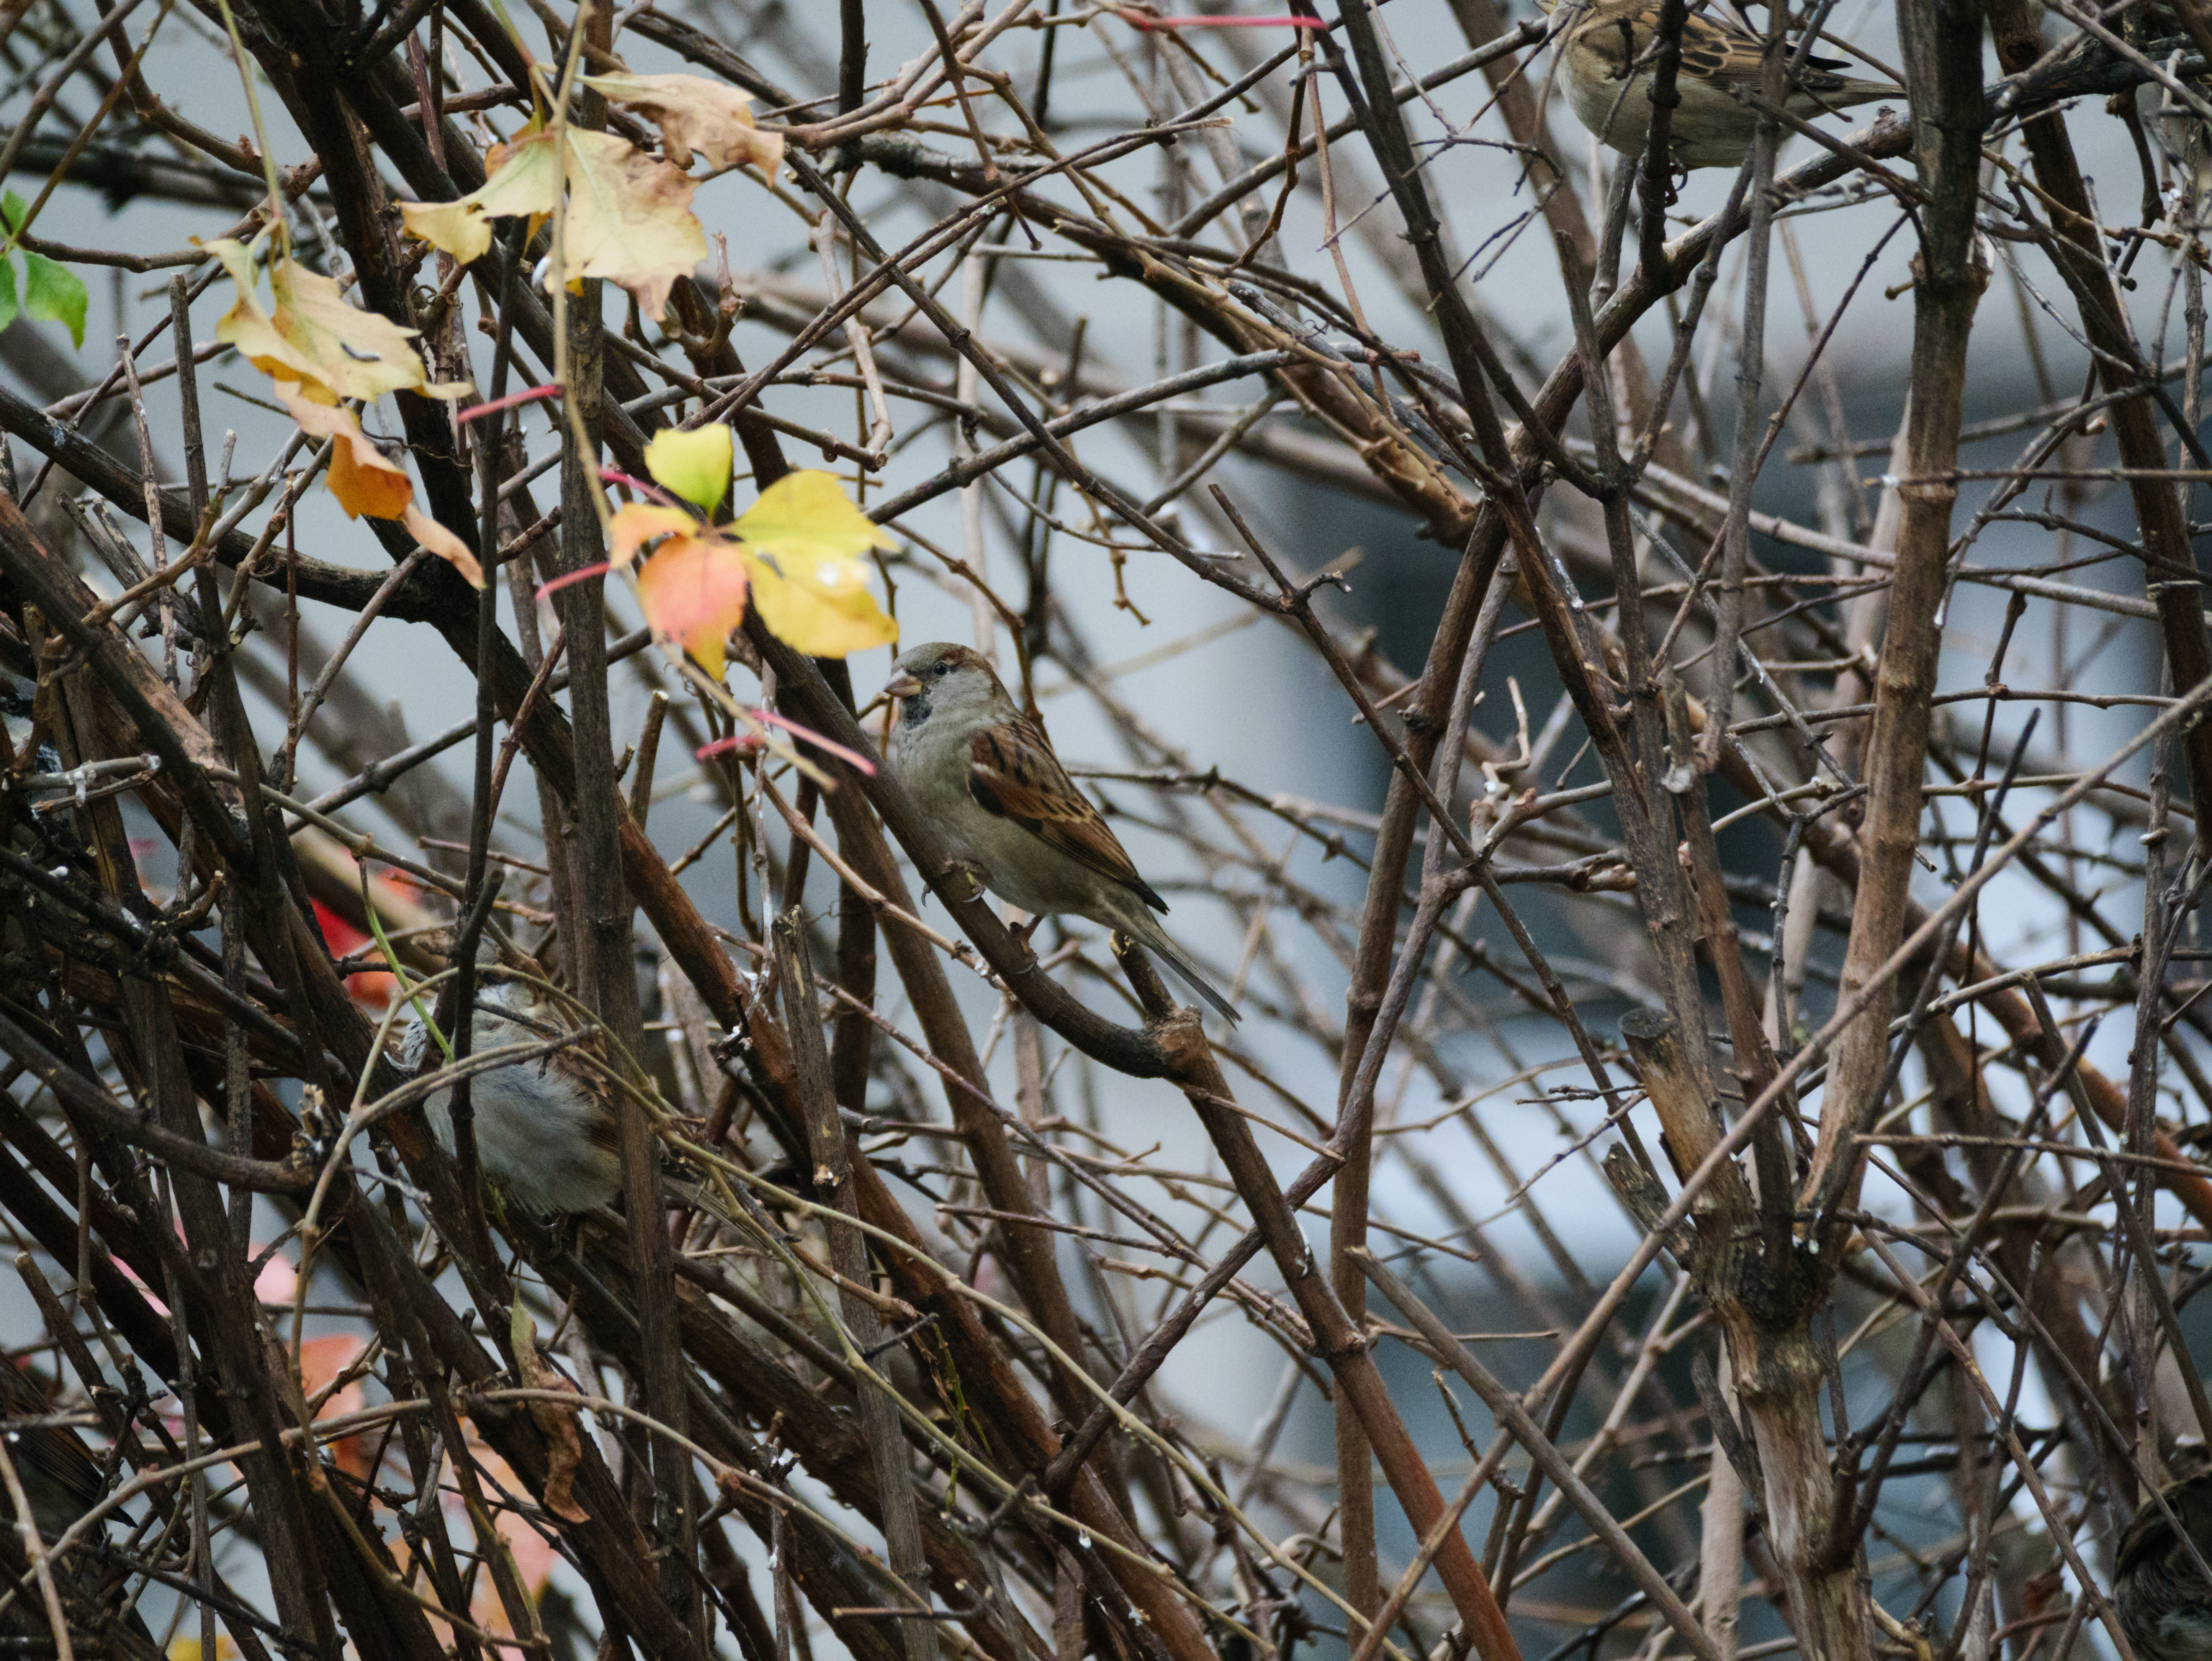
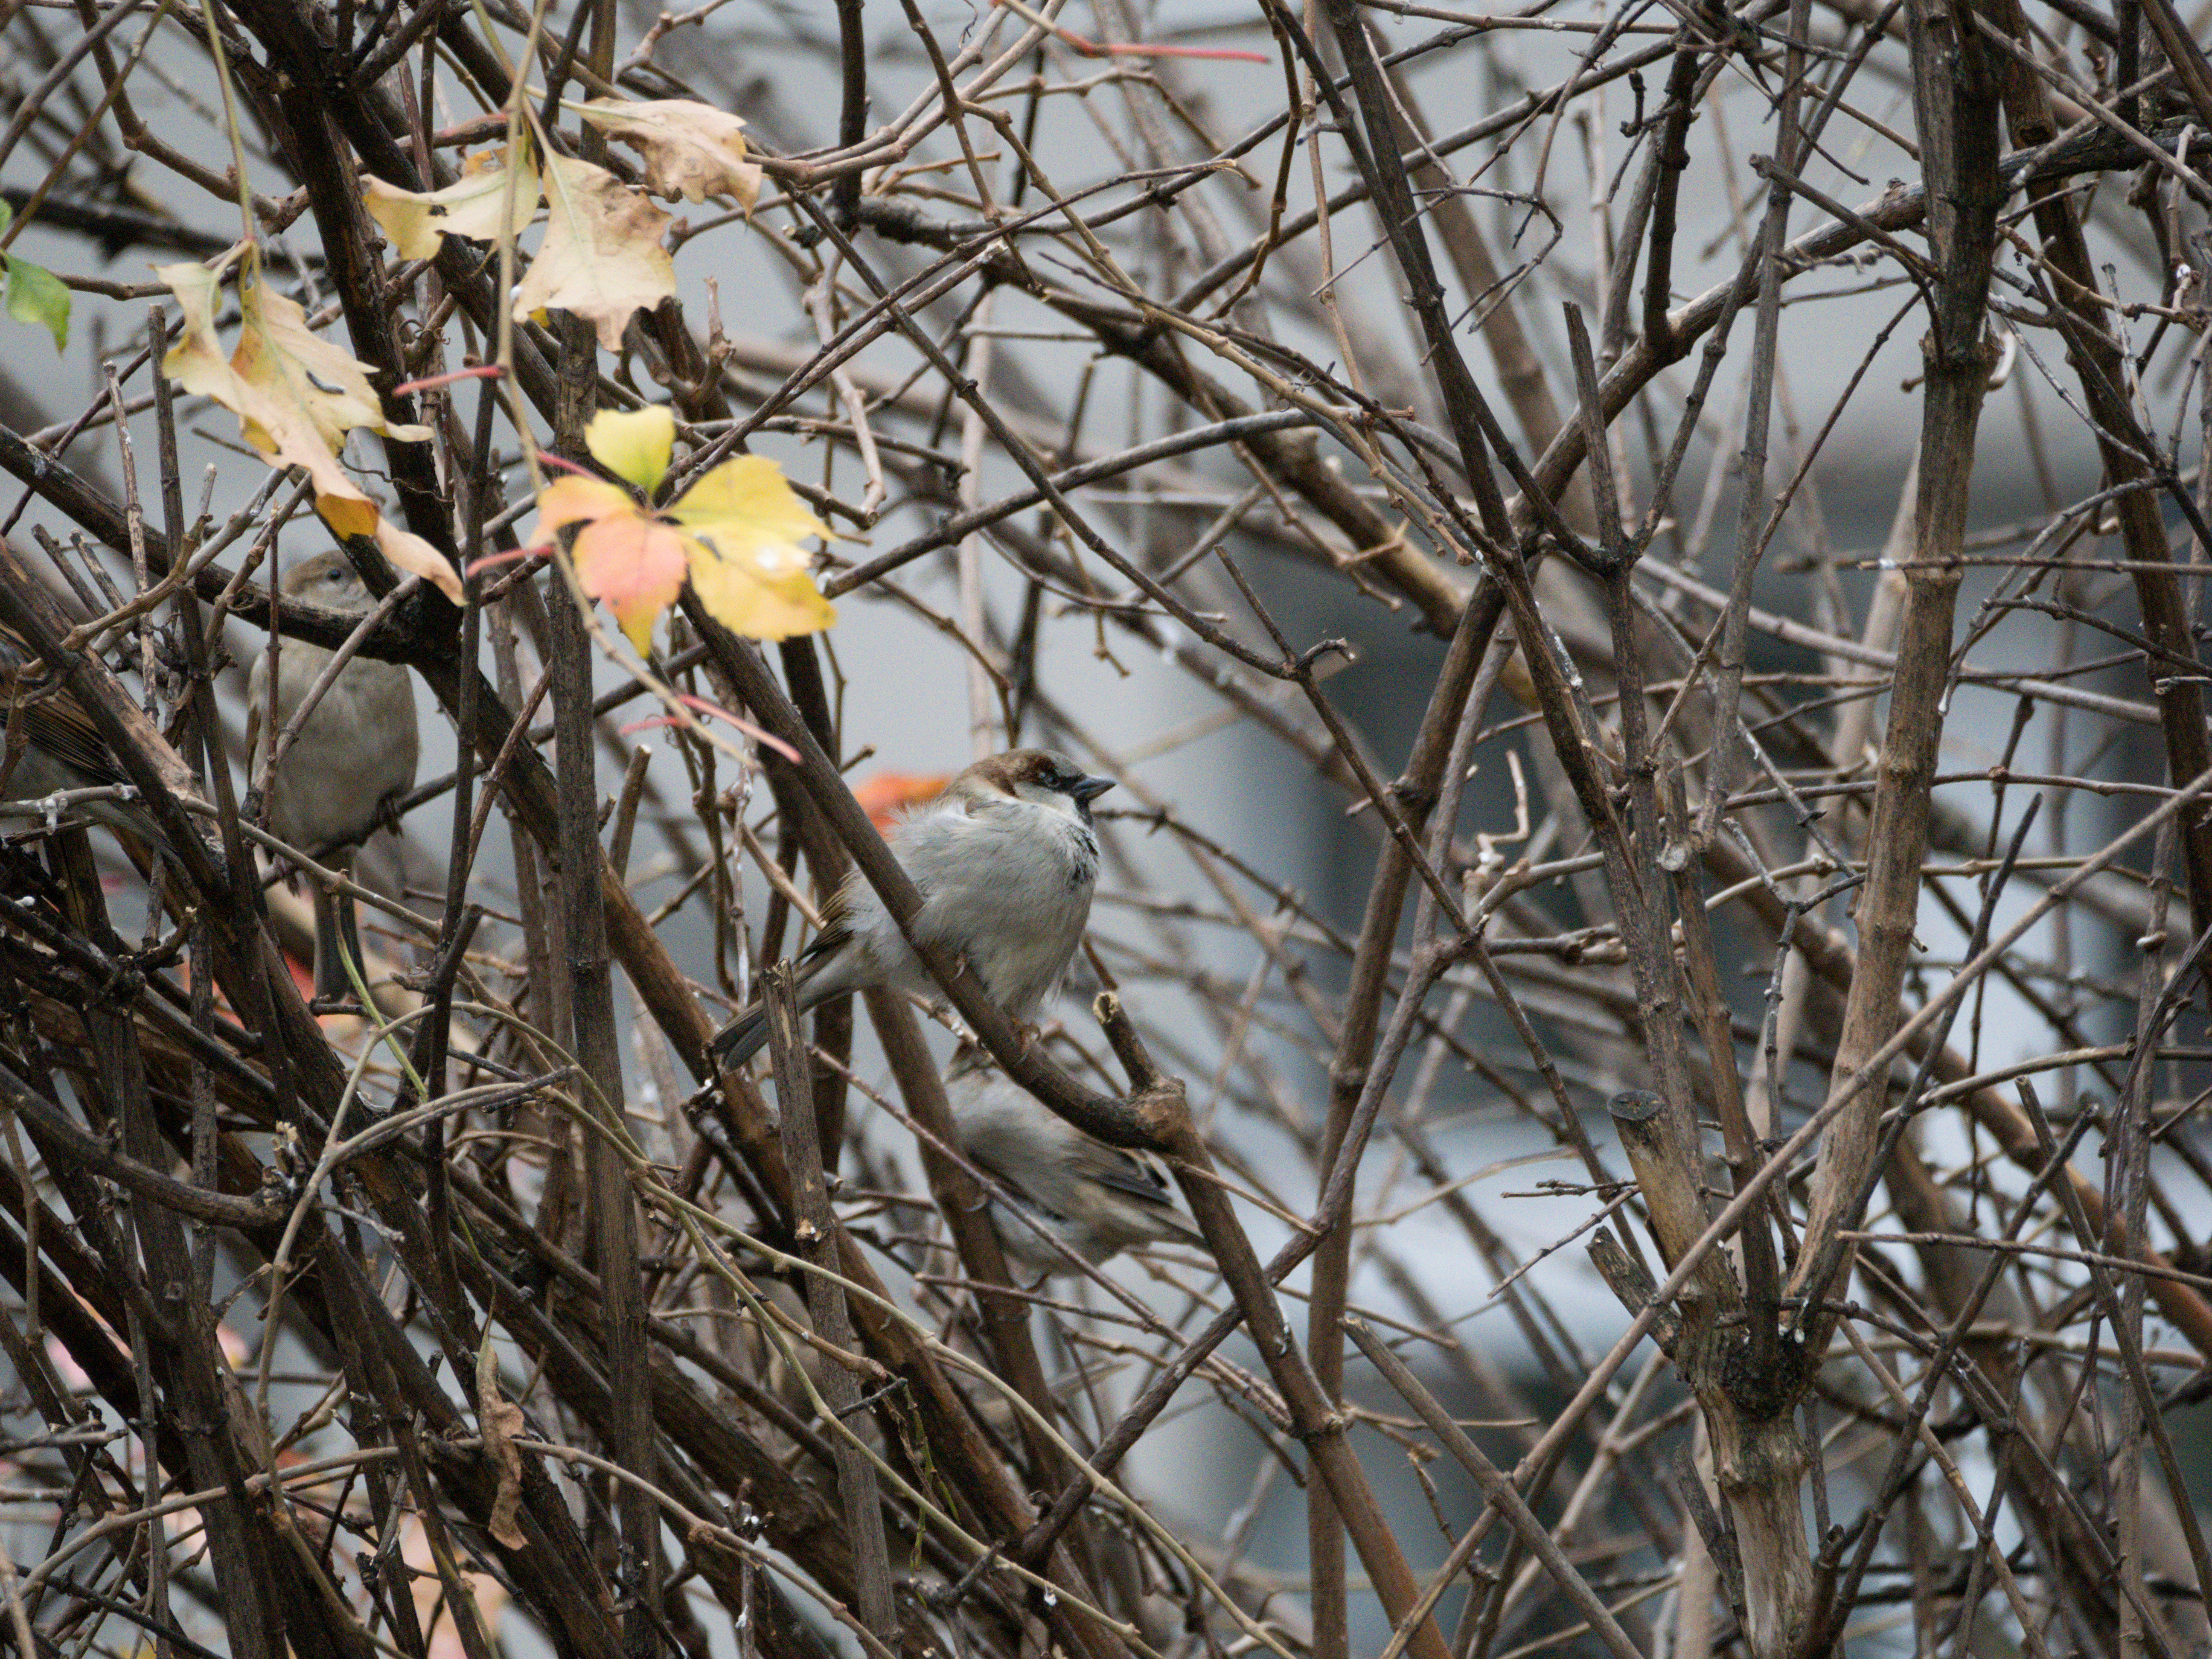
Next, I started with a quick check of how well the Subject ID works on each body, taking my 150-400 out to the next street corner, where a bunch of sparrows always hangs around a bush in which someone regularly places fat balls. This is a good location, not for great shots, but for camera/lens testing: you rarely get a clear view of any of the birds, since lots of small twigs and branches keep getting in the way, so AF performance matters.
On the outset, G9II and OM-1 looked similar here: using Bird Eye ID, they find the bird’s body quickly and mark the eye once found. Focusing speeds, in decent light and at a distance, were similar enough for me not to view them as a practical difference. At this particular location, which I used for other tests before, I have found more than once that the OM-1 has a habit of focusing on a twig rather than the bird behind it, even when that twig is MUCH smaller than the bird. (This was far worse with early firmware revisions but still remains an issue with 1.4, which I currently use.) In addition, even when it nails the focus, the OMDS sometimes hunts back and forth between bird and twig in C-AF. It is not terrible, but this happens every so often and can be annoying whenever you don’t know how much time you will have before the bird is gone for good. Switching between a small AF area and single point AF makes less of a difference here than you might expect. In my ‘real world’ shooting, I’ve more than once used the manual focus override on the OM-1 to correct for it.
Well, the G9II impressed me here: it also misfocused on a twig at times, but less frequently so than the OM-1 did. This was easily corrected by re-focusing slightly to either side of the twig, which again worked more reliably than it does with the OM-1, which has a tendency to hunt in such cases. Most of the time, the G9II showed good focus, even in situations I consider quite tough for any body. (My Canon R5 with the RF 100-500 lens that serve as my yardstick for these kinds of statements.) Whether or not I had the TC engaged on my Big White made no appreciable difference: the camera just did its job. Don’t get me wrong, the OM-1 knows how to nail a perfect shot, too. It does that less consistently, however, at least in this kind of test setting, struggling much more in this admittedly challenging test. Not a day-and-night difference, but enough to matter.
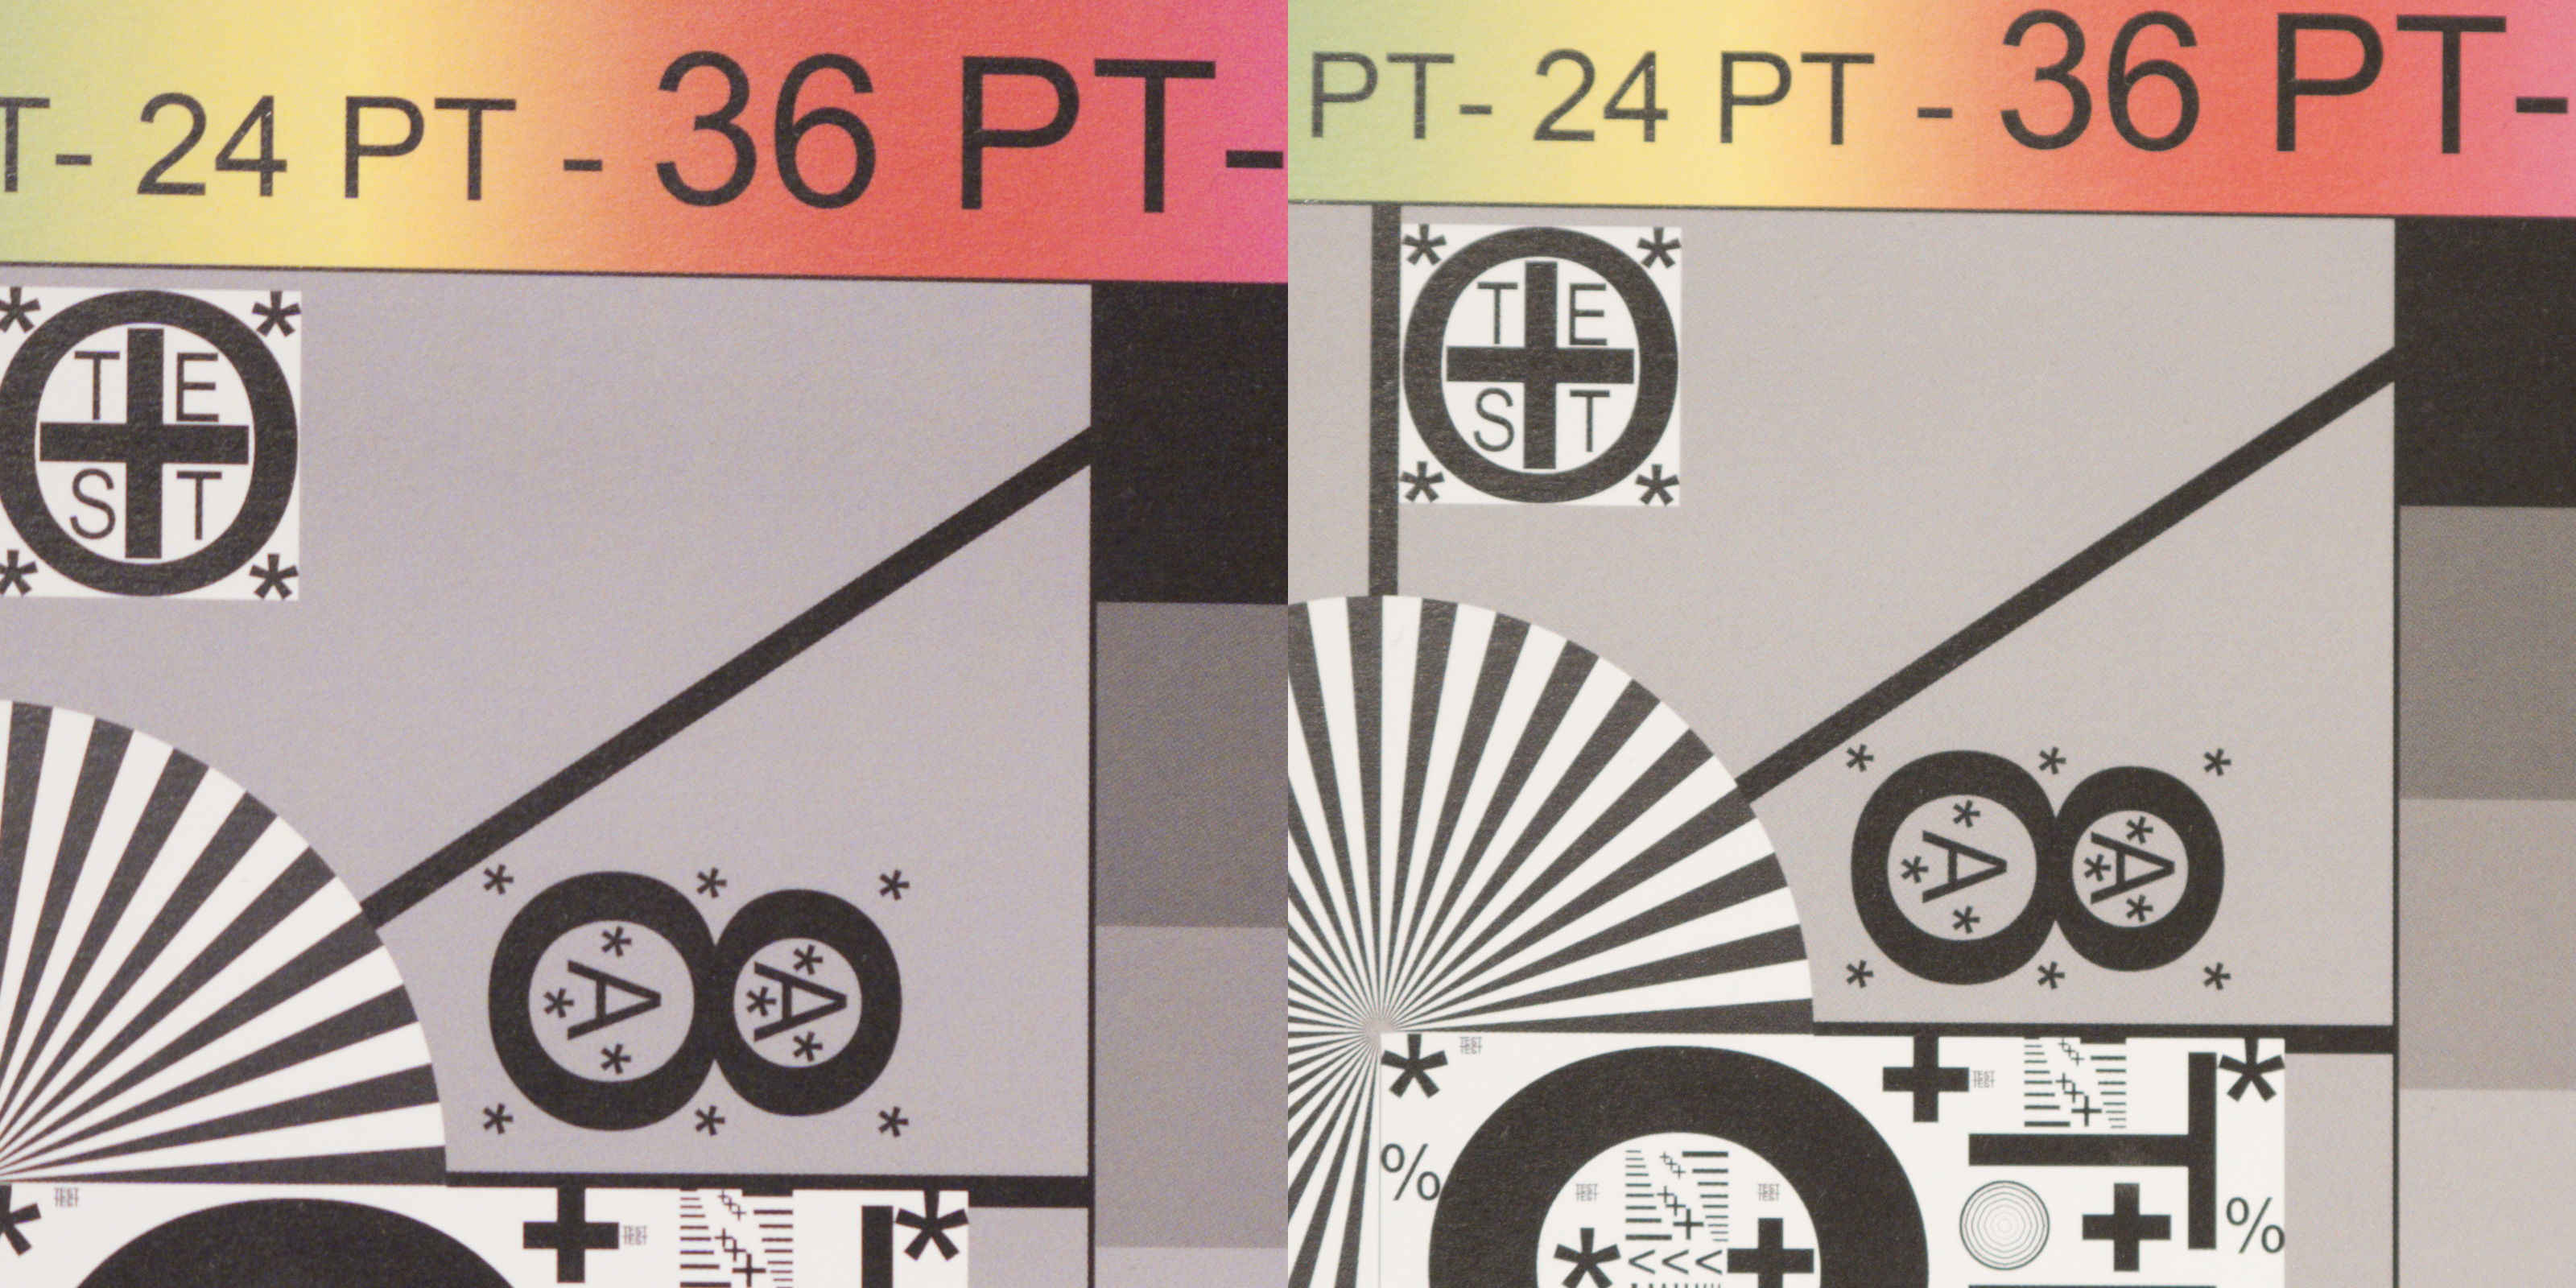
Let me share a few examples, all of them converted in ACR using Adobe Standard and ACR’s default settings. I don’t see much of a point in sharing out-of-focus images – you already know how they look. Most are therefore going to be properly focused ones. They may give you the impression of things being near-equal, but please trust me here: the difference in AF performance was very noticeable.
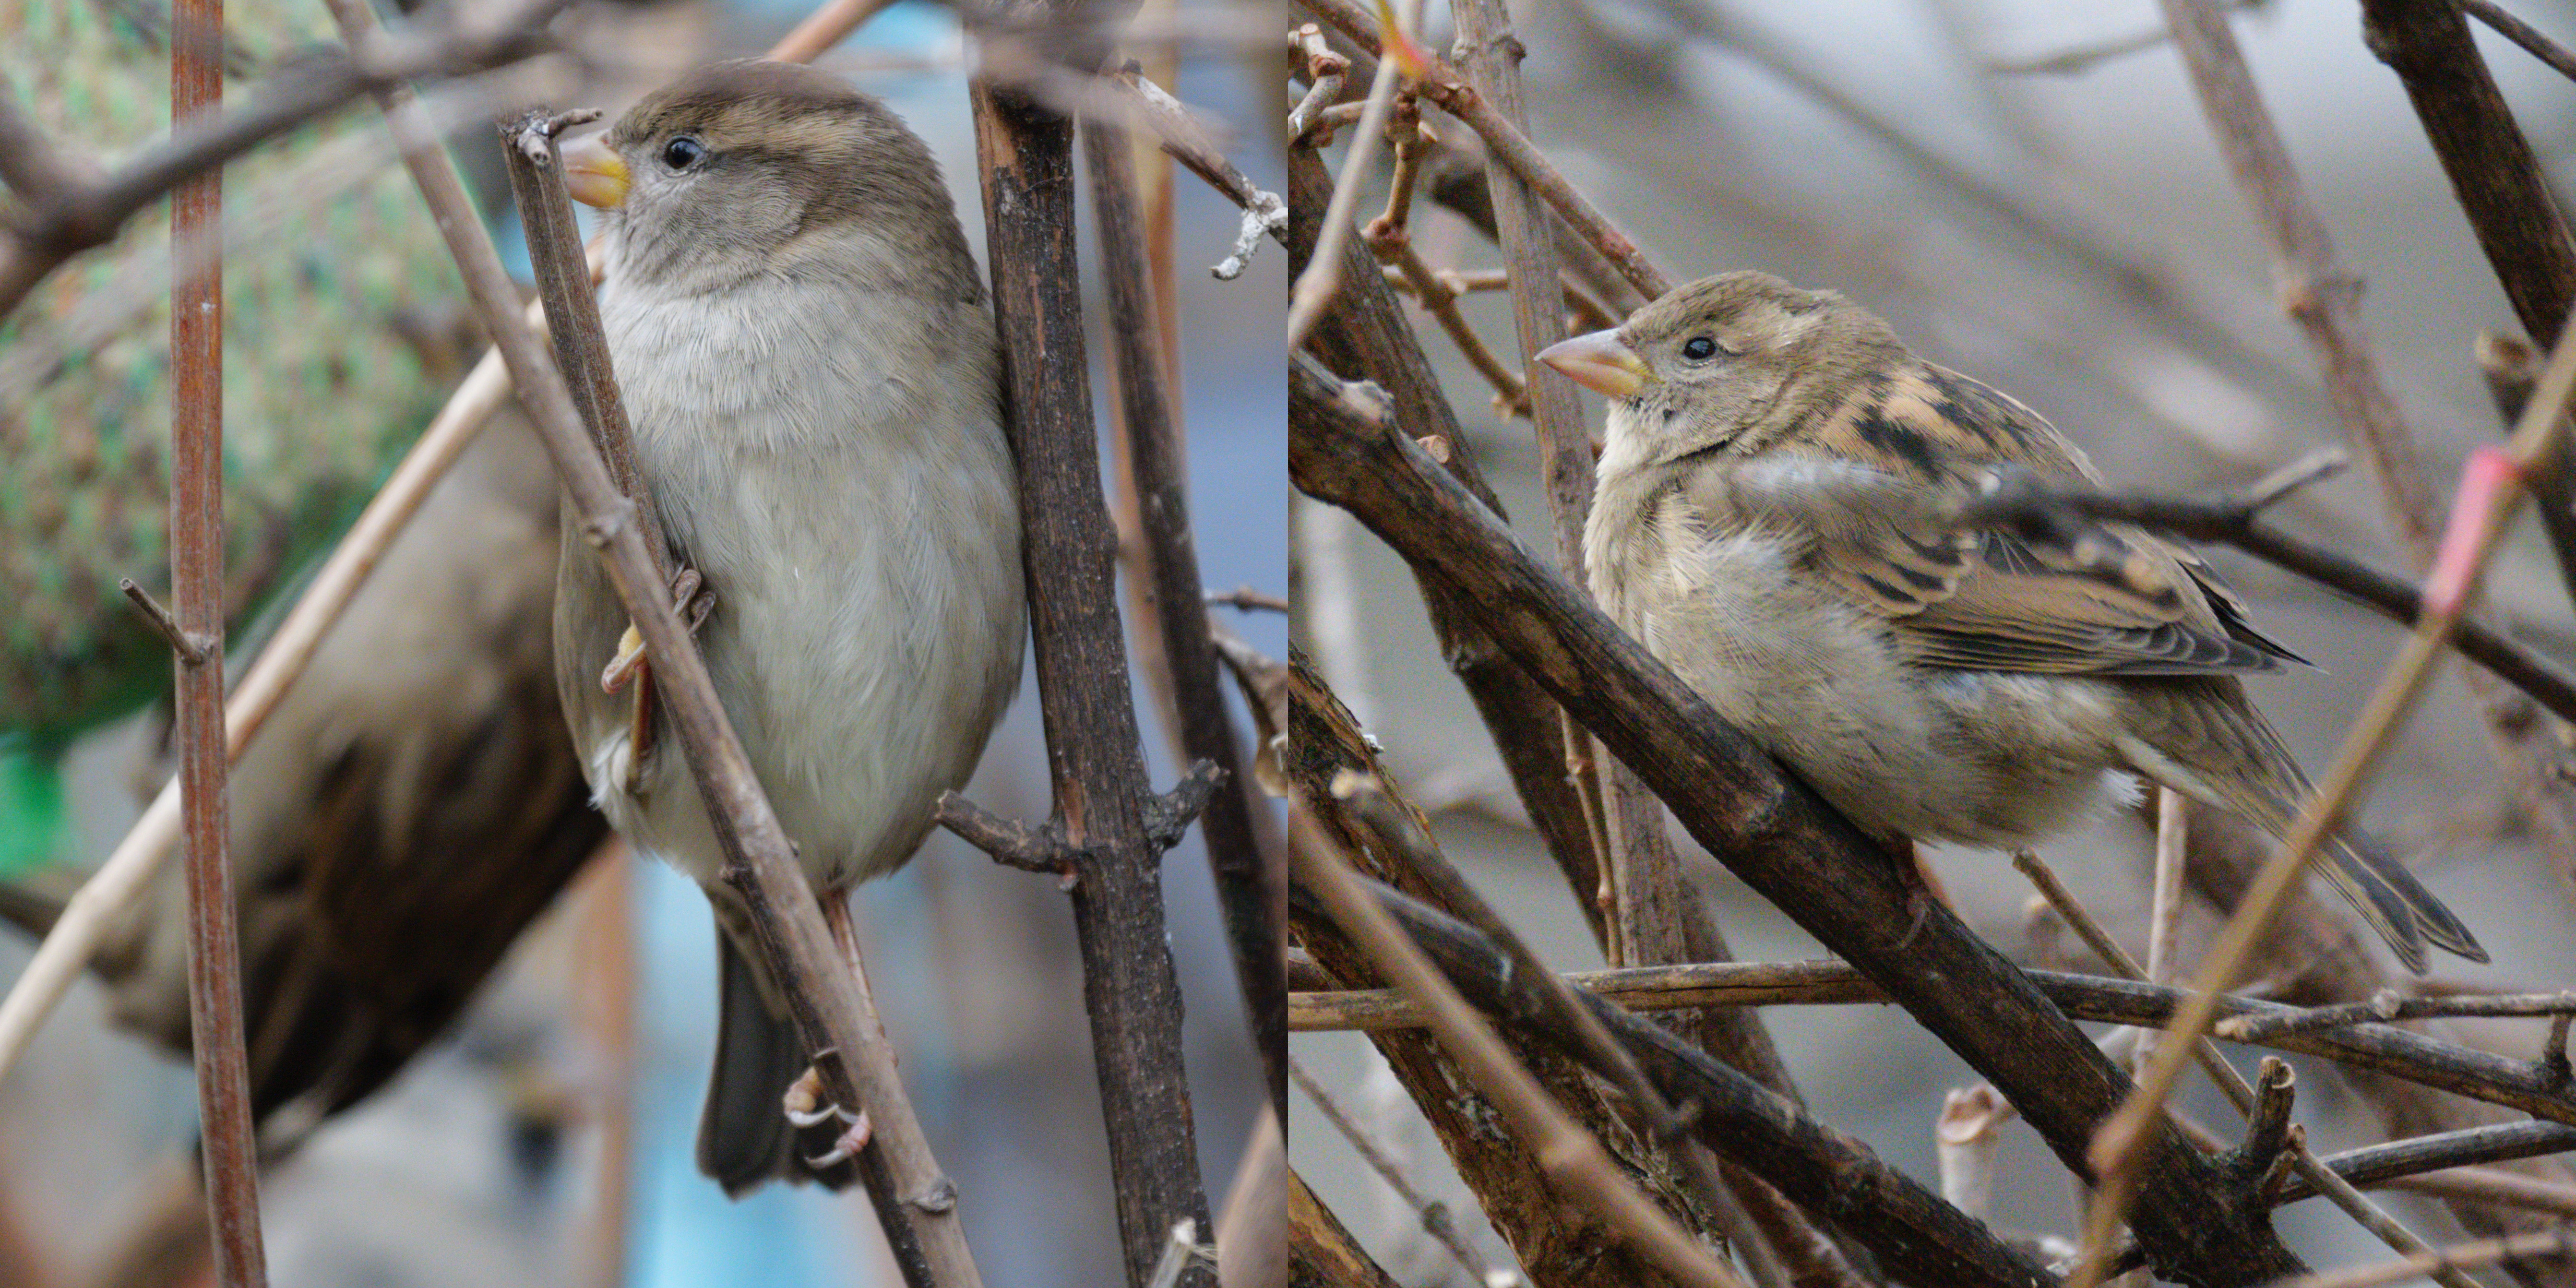
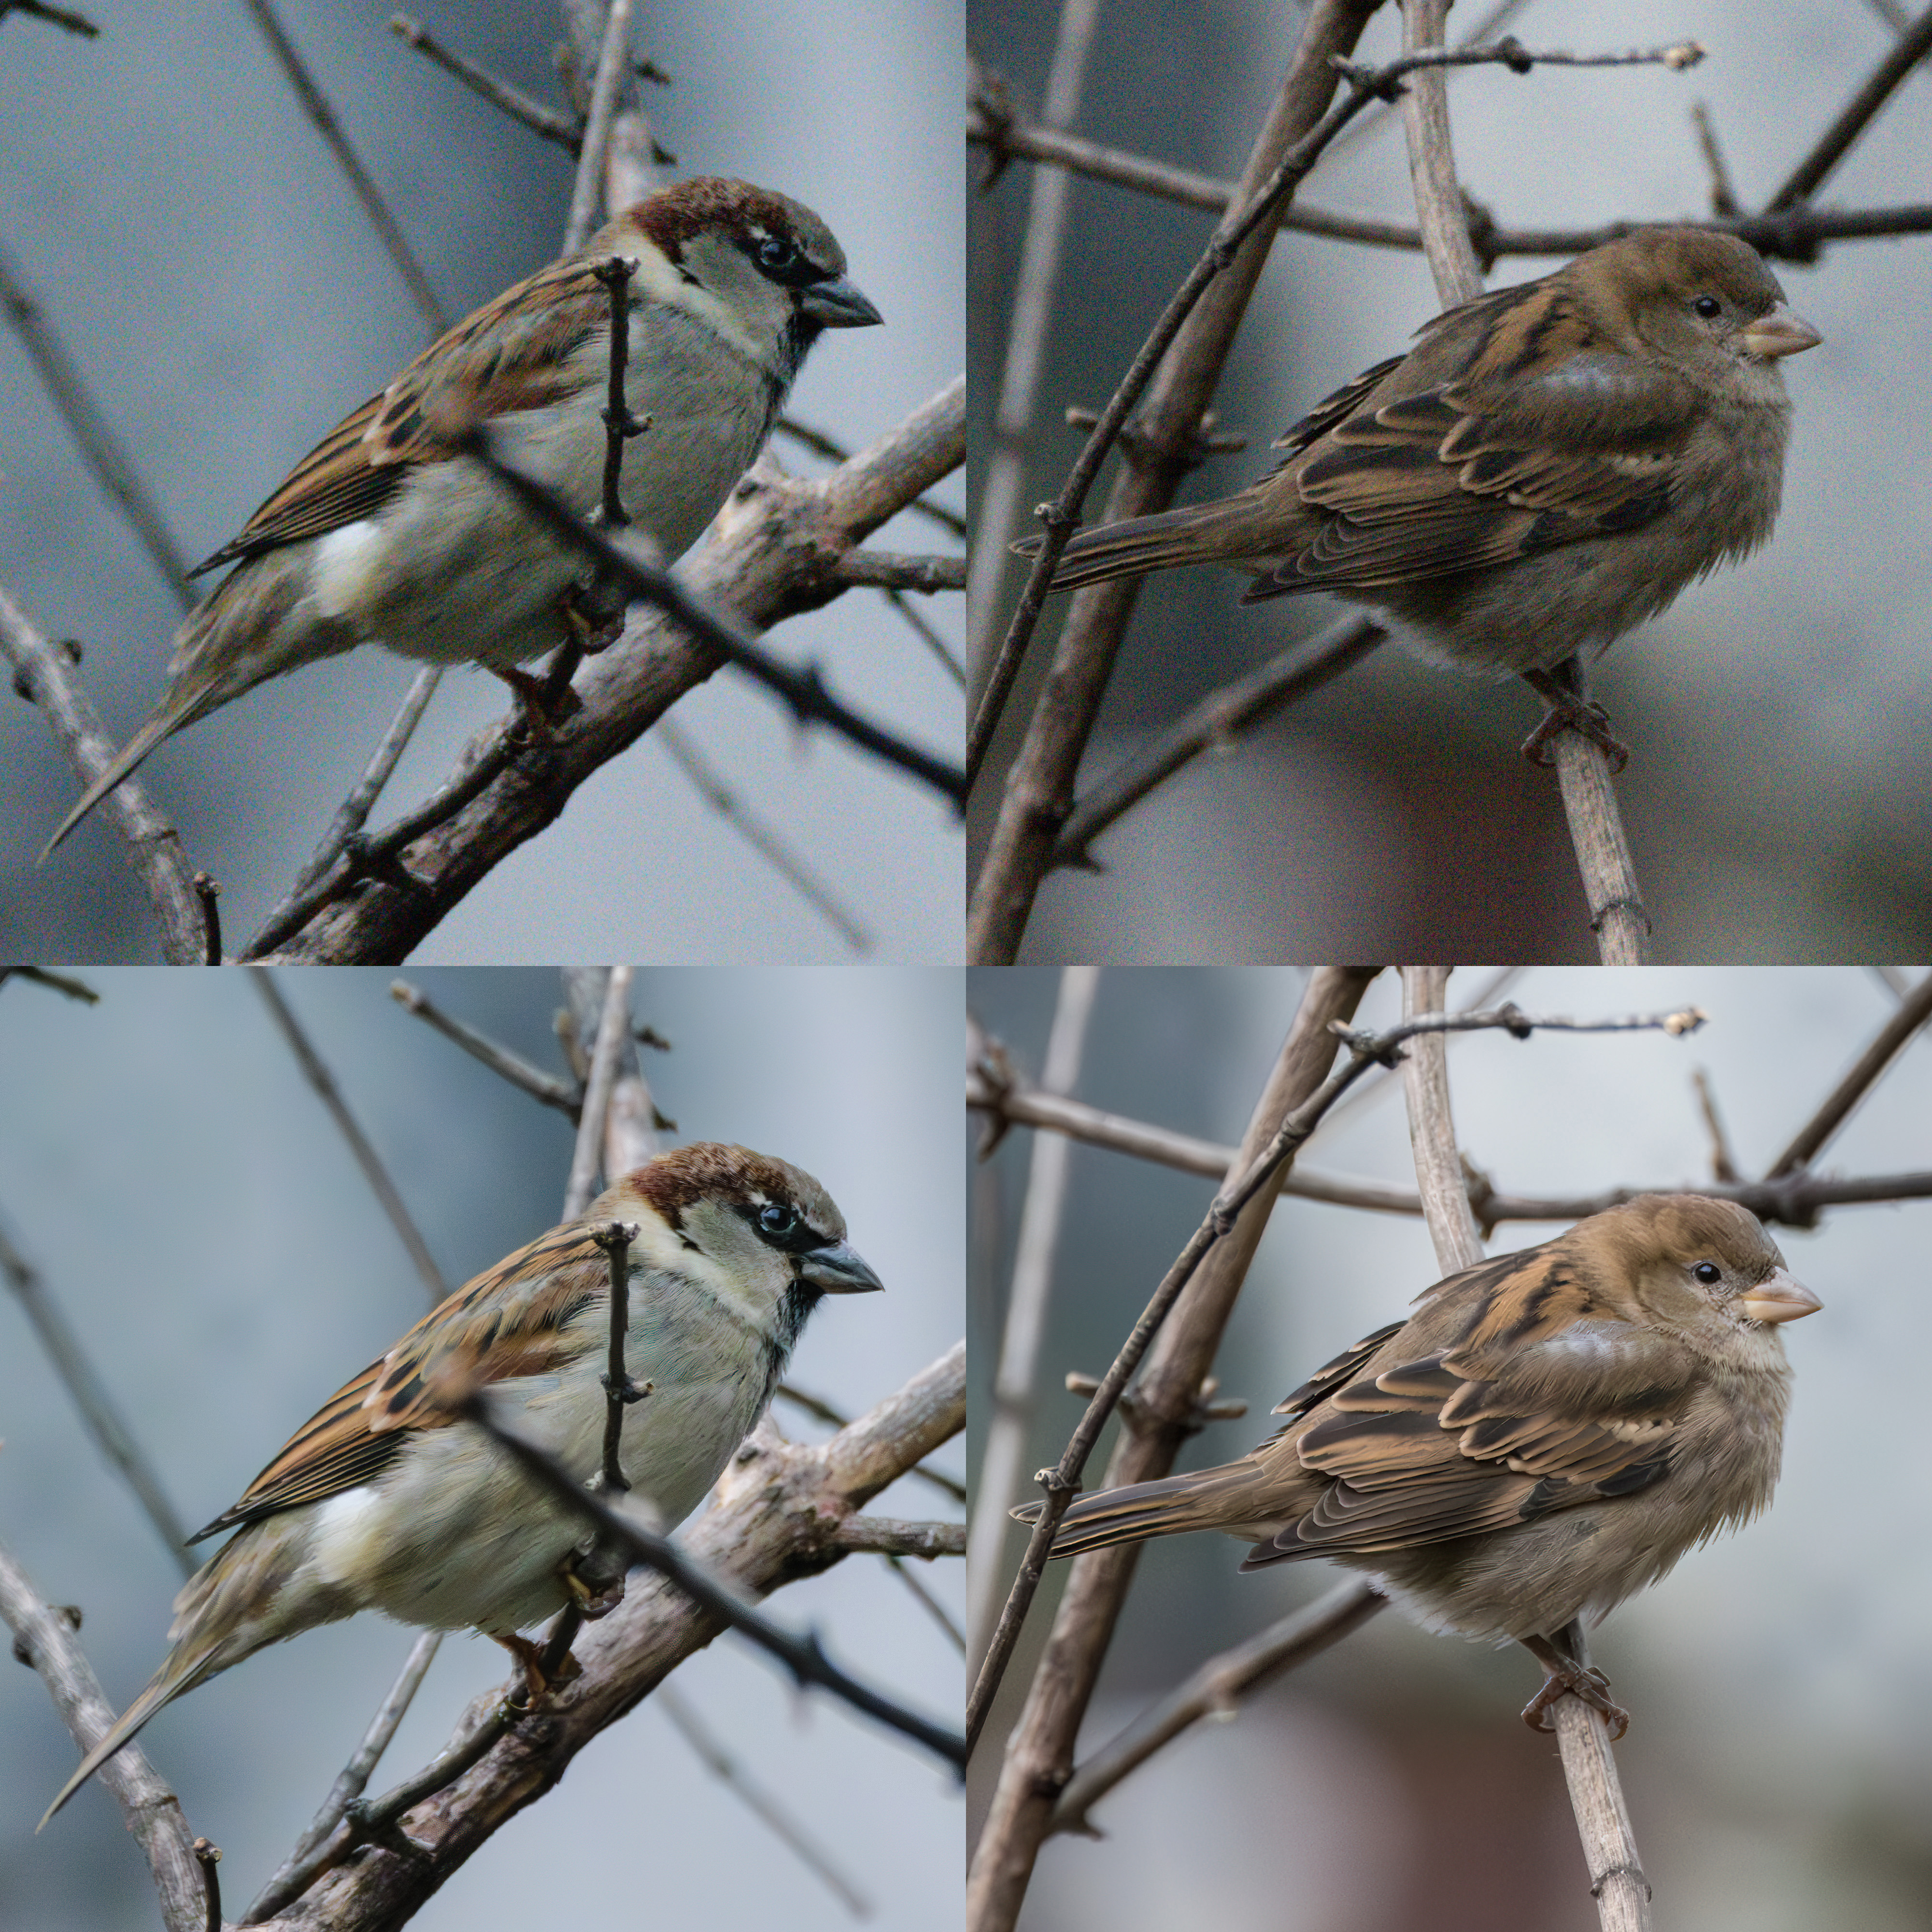
I’ll start with a few G9II takes. The light was ok in a few, but poor in most of my tests. ISOs are high, as I wanted to maintain decent shutter speeds. (If you believe keeping your ISOs low is more relevant, read this excellent article by Thomas Stirr, a master in bringing out the best of the MFT system: https://smallsensorphotography.com/importance-of-shutter-speed.) This compares four shots where the Panasonic nailed the focus (#1+#2), missed it slightly (#3), and screwed up, focusing on a branch instead (#4), all taken on the Big White with the TC engaged. All taken at 1/250s, f/5.6, ISO Auto at 1000 or 1250, no corrections, noise reduction or sharpening applied, but images were cropped and merged in one composite. You may not like #2 that much and think it is incorrectly focused, but in 100% view, you’ll see that the G9II focused exactly where it was supposed to: on the eye. Because of the shallow Depth of Field, not much of the bird is in focus. (Beginners often underestimate how much of an impact this can have. In this shooting situation, the DoF was less than 3 centimeters!)
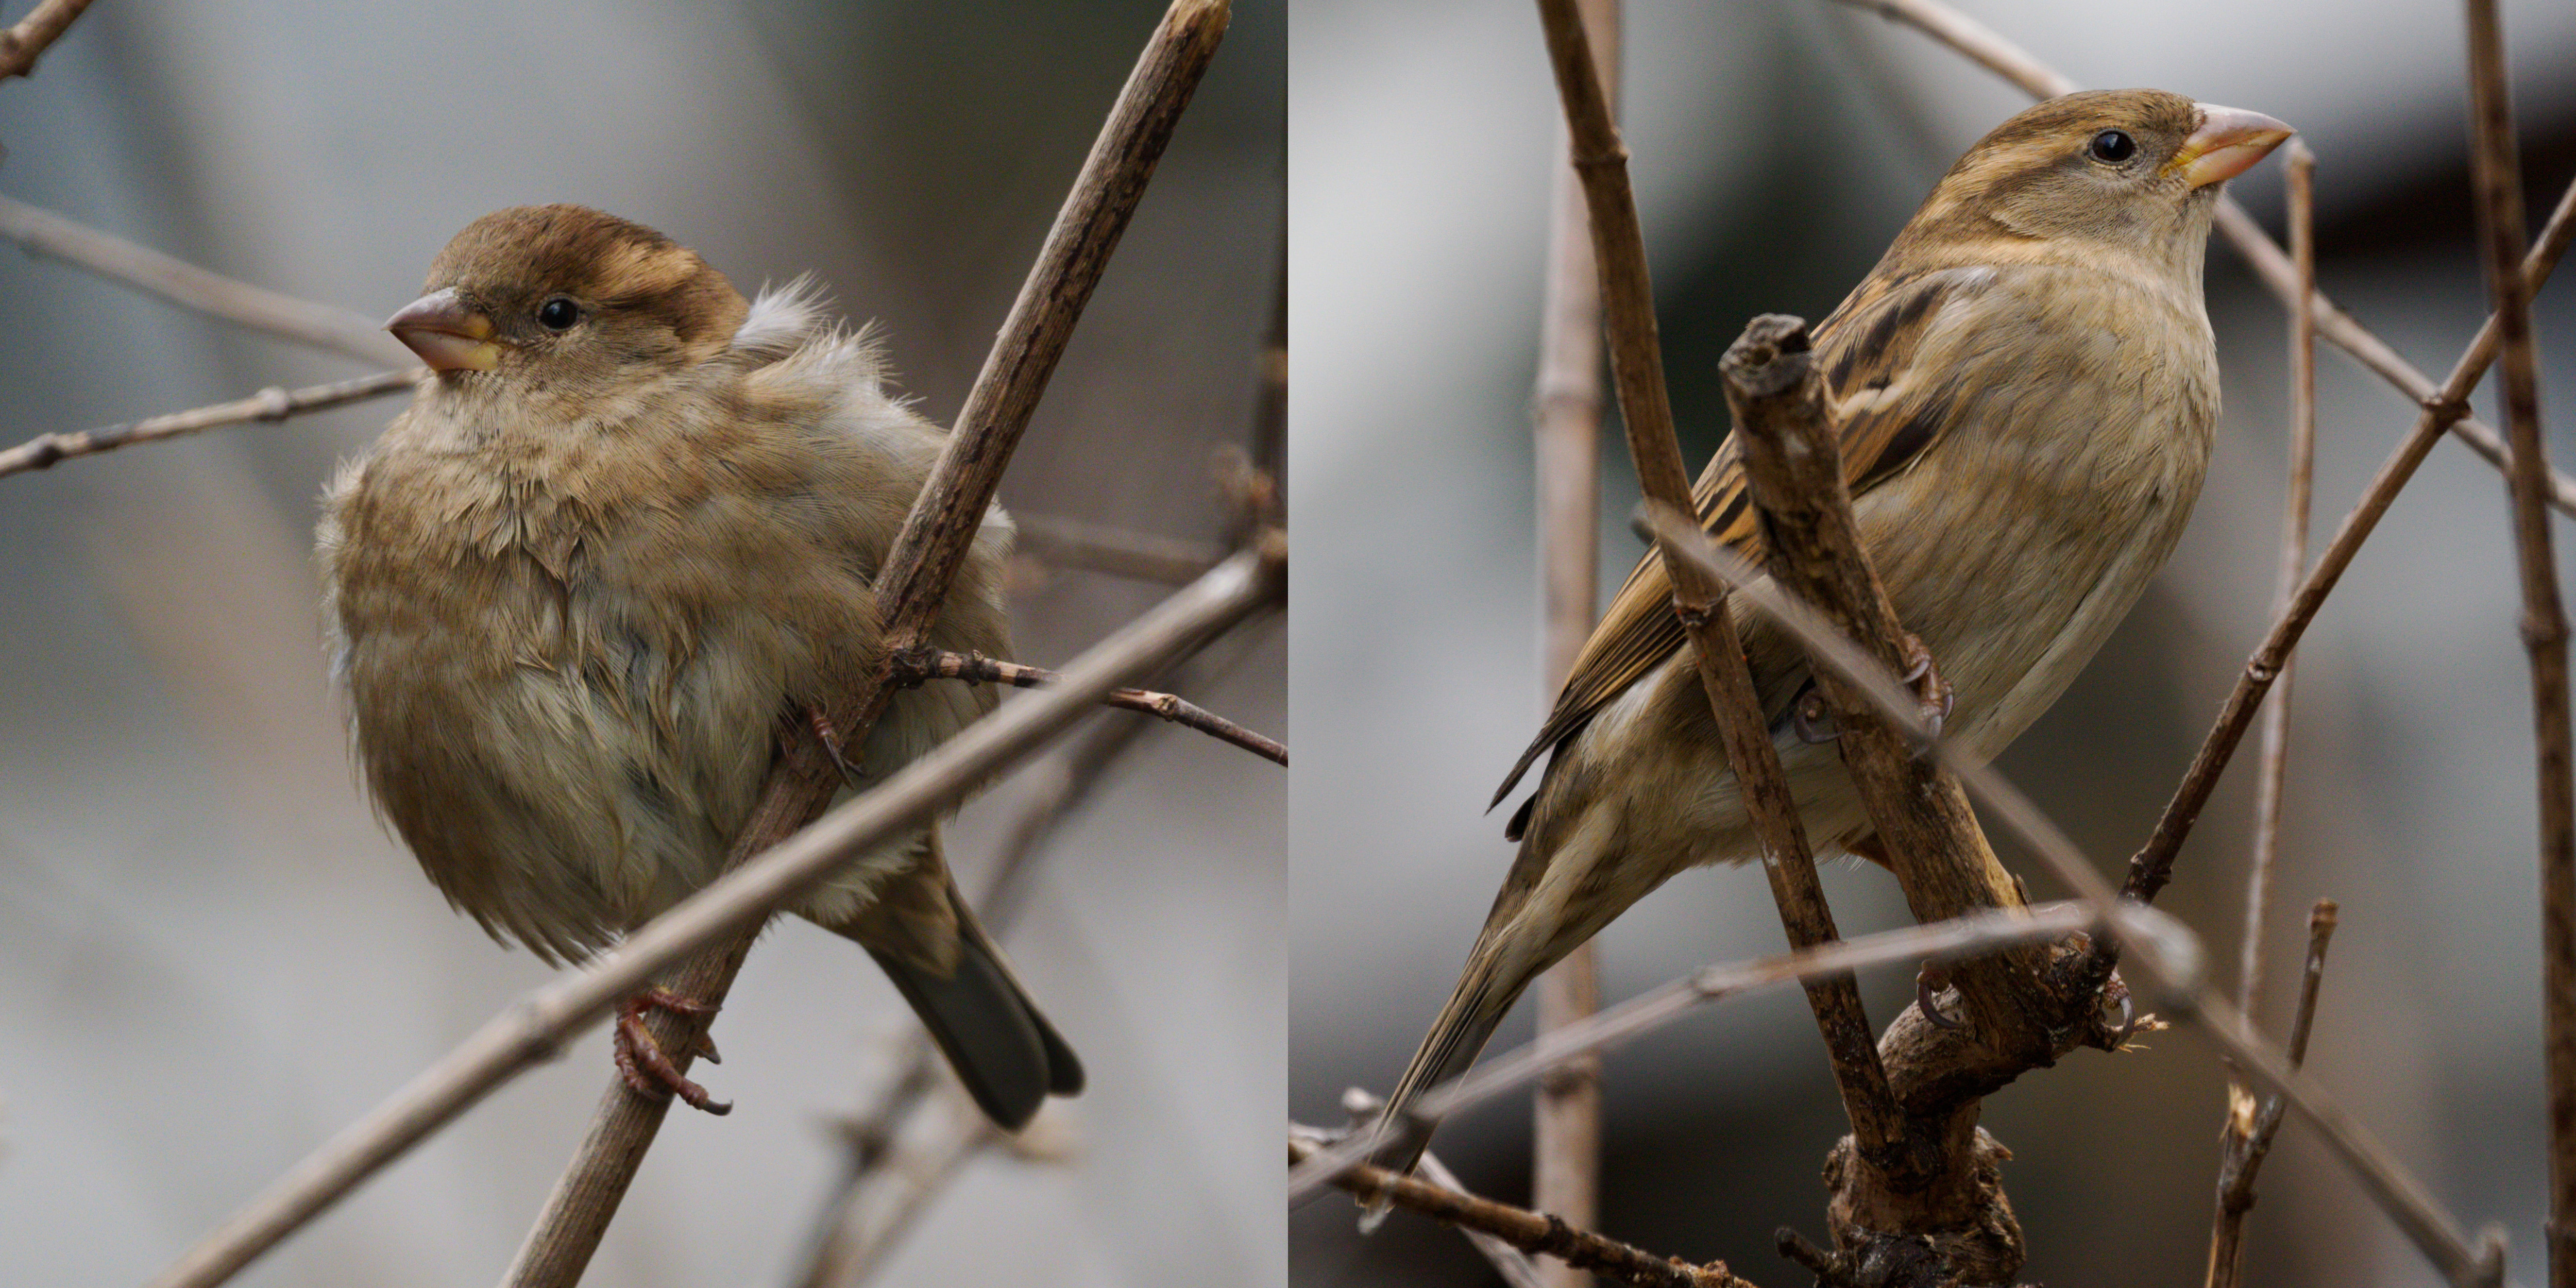
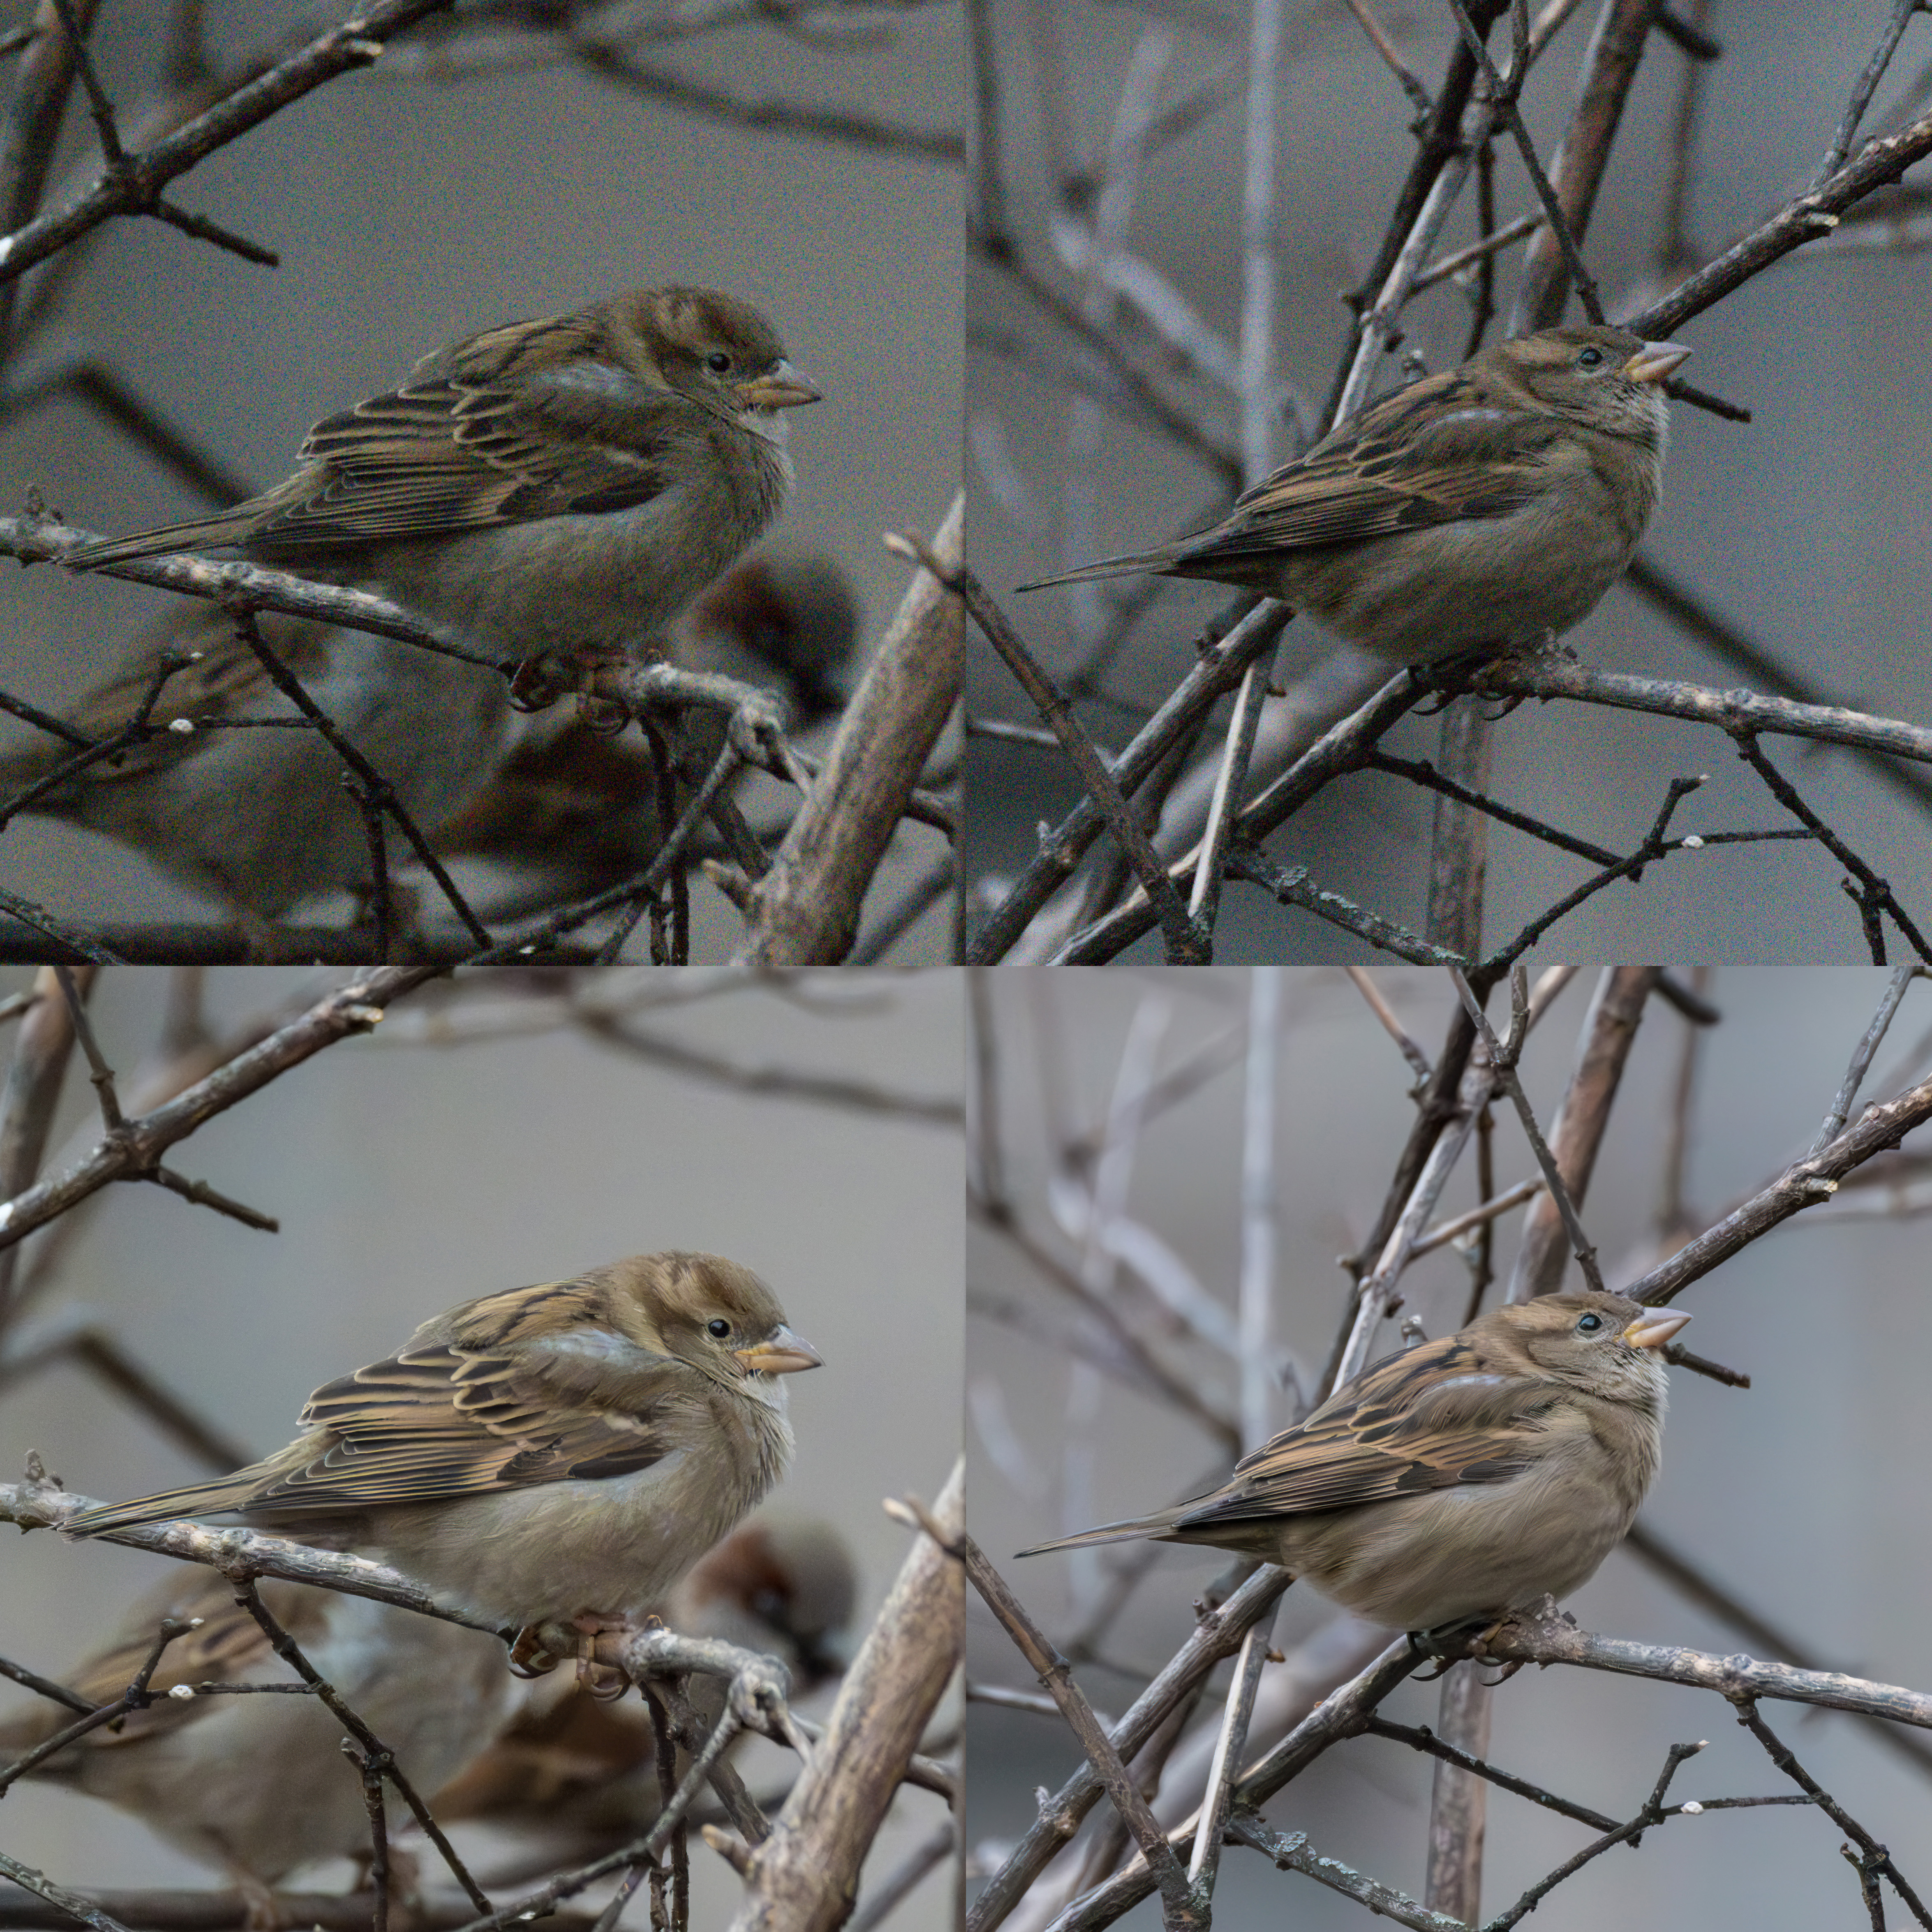
There were focusing situations both bodies mastered, but there also were quite a few that presented real challenges which only the G9II handled competently. Take this next shot taken at 400mm, for example, which I am sharing full-size to give you an idea of the challenge. I couldn’t blame any camera for not finding the proper focus in this kind of situation. The G9II did (look at it in 100% view if you like). In fact, it did the same many times over and kept impressing me. Below this shot, there’s a composite with three shots taken with the 150-400 TC on the G9II, again in difficult settings. The body nailed the first two of them but gave up on the third one. Yes, the OM-1 sometimes nails such shots, too. But not as reliably, and not as often.
An excellent start for the G9II. For good measure, I then repeated my tests with the PL 100-400 on both bodies. The tendency remained the same: the G9II had a significantly higher hit rate. Keep in mind that this was a challenging focus situation. I’ve got tons of slightly to unacceptably non-sharp shots to prove it, from both cameras. The majority of them show “OMDS” in their EXIF data, though.
[Side note: it was only after a while that I noticed I had shot the two bodies with slightly different settings, inasmuch as the picture mode was set to Vivid on the OM-1 while the photo style on the G9II was on Standard. This has no consequences for the RAW files themselves, but RAW converters take these respective settings into account unless I tell them not to. I now set the G9II to Vivid, as well, so this is no longer a difference from here on. The reason I prefer Vivid is that it gives the EVF view, as well as JPEG previews, a color boost that sometimes makes seeing the scene easier when shooting with the sun behind or to the side of me. It also gives thumbnails in Windows Explorer a less dull look. I like vivid colors anyway, but to the most part, that is a matter of post processing. In any case, all comparison shots I am sharing here have similar styles.] Because I know that some of you will ask for these anyway, here are some comparison shots between the lenses and bodies. First, a comparison of the Oly 150-400 vs the PanaLeica 100-400, both wide open at 400mm on the G9II (1/250s, ISO1600 respectively 5000, cropped).
Left: Olympus 150-400 TC.
Right: PanasonicLeica 100-400 (version 1).
Both shot at 400mm.
The PL 100-400 looks good in this comparison. It is almost as sharp as the much pricier 150-400. It also feels like a better lens on the Panasonic body when compared to using it on the OM-1. This is partly because of the better stabilized EVF view (see also Part II), partly because it focuses a little faster here than with the OM-1. Nevertheless, I scored better with the Olympus and its wider aperture, as the integrated TC and its faster focusing performance gave me more keepers and higher IQ. It is still the better lens on either body. [Well, it’d better be. Did I waste all that money for the same IQ? Don’t think so. ;-)] Alright, here are now comparisons of the two bodies, both with the Olympus and with the Panasonic lens, using the same settings as before, with Auto ISOs ranging from 800 to 1600. These were cropped to the same pixel counts, so the bird should always look larger on the G9II because of its higher resolution. However, it doesn’t quite do so in the first pair, shot with the Big White, as the body poses are different and I might have been slightly closer to the bird when shooting with the OM-1:
Left: G9II with Olympus 150-400 TC.
Right: OM-1 with Olympus 150-400 TC.
Both shot at 400mm.
The second pair, now with the PL 100-400, almost exaggerates the pixel count difference, as this now reflects the opposite situation: the body pose makes the bird look small in the OM-1 shot:
Left: G9II with PanasonicLeica 100-400.
Right: OM-1 with PanasonicLeica 100-400.
Both shot at 400mm.
This time, I also tried two more things:
- I turned Eye ID off, meaning that both cameras were only set to bird detection. In case of the OM-1, assuming the on-screen hint tells the truth, this only turns off the little frame around the eye anyway while eye detection will still be active. The Panasonic’s manual, on the other hand, makes it sound as if this indeed disabled Eye ID. I did not notice any differences in the end results, which is why I am not including any of these shots. Quite honestly, I cannot think of any good reason why anyone would want to disable eye detection. Maybe someone else can.
- I roughly doubled the distance between me and the birds, from about 6.5 to 12.5 meters. This moved the test closer to my real world shooting, where with such small birds you rarely get close enough to fill the frame. It turned out to be another interesting (to me) test: as I have come to expect, the OM-1 stopped indicating any bird’s eye. (Bird ID was turned on again.) This has been my experience throughout owning these bodies, namely that the OM-1 needs the eye to be ‘relatively large’, whatever that means, before its eye detection becomes effective. Take the Panasonic instead: in good light, whenever there was one to detect, it marked every bird’s eye almost flawlessly. If nothing else, this is very reassuring, as it adds confidence that the camera focuses where and when it should be focusing. This performance was less impressive on subsequent days with poorer light, but it still kept beating the OM-1’s as long as the light was decent. The next two full images, the first one taken with the G9II and the second with the OM-1, illustrate how the birds are getting quite small at this distance, even at a 35mm equivalent Field of View of 800mm. These are unedited RAW conversions using ACR.
G9II with PanasonicLeica 100-400, shot at 400mm.
OM-1 with PanasonicLeica 100-400, shot at 400mm.
You may be wondering at this point why I am not sharing “standard” focusing results here, using C-AF without any subject detection. The answer is that I have no doubt anyway that both cameras are fairly good at it, and that I deem this almost irrelevant for bird shooting. Adding subject ID can sometimes mean that the focus accuracy becomes worse rather than better, but in my experience, this is a very rare thing to happen. In addition, it happens mostly in scenarios where you are unlikely to get a good photo anyway. If you want the highest focusing accuracy and pick those situations that promise to yield at least a decent shot, you’re better off keeping subject/eye ID turned on.
The one thing I also needed to do was to go out again to check how quickly both bodies focused when shooting in light that was borderline, so I went back in the mornings when the light was still dim. I did not use any challenging focusing settings in these tests, as I thought that might be asking too much. I was in for a bit of disillusionment, inasmuch as the OM-1’s AF system takes low light better than the G9II’s: in low light, my Big White Oly started to feel tardy on the Panasonic, which was especially slow when trying to focus on near targets. Ok, near targets in low light aren’t much of an issue for me, but the OM-1 also focuses faster in low light at normal shooting distances. The Panasonic’s AF continued to be the more reliable one, but it was also the slower one of the two bodies. Not hugely so, but remembering some of my past shooting situations, I think this could occasionally be a problem.
Low light focusing felt a tad quicker when using the PL 100-400 on the G9II. The OM-1 was still a little snappier with that lens and light, though.
Images came out as expected per the High ISO comparison I shared earlier. Here are a two different comparisons. I edited the images, including NR and some sharpening, to demonstrate how much can be recovered at high ISOs. Easy to see which is which.
This first pair has been taken with the Panasonic at ISO6400 and the OMDS at ISO8000. Both still strike me as usable after editing. (Note that in the G9II shot, the bird’s movement caused some motion blur.)
Left: G9II with PanasonicLeica 100-400.
Right: OM-1 with PanasonicLeica 100-400.
Lastly, here is an extreme example, with both bodies at ISO12800. This time, I am paying a price for the very high ISOs as the edited images look rather artificial upon close inspection.
Left: G9II with PanasonicLeica 100-400.
Right: OM-1 with PanasonicLeica 100-400.
Let me get this straight: earlier, I found the G9II to beat the OM-1 in very low light because it found the right focus where the OM-1 all but gave up. Here, however, I am saying that it performs worse. Yes, I’m afraid this is what I found. Shooting birds outside in early morning light, the light was certainly not as dim as it was when shooting inside at night. It was enough for the OM-1 to find its targets, at least fairly often. The Panasonic, on the other hand, was consistent as far as its low-light performance goes: it reliably finds its targets, which is great, but it takes its time in doing so.
That much about testing in, well, semi-controlled settings. Let’s talk about real-world shooting now. Focus acquisition presents a wide spectrum as far as the level of challenge for a camera goes. Neither body is quite perfect, but both performed very well with large, slow birds, with “perfectly sharp” hit rates of well over 90 percent. When such a bird in flight was farther away and got smaller in the viewfinder, that rate sometimes dropped to 75-85 percent, as the body lost focus for a while and struggled to reacquire it, but the focus was never off by more than a small amount, so this remained fixable in post. The G9II performed at slightly higher rates but also had its own share of misses, so I don’t consider the OM-1 substantially inferior in this category.
Focus acquisition becomes a whole different ballgame when a smaller bird either roams the shrubs or flies faster and more erratically, especially when the background is more cluttered than the sky. That’s where in my experience, gained in part when using the excellent Canon R5, smart AI algorithms do a better job than traditional tracking mechanisms.
Over my now 20 or so months of owning it, I more than once chided my OM-1 for its focus acquisition weaknesses in this area. Don’t get me wrong, I am generally very happy with its performance. Most of the time, it focuses fairly quickly and with high accuracy. Not quite at the level of the R5, which I have come to love for its extremely good AF performance, but close enough overall. Yet, even after some improvement brought by firmware update 1.1, the OM-1 still likes focusing on twigs rather than the bird sitting in clear sight behind it. With a small near object in front of a large background one, it also sometimes prefers the latter, though this is not a frequent occurance. Once it focused on the one in the back, however, it then sometimes stubbornly refuses to re-focus on the near object. Every so often, I had to resort to focusing on something else at a closer distance to get the camera to reconsider. For the same reason, I also learned to love the manual override option (AF+MF), as a quick twist of the lens’ focusing wheel is usually enough to get the OM-1 to concentrate on what I want to shoot.
Waiting from my G9II to arrive, I was hoping focus acquisition would become less of an issue for me with the newer body.
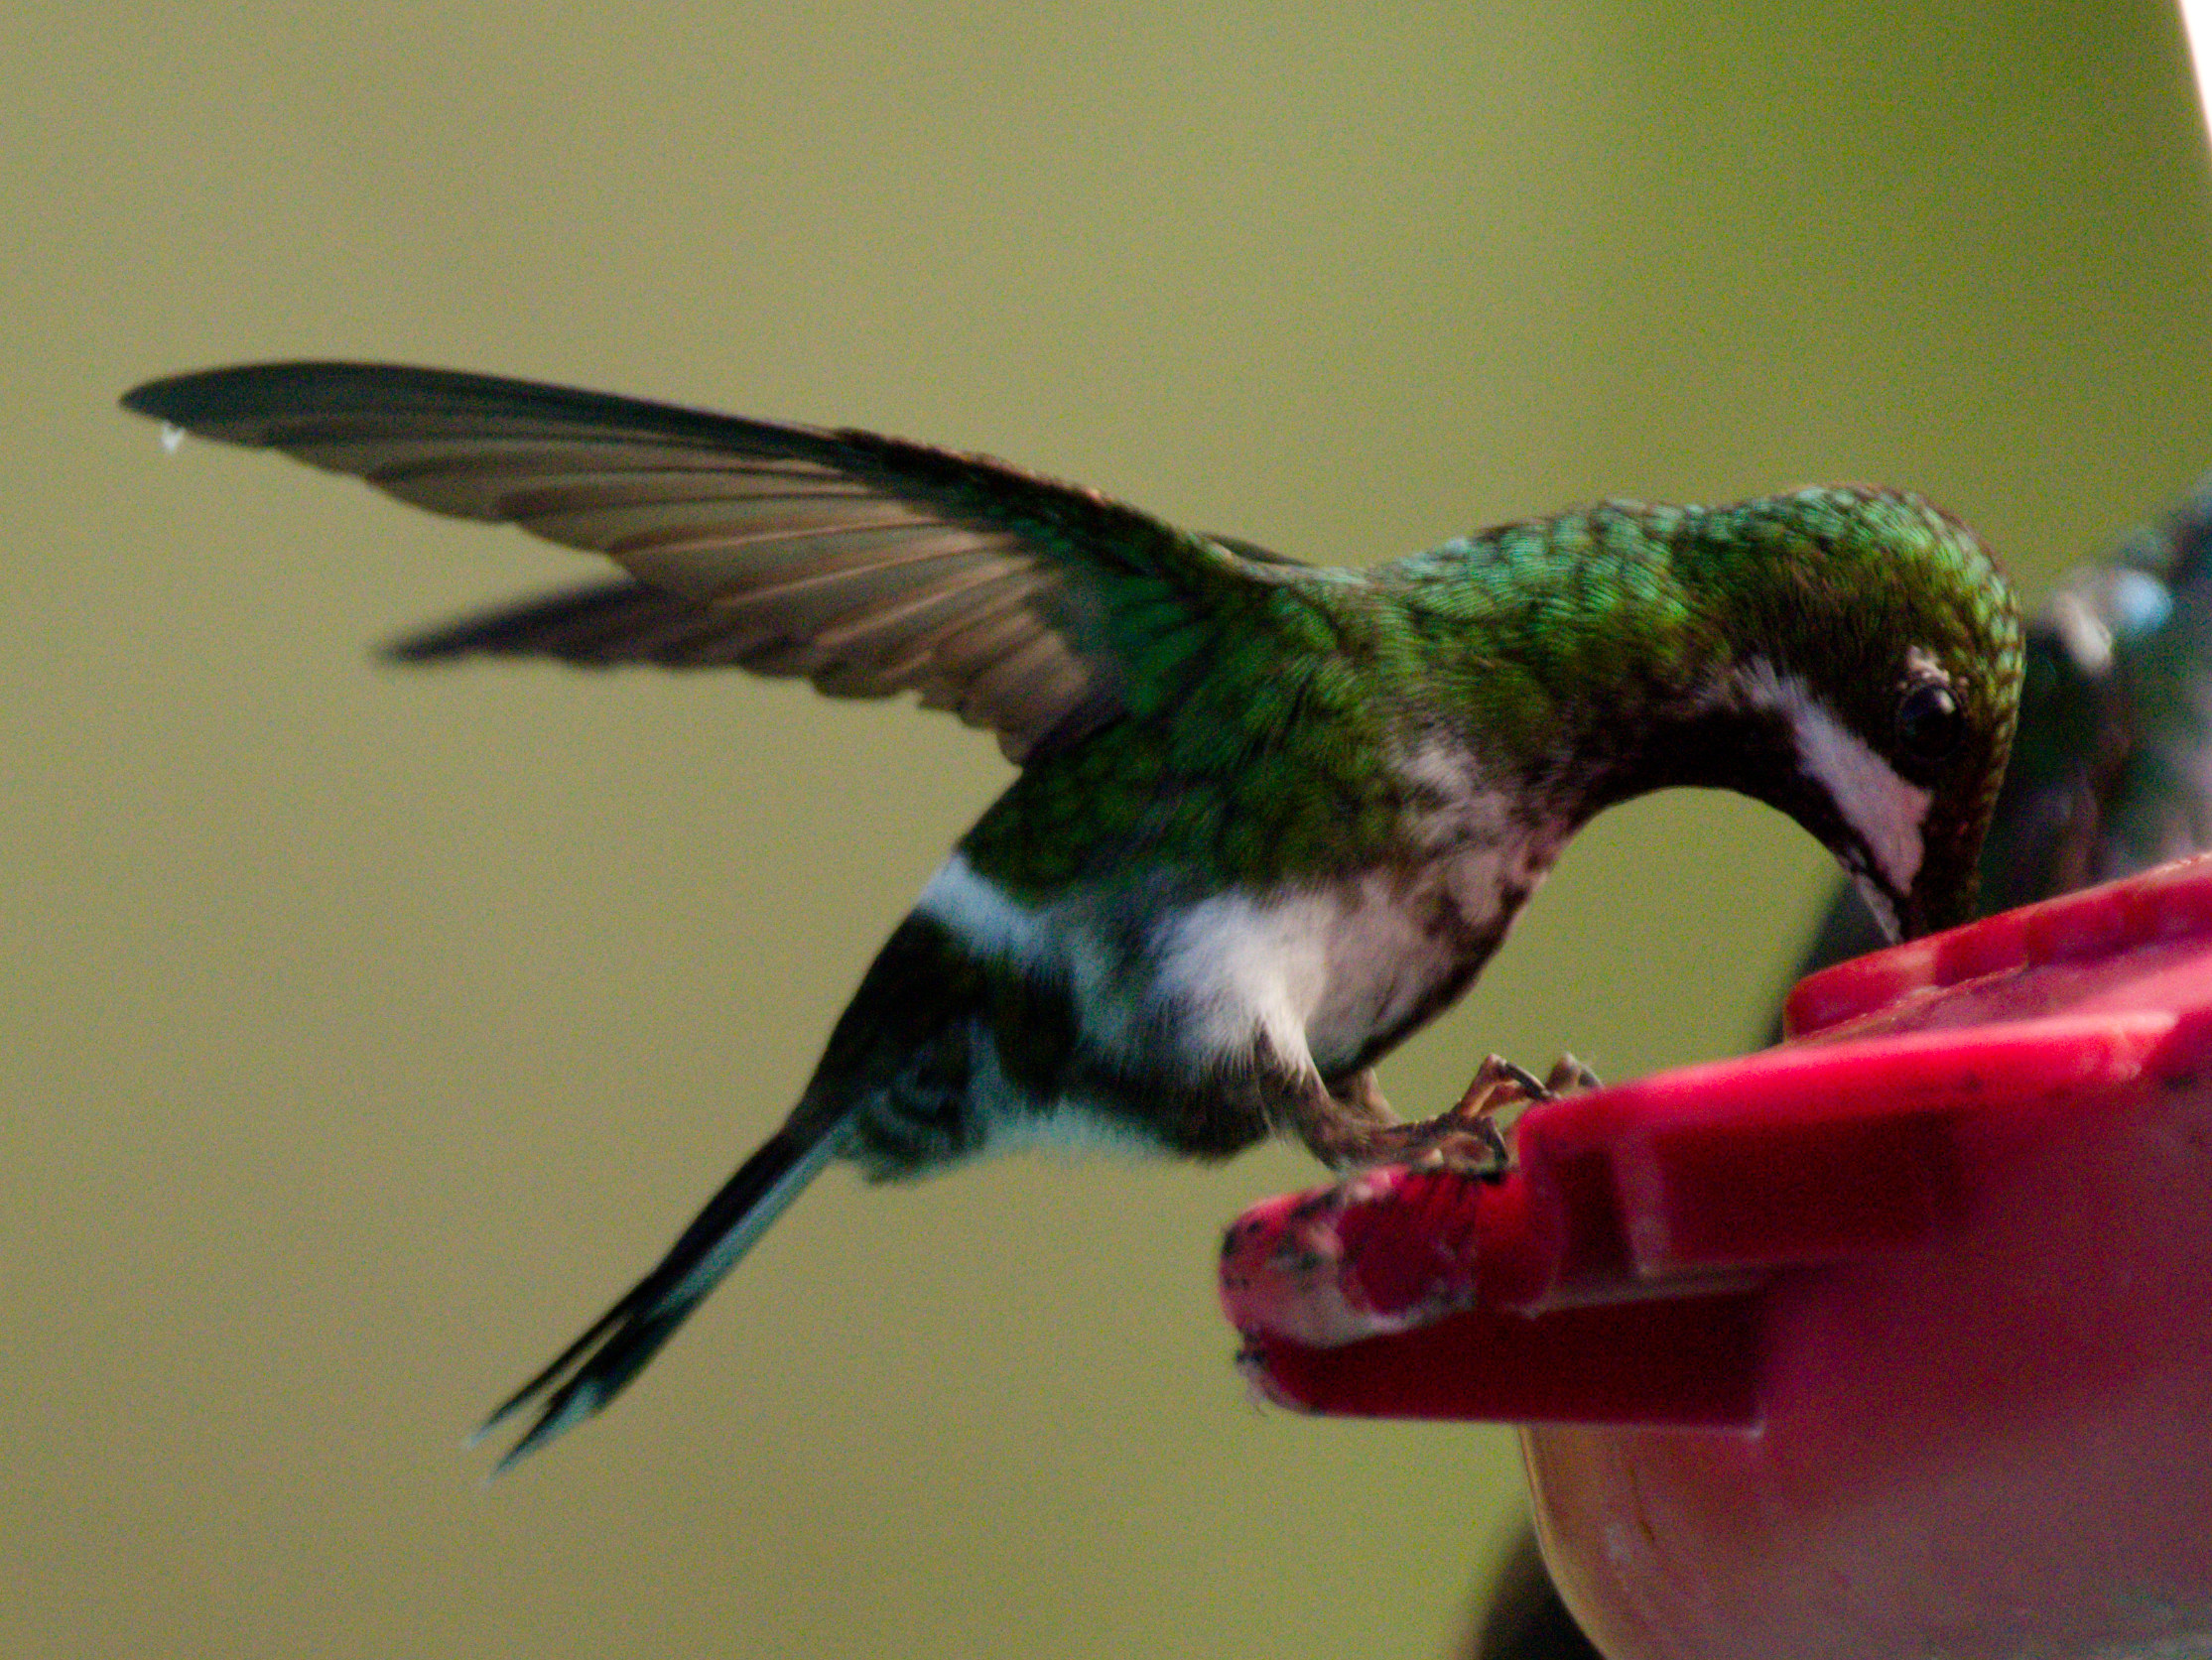
Did it? Well, I’m afraid that’s a “yes and no”. On one hand, the G9II is less enamored with twigs than the OM-1 is. In all but a few cases, it did a fine job getting a bird in focus that was partially hidden. It generally impressed me in this department, sometimes quite so. Yet, the Panasonic’s “small object in front of larger background one” behavior in my experience is worse than the OM-1’s. Usually, that’s slightly worse, but there were also situations where I found myself cursing the camera for what I felt was inept performance. Take the following image of a hummingbird feeder as an example: I needed to pre-focus on it in order to make sure that when I wanted to shoot hummingbirds hovering in front of it or landing on it, the focus would be on the bird, not the background. Because hummingbirds’ flight patterns are unpredictable, I needed to zoom wide, meaning that the feeder cup would be fairly small in the frame. Yet, the G9II had tremendous difficulty finding it and getting it in focus. It didn’t matter whether I used a small AF area, even Pinpoint, or a large one, the body would consistently focus on the shrubs in the background. Where that wasn’t the case, it would just keep hunting. Limiting the focusing range did not help since the shrubs weren’t far enough away. Almost without exception, I had to use a small AF area, then pre-focus on leaves below the feeder, and finally keep the AF area trained on the feeder. Any deviation from it, and –bang- the focus was again on the background. Yes, I realize it is no bird I focused on, but when there is no bird in the frame, the focusing system should still try to focus on what it finds within the defined AF area. (Yes, I also know I could simply turn subject detection off, but I need it back on when a bird arrives, and speed is paramount.) The OM-1 had little to no issues with the same setting. This made getting hummingbirds-in-flight shots with the Panasonic difficult in these settings, MUCH more so than seemed necessary.
For proper focus acquisition, the G9II often, but not always, wants you to use smaller focus areas than the OM-1 does. In any case, it seems to expect you to change them more frequently in order to adjust to the respective shooting scenario. With the OM-1, I get away with using a medium-sized AF area in most cases. I use smaller ones when birds are hidden in dense shrubs, and I rarely encountered situations where using the largest AF area options brought any advantages.Shooting with the Panasonic, however, I often found that using a medium-sized AF area already increased the risk of focusing on the background rather than the bird, even if most of that AF area clearly showed the bird I wanted to focus on. Naturally, this applies only to shooting against busy backgrounds. When shooting against the sky, the size of the AF area makes little to no difference as far as focus acquisition goes.
In his YouTube video comparing the two, found at https://www.youtube.com/watch?v=n8qtfT8eHqA, Mike Lance demonstrates the difference between the OM-1 “snapping” into focus quickly and the G9II more gradually “sliding” into it, which makes it focus more slowly. I’ve found the same thing to be true, sometimes irritatingly so, though it depends to some degree on the available light. The darker the scene, the more time the G9II needs to gradually acquire focus. I assume that Panasonic implemented the AF this way on purpose, keeping video shooters in mind who love smooth transitions, but its impact can be unpleasant when shooting stills. I’ve missed quite a few shots, especially of birds like the Yellow Warbler, a small bird that rarely gives you more than a second before changing location: in my many attempts to shoot it, the G9II did not even once manage to achieve focus before the bird had left its present perch again. The OM-1, on the other hand, generally fared better. In fact, while I was intent on testing the G9II, I more than once encountered situations around the Galapagos islands where I switched back to the OMDS camera because I felt I was missing too many shots that I had really wanted to get. In very poor light, on the other hand, the OM-1 either acquires the target fairly soon or tends to hunt quite a bit, sometimes never achieving focus, so the G9II can be preferable then.
How do these bodies compare in a very challenging focusing situation, namely when shooting in low light when using the 150-400 with the internal TC engaged AND an external 1.4x TC on it, for a total FF-equivalent Field of View of 1,400mm? To check this, I alternated between a close bright area and a far darker one, both at ‘normal’ bird shooting distances. Both bodies fared quite well this time, acquiring focus reliably, though quite slowly in the dark area. The G9II was slightly faster in the latter than the OM-1 did. Overall, this quick test again confirmed my overall impression that the Olympus 150-400 does not penalize being used on a G9II. Olympus teleconverters work properly on the G9II as long as you use compatible Olympus/OMDS lenses. As a fun exercise, I shot a smallish Tropical Kingbird at a ridiculous distance of 36m/120ft, in ok-ish but not great light. In spite of the 1400mm FoV, the bird was still small in the viewfinder. Nevertheless, both bodies focused just fine and produced a result that, with good post processing, might still be usable on the web. Here’s the G9II version, severely cropped and with brightness and other adjustments applied in DxO, but not sharpened:
As far as bird eye focus goes, neither body is consistent. As I said earlier, with birds that are far away, and therefore relatively small in the EVF, the G9II generally seems to find the bird’s eye more frequently, a situation in which the OM-1 often resorts to only framing the bird’s body. A consistency issue, however, is that both cameras every so often fail to identify the bird’s eye, even when I can clearly see it with the naked eye. I assume that they place the focus somewhere on the bird’s body in such situations, but not necessarily on the eye, where I want it to be. In case of the G9II, this is aggravated by what I said in the above about it preferring small AF areas: if a bird’s eye remains outside of the selected AF area, the camera seems to ignore it, only outlining the bird’s body. The OM-1, on the other hand, seems much more tolerant with respect to this behavior: as long as it identifies some part of the bird, the camera usually finds and marks the eye just fine, regardless of whether the bird’s eye is located within the selected AF area or not.
As should be obvious from the above, the OM-1 wins in this category. Its focus acquisition and speed are not perfect but overall pretty solid, more so than the G9II’s. It is only in very dark light that the G9II gets ahead, and not by enough to make a difference. Given that on paper, the G9II combines the best of DFD and PDAF, it is unfortunate that the sum of the ingredients does not perform better (yet) than what other bodies deliver. Future firmware updates might change this.
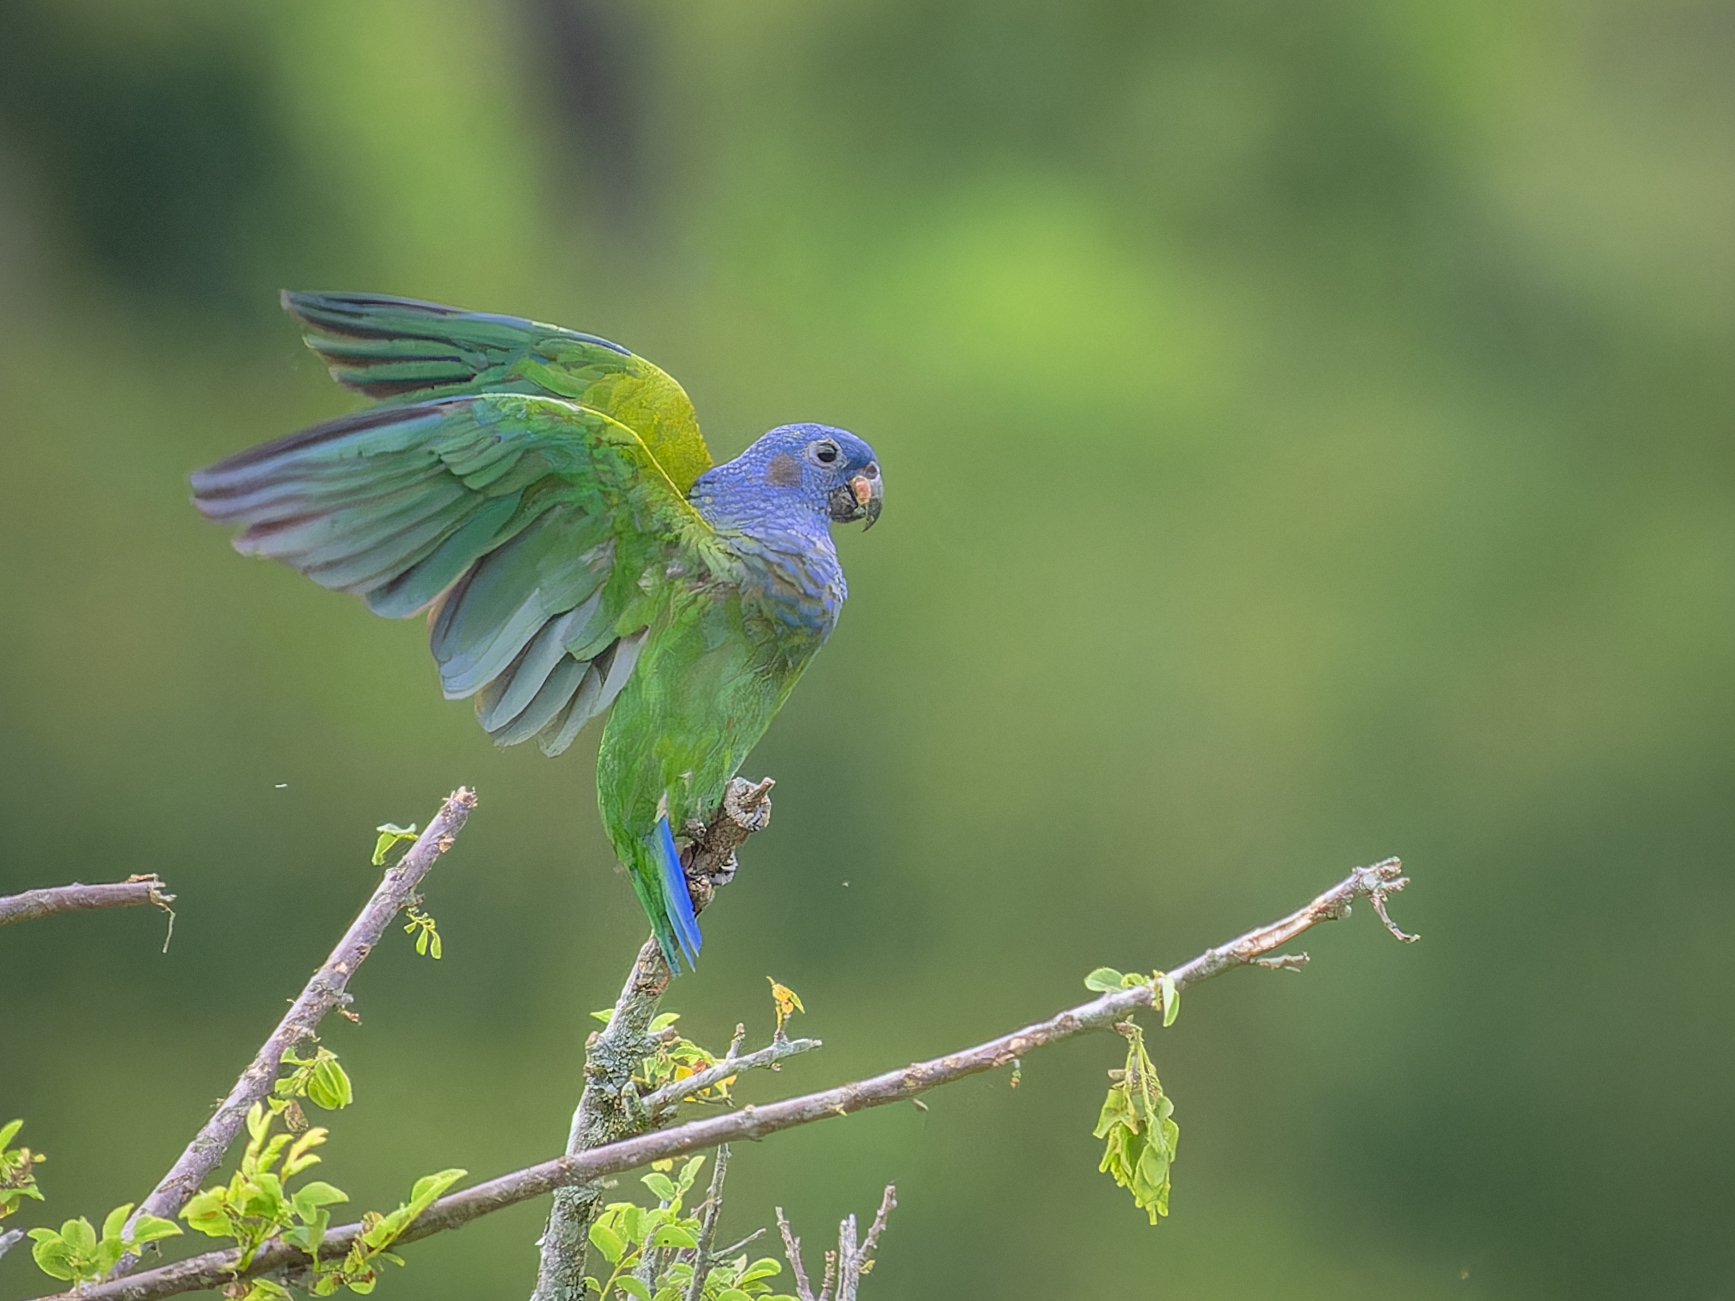
Focus testing II: Focus tracking
As I mentioned earlier, I love shooting small birds, which constituted the majority of my test subjects during my tests in Colombia and around the Galapagos Islands. This presents two particular challenges to any AF system: for one, most of these birds tend to be erratic flyers that give predictive AF systems a hard time. On top of this, even when using the Olympus 150-400 lens, I often have to crop considerably, either because I want to shoot the bird in flight and need to leave ample space because I have no idea in which direction the bird will fly, and/or because these birds rarely let you get close, so cropping is required even with this long lens. This means that the AF system needs to detect, focus on and track a small subject within the sensor area, never an easy feat.
Shooting large, slowly flying birds, such as eagles or egrets, is a different ballgame and usually sees much better performance from the bodies tested here. Take this G9II image of a slowly flying American Flamingo as an example (converted in DxO, no edits): any body should have a near-perfect hit rate with this kind of target, regardless of whether the bird is perched, flies towards me, flies parallel to the plane of focus, or flies away from me.
All of my tests around focus tracking were conducted in SH modes, which means SH25 or SH50 with the OM-1, and SH20 or SH60 with the G9II. Those are all electronic modes. I realize that some folks prefer to use the mechanical shutter. I am not one of them. For one, I prefer to shoot in complete silence, plus I often want faster frame rates than mechanical shutters permit. In case of the G9II, even the H mechanical shutter setting still means that the body uses what Panasonic calls “estimated focus”. You’d have to go down to the 6fps “M” shutter mode to get it to actually re-focus for every individual shot, a mode I rarely use, if ever.
Focus tracking is difficult to test with any accuracy. It takes many long bursts with both bodies to get a feel for how well each performs and how they compare. Don’t want to bore you with too much detail here, and I certainly don’t want to imply that I have accurate numbers on hit or miss rates. I shot and evaluated many burst series (about 25 for the OM-1, which I know better anyway, >45 for the G9Ii, many of which were comprised of more than 100 shots) to get a feel for how well each body tracks. Let me summarize my findings and share only a few examples illustrating them.
The first peculiar thing I noticed is that the OM-1 keeps the focus when tracking, or at least tries to, not matter whether the bird is still within the selected AF area or not. In contrast, the G9II stops tracking when the bird leaves the chosen AF area. This makes it much harder to track an erratic flyer if you needed a small box for initial focus acquisition. No idea why Panasonic implemented it this way, but it seems they designed the “estimated focus” the body uses when shooting at higher fps rates to only look within the AF box. In any case, that’s not a smart decision.
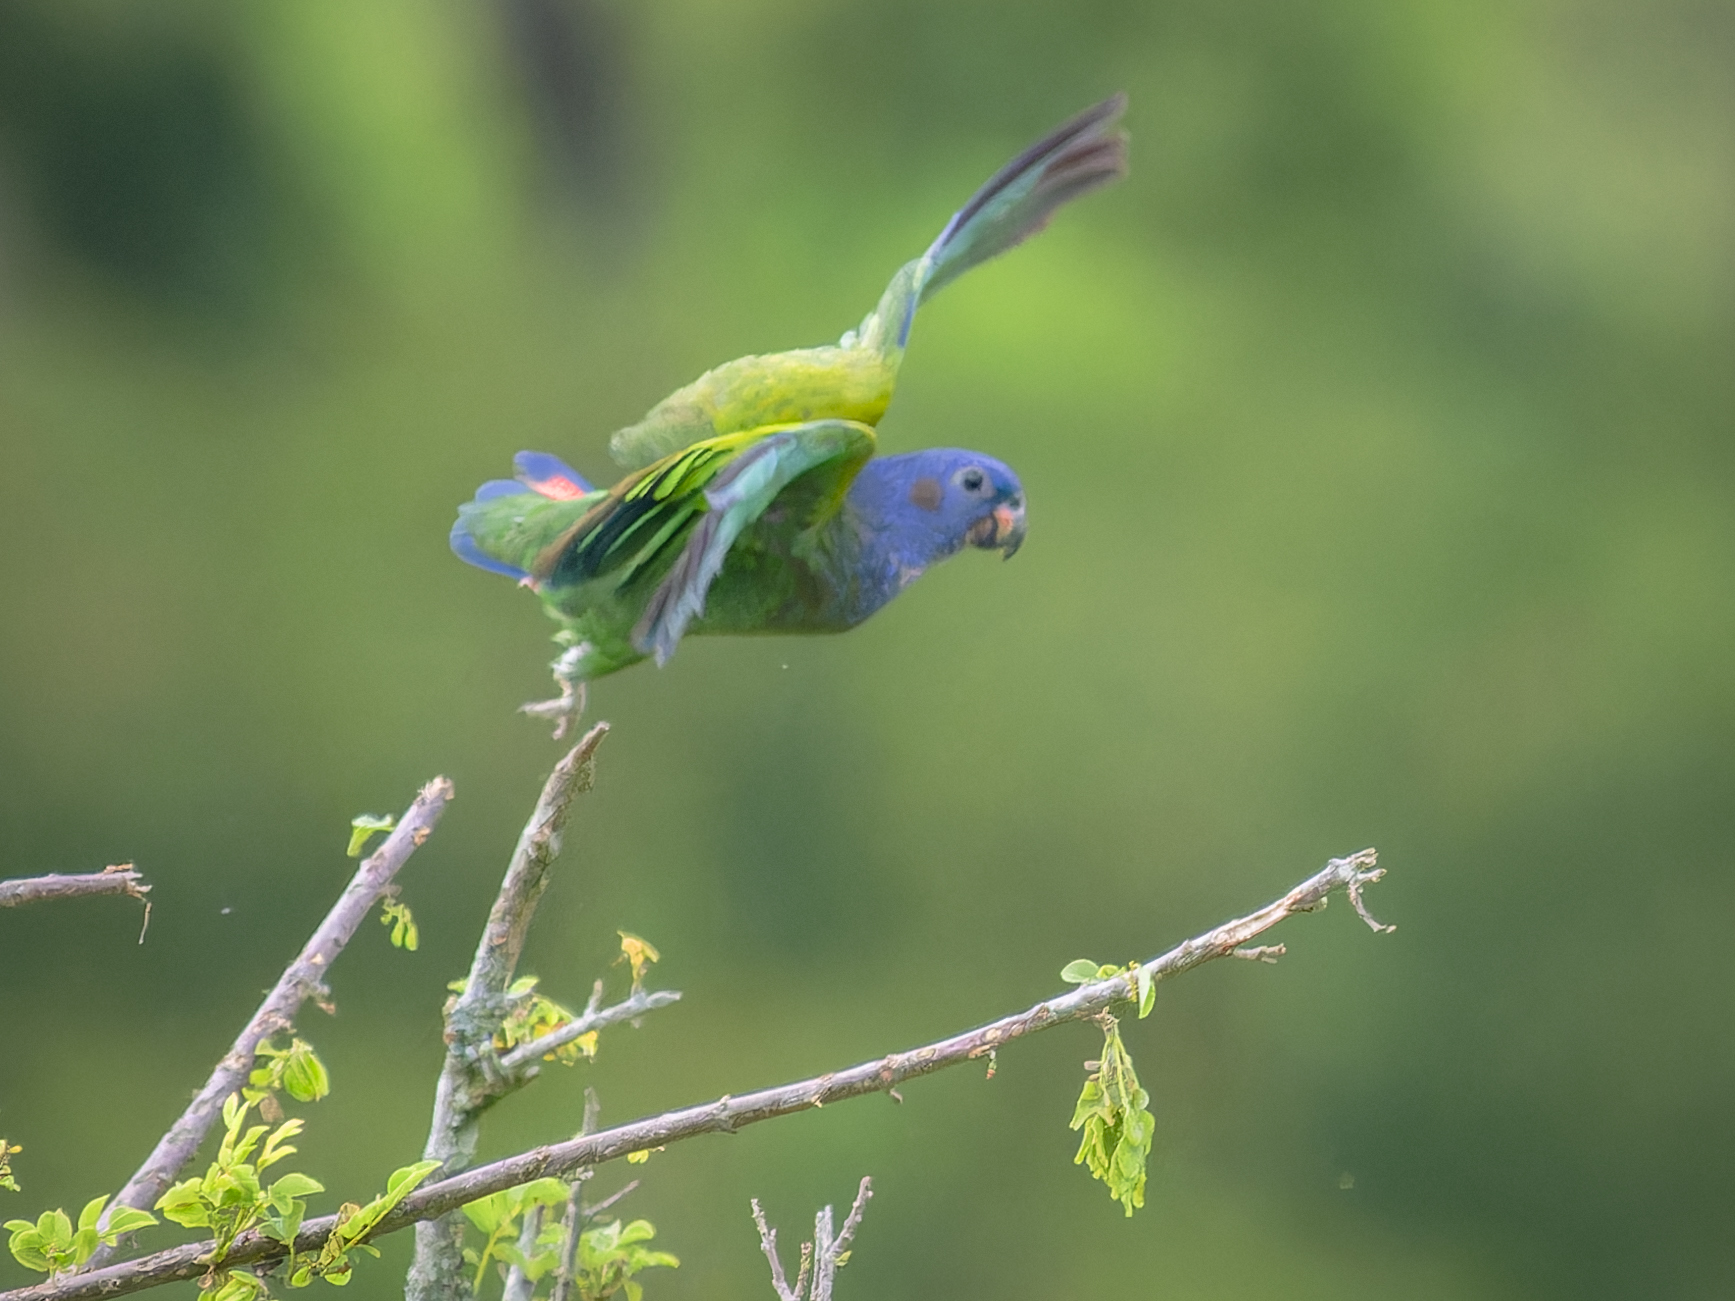
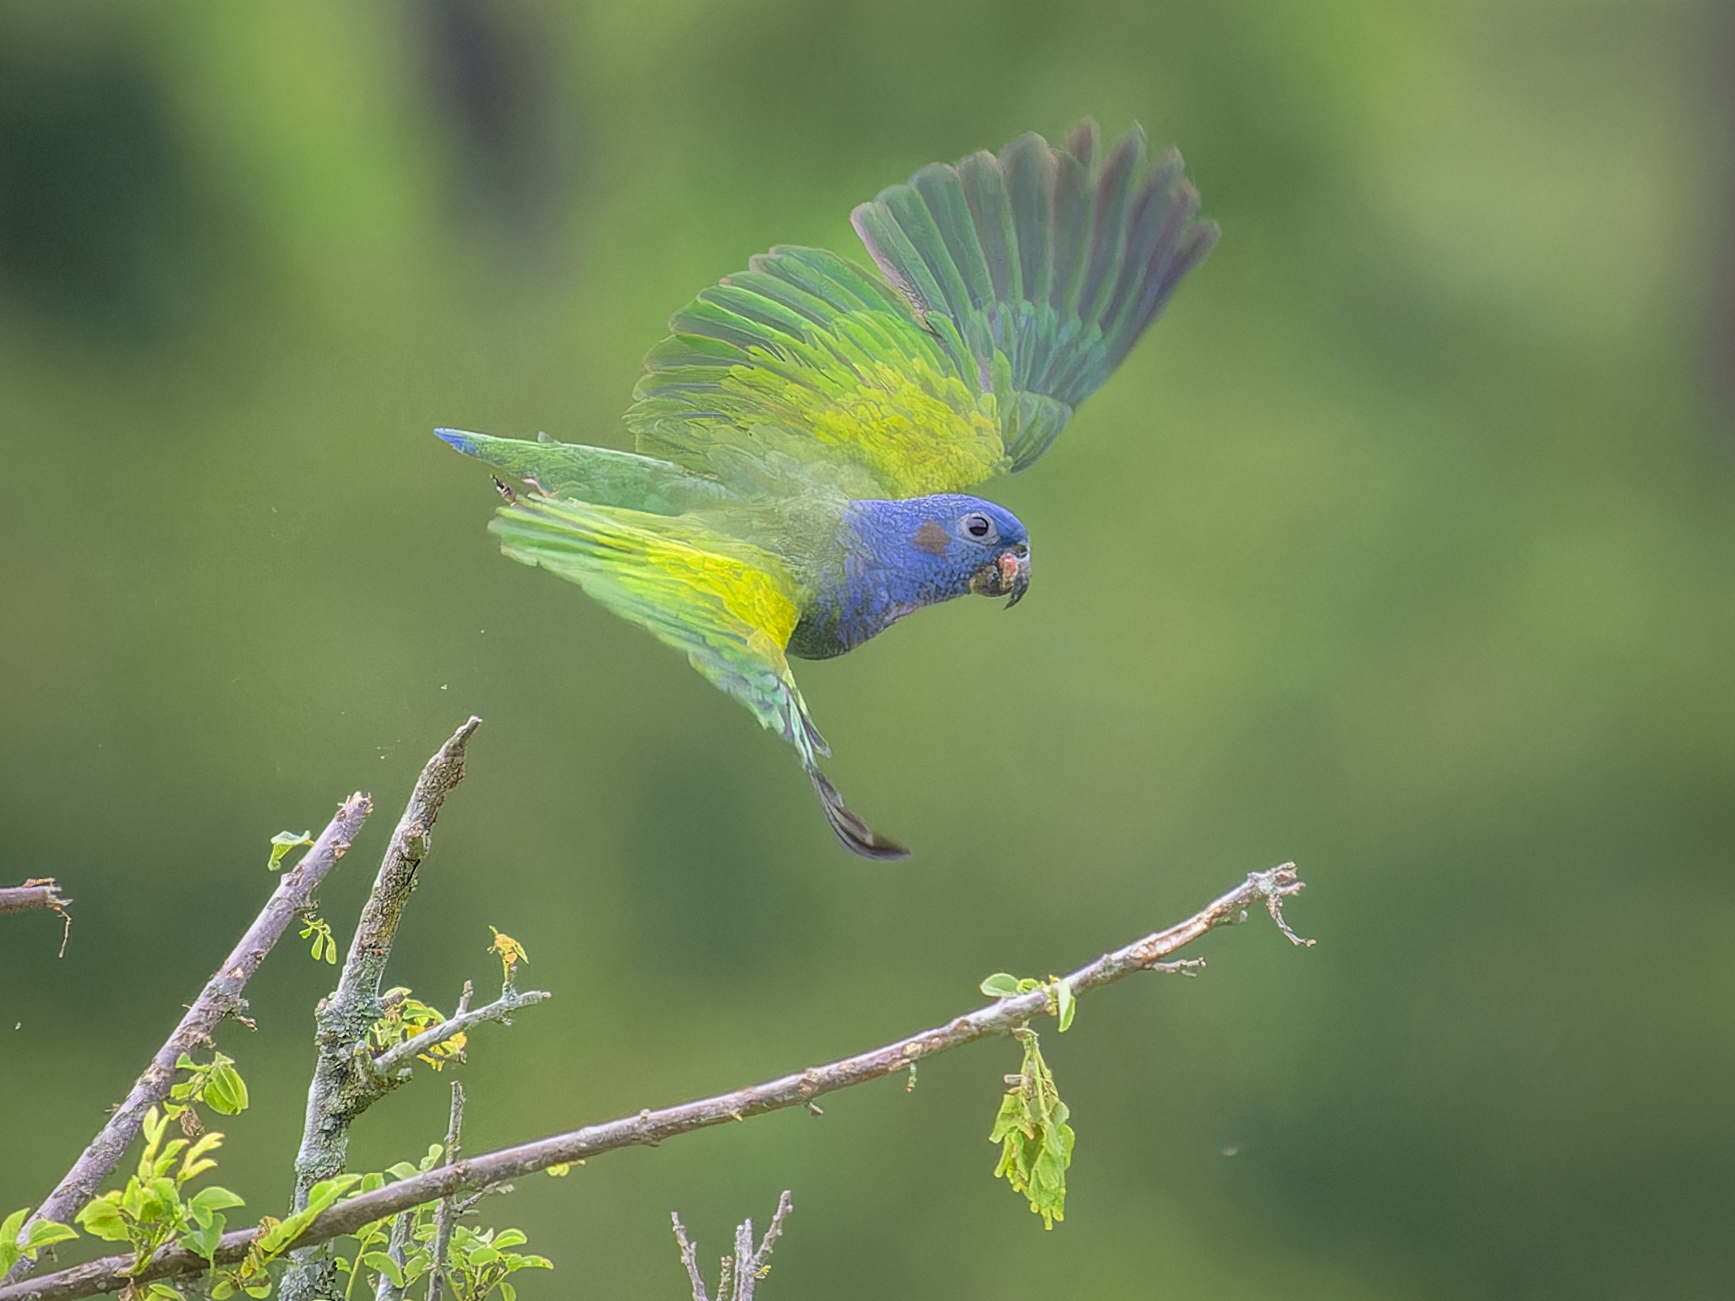
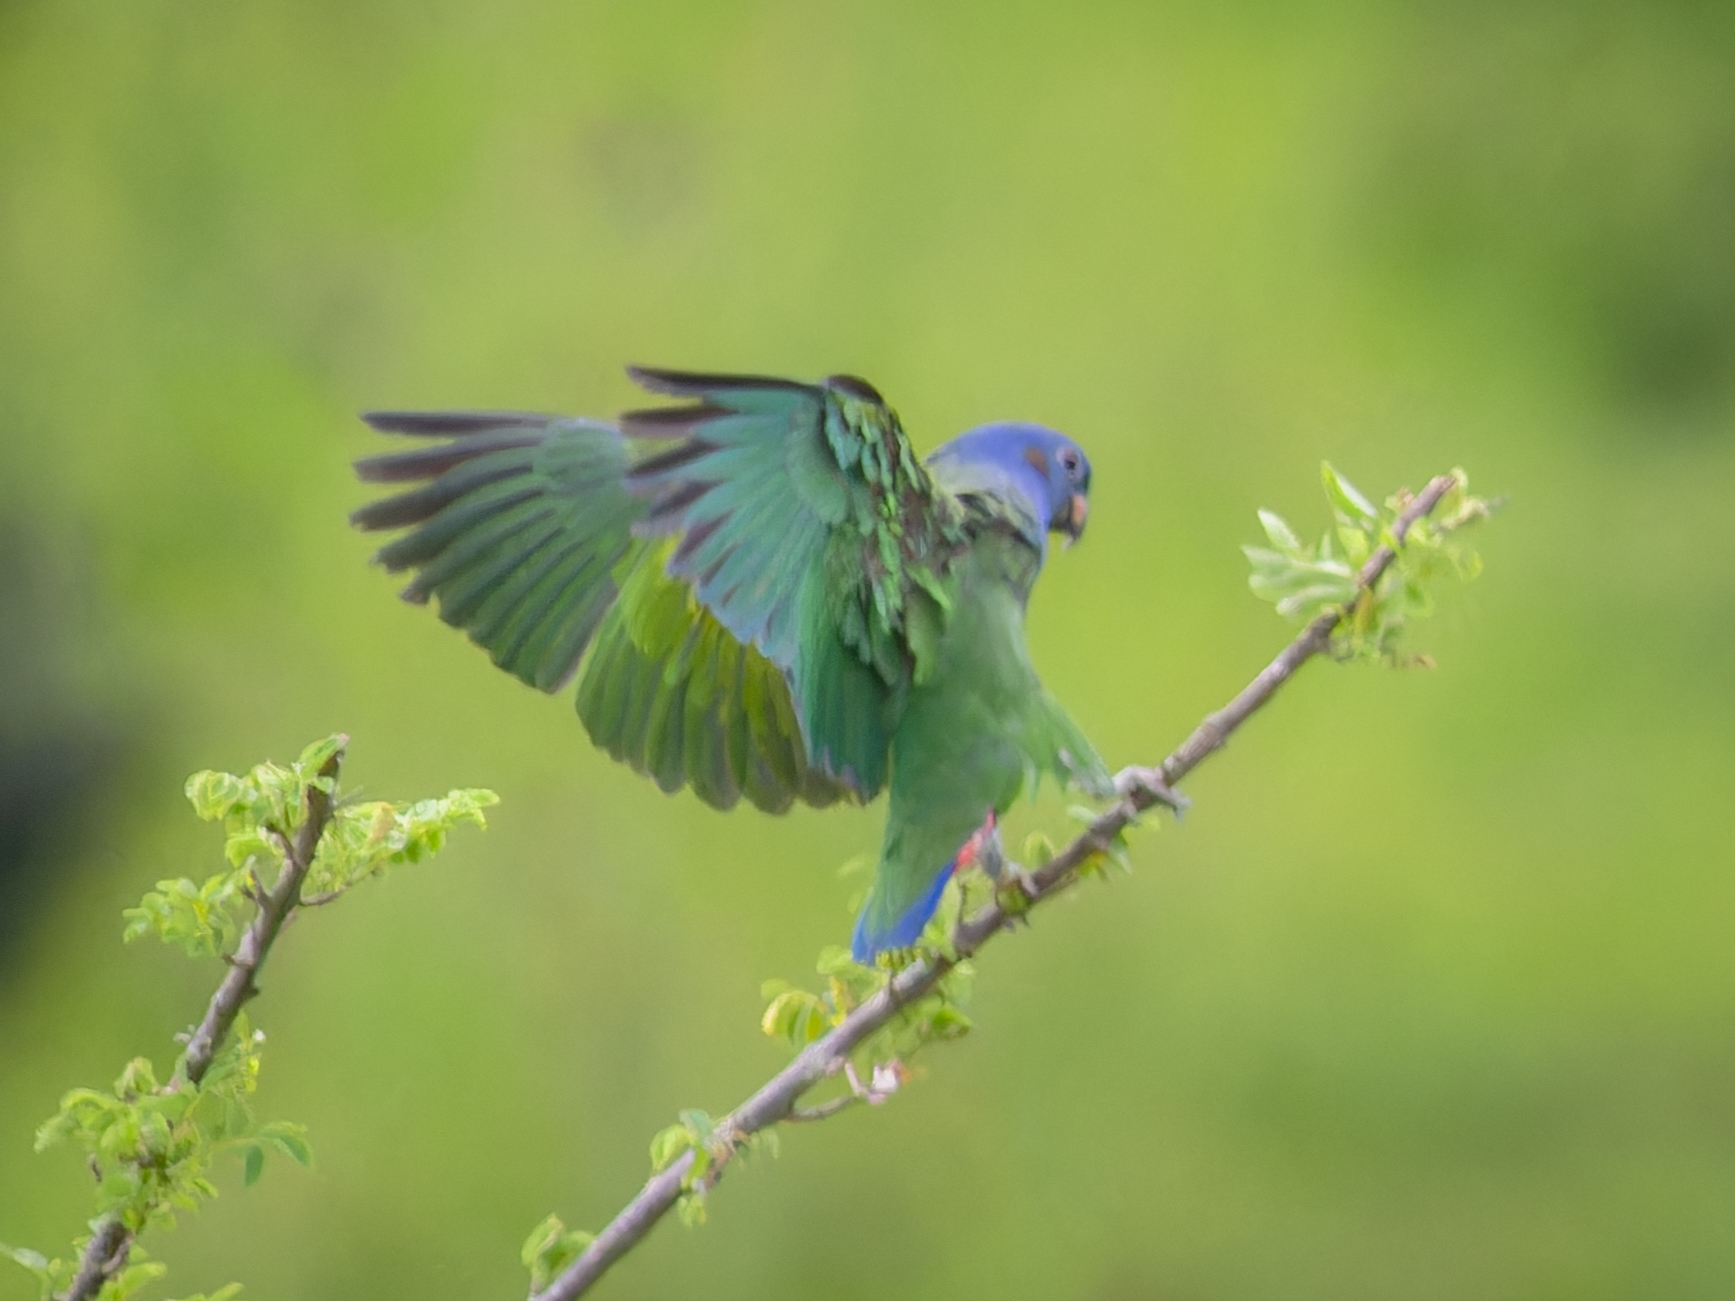
I found that both, the G9II and the OM-1, have a tendency to “cling on” to a bird’s perch when I use ProCap/Pre-burst to shoot it when taking off: the first few shots, where the bird gradually spreads its wings and takes off, are all sharp, but once the bird leaves the place of focus that it initially shared with the branch or twig where it previously sat, both bodies tend to keep that perch in focus rather than following the bird, or find another static element in the image to focus on instead of the moving animal. This frequently happens IN SPITE OF the camera clearly framing the bird and its eye when starting the sequence. Rather strange, but I experienced the same thing time and time again during my testing, so this was not a rare occurrence. Take a long series of a blue-headed parrot I shot with the OM-1 as an example, where I managed to follow the bird from its initial perch throughout a long flight to a different, faraway tree, passing other trees along the way: The parrot took off, which made the branch where it had sat move back and forth. This made the camera focus on another branch instead, leaving the bird slightly blurred. The focus then quickly snapped back onto the bird again, which was now perfectly sharp. During the 40 or so images tracking the bird in flight, there were maybe two where the OM-1 misfocused just slightly, with all other shots being perfectly sharp, even when the bird passed another tree in close proximity. Once the bird neared its final destination, though, a similar thing happened: when the bird almost landed on a branch but then decided to take the next one as its landing spot instead, the OM-1 stayed focused on the previous branch, so the images of the bird landing were all a bit blurred. Below are a few sample shots. The first one shows the full initial perch, illustrating how small the bird was in the frame and how much I had to crop, the next ones show the bird taking off, then the bird getting a bit blurred because the camera focused on a different branch, then the first image where the focus “snapped back” to the bird, and finally two images of the eventual landing, one where the bird and its initially chosen branch are sharp, then one where the bird landed on a different branch but the OM-1 stayed focused on the first one. Similar issues happened several times with the G9II, so both bodies showed comparable weaknesses.

Unsurprisingly, both bodies fared better when shooting a bird in flight whose flight path was parallel to the camera than one flying towards or away from it. Even with parallel flights, don’t expect perfect performance. This depends to a large extent on bird speed and size in the viewfinder: in almost ideal conditions (slow large bird against a clear background), both bodies track well and deliver mostly sharp pictures, with a slight advantage for the G9II. When conditions are less ideal, the percentage of sharp shots tends to go down quickly and very noticeably, more so on the G9II: the faster and smaller the bird, the less well the Panasonic performed, while the OM-1 held up a little better. Overall, the OM-1 gave me about 84% sharp shots, while the G9II reached 73%, both with birds flying mostly parallel to the plane of focus. The focus was usually off only by a bit, but there were also several instances where the shots were all but unusable. In its defense, the G9II produced less completely out-of-focus shots than the OM-1 did. But then, it also had more near misses than the latter. Here’s an example of shooting a Green Thorntail, first with proper focus, then a shot within the same series where it was suddenly slightly off. This was NOT caused by motion blur, as you might be tempted to assume – in most such cases, several sharp shots were followed by several slightly fuzzy ones before the body re-adjusted the focus:

Small, fast birds flying towards or away from the camera present a challenge neither body handles particularly well, though the OM-1 again performed notably better. I got some bursts with both bodies where almost no shot was sharp once the bird had left the original plane of focus. On the other hand, I do not recall getting even a single burst like this where the whole series of images was sharp. Each situation is different, so please don’t ask for percentages here, because whatever numbers I could only you would be somewhat arbitrary. After plenty of shooting, however, it was obvious to me that while the G9II performs slightly better with large, slow birds than the OM-1 does, the opposite is true with fast birds that are also smaller in the viewfinder: the G9II missed a lot more frequently than the OM-1 did. Neither body reached R5-like performance here, but overall, the OM-1 did a better job than the G9II did. I had been hoping for the opposite to be true.
Side note: The G9II has an irritating ‘silent movie’ effect, where the EVF freezes for fractions of a second when tracking if the EVF refresh rate is set to 120fps. This made BiF tracking harder than it should be. At 60 fps, it wasn’t an issue, so I eventually kept it set to that rate. I never experienced a similar issue with the EVF on the OM-1.
High-speed shooting I: Shooting at high frame rates
Some time last year, I shared a series of images of a Eurasian Hobby in a DP Forum thread I called “Is shooting at 50 frames per second overkill?” (https://www.dpreview.com/forums/thread/4716733.) It served to illustrate that quite a few birds, this small bird of prey included, move at speeds when taking off or landing that make even 50fps look slow . Look at how different the bird’s postures are between individual shots. There are really only one or two decent shots in the series. Shoot at 10fps, and there may be none. The series also demonstrates how relevant ProCapture/Pre-burst can be: the 11 images shown in the post spanned a total time of merely 200ms. That’s one-fifth of a second, significantly less than my fastest reaction time or, for that matter, that of any other human being.
The preceding paragraph is a long and winded way to say that high frame rates can make a big difference. Remember, I don’t shoot video. Yet, I believe that shooting at rates even higher than 50fps makes sense at times. Once the bird is up in the air, its wing movements usually become slower, so I shoot at lower frame rates then (usually 20fps on the Panasonic, 25fps on the OMDS), since I don’t want a gazillion similar images of the same bird in flight. When shooting ProCapture/Pre-burst, I shoot at 60fps (G9II) respectively 50fps (OM-1) and appreciate the higher rate of the Panasonic body. Within the AF acquisition and tracking limitations I already discussed, both bodies do a fine job when using ProCapture/Pre-burst. I LOVE the feature, which makes it possible to reliably capture shots that were previously left to sheer luck.
Something to mull over: did you notice that the ‘reaction time’ argument also means that it makes no sense to use BBF (back button focus) in these modes? Shooting birds in flight, many ML shooters have abandoned BBF because the camera needs to adjust its focus all the time anyway, so setting shutter button priority is logical as it lets you use your thumb for something better than merely pressing AF-On the whole time. However, not all of these photographers realize that the same goes for ProCapture/Pre-burst: if you use BBF, you’d have to press the AF-On button the second you half-press the shutter button anyway, because your reaction time is too slow to pre-focus and only press AF-On once the action starts. So, why bother? Pre-focusing makes no sense in this shooting mode. For my part, I only use BBF with perched birds, landscapes and the likes, but not for any burst shooting.
Some bird shooters may have entirely different things in mind when thinking “take-off and landing”. Their preferred subjects may be large birds of prey, say, an osprey or sea eagle fishing from a perch. In my view, you don’t even need ProCapture/Pre-burst for those, as it is easy to see when the bird gets ready to leave, so tracking it in C-AF is all you might need. You sure won’t be needing 50+fps. Small birds, on the other hand, tend to be fast and erratic flyers. Some of them give you next to no chance to track them unless you let the camera do it for you.
When you let the camera “do it for you”, an inevitable dilemma appears: since human reaction times are too slow for fast birds, tracking the latter would be left to chance. Much more often than not, they already left the frame before I even started to move my camera along. When trying to capture a small bird taking off, I therefore either frame wide, so I have a decent chance of cropping the shot later to wherever the bird was as it took off, or I take my chances and pre-focus on the area where I think the departing bird will show me its nicest flight pose. Whenever I opt for one of these two, I generally find myself wishing I had opted for the other. 😉 Getting good shots of small departing (or landing) birds takes skill, patience and, not to be underestimated, quite some luck. Just one example, taken in poor light at ISO12800, then heavily post-processed:
High-speed shooting II: Write speeds
[Note: I use the term “Write speed” in the sense of “Megabytes per second written to the card”. Only this parameter allows you to compare different bodies accurately, since “The number of images written per second or minute”, another definition some people use, depends on a lot of variables, such as image noise levels, compression rate, RAW/RAW+JPEG or JPEG only, etc.]
Much has already been said and written about how long the G9II needs to write images to its cards. Some people reported their body needing almost four minutes to write a full buffer of 200 images. It appears that these long delays were caused by rather slow memory cards. My own tests yielded much better results.
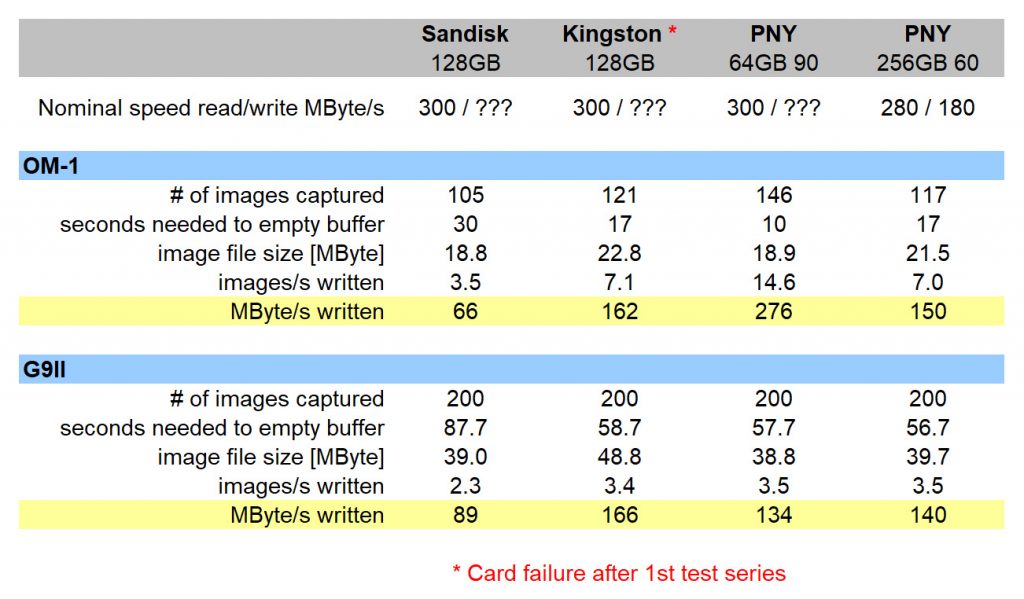
After a quick initial check that was somewhat inconclusive, I have now conducted a more systematic one where I repeated each test, testing four different cards on each body by filling the buffer on the G9II and OM-1, then measuring the time it took to complete writing all of these images to the card. The memory cards I used were a 64GB PNY Elite-XPRO 90, a 128GB Sandisk Extreme Pro, a 128GB Kingston Canvas React Plus, and a 256GB PNY Elite-XPRO 60. All spec’d at 300 Mbit/s, the first three are all nominally among the fastest SDXC models available. This spec applies to the read speed; write speeds are typically a little slower. The PNY Elite-XPRO 60 card is spec’d at 280 Mbit/s read / 180 Mbit/s write speed. The results varied to a surprising degree, which is why I am sharing them here.
Using the 128GB Sandisk card, the OM-1 needed 30 seconds to write 105 RAW images. The write speed (yellow line) calculates to a meager 66 MBit/s, which is MUCH slower than the card promises. With the same card, the G9II needed 1:31 minutes to write 200 RAW images, a write speed of 86 MBit/s. In other words, the G9II wrote faster to this card than the OM-1 did but needed much longer because of the higher number of images in the buffer and the much larger image file size.
Using the 128GB Kingston card, both bodies performed substantially better. The OM-1 now needed 17 seconds to write 121 RAW images (approximately 162 MBit/s), the G9II needed 1:02 minutes for its 200 RAW images (approximately 157 MBit/s). While I performed several test series with the other cards, the Kingston tests stopped here: the next time I tried testing it, the G9II reported a card error, even after trying to re-format the card. While the OM-1 initially still worked with this card for a little longer, it eventually reported the same and would not even allow the card to be re-formatted.
The test with the fast 64GB PNY card yielded a huge surprise: on the OM-1, it took a mere 10 seconds to write 146 images, for a whopping write speed of 276 Mbit/s(!), while the G9II did not even get close to this, its write speed being less than half of that at 127 MBit/s. I could not believe what I experienced and ran this test three times, always with the same results.
Again to my surprise, the final comparison, with the somewhat slower 256GB PNY card, still had the OM-1 ahead, at 150 MBit/s versus the G9II’s 132 MBit/s, but the difference was now insubstantial. Same card maker, but very different results between the two bodies.
A few notes and thoughts:
- The number of images written is constant on the G9II (200, its buffer size) but varies on the OM-1 because that camera starts writing images to the card immediately while the Panasonic apparently waits until the buffer is full. Accordingly, faster cards mean the OM-1 records more images before its buffer is full, since more images have already been written away while still shooting.
- Files sizes are different between these tests because some of the tests were conducted with new cards on different days. Testing the Kingston happened in poor light, so more noise led to larger file sizes. This should not impact the calculated write speeds, at least not significantly. Comparison between the two cameras always took place under identical conditions.
- Smaller cards are generally said to perform slightly better than larger ones, so the 64GB PNY card’s stellar performance on the OM-1 may in part reflect this. Why the small PNY card performed so much faster on the OM-1 than the big PNY card, while write speeds with the two were almost identical when using the G9II, is a mystery. In all likelihood, this has to do with the camera, not the card.
- Why the G9II’s RAW files are so large remains unclear. They are often twice the size of the corresponding OM-1 files, a much bigger difference than the respective sensor resolutions suggest. One reason might be that the Panasonic allegedly uses a 16-bit RAW format, though even after reading all kinds of explanations I am still unsure why it would need that. In any case, this slows down the write process. In my view, Panasonic would be well advised to introduce a lossless compression format, which other brands have been offering for a long time.
A needless and irritating aspect about the Panasonic, also the subject of many discussions on this forum, is that it stops shooting when the buffer is full. You have to release the shutter and press it again to continue shooting while the body stores away images, then do the same when the buffer filled up again, and so on. I know of no other camera that does this. On the OM-1, you can keep shooting at slower speeds, essentially at the image writing speeds I show in the table. On the G9II, you cannot do that continually, because the camera will stop shooting again every time the buffer is full. What does all this mean? Overall, it is an issue, but I think it a lesser one than many other folks seem to consider it to be. The Panasonic’s buffer, at 200 RAW images, is huge, about twice the size of the OMDS’. Few people ever shoot 200 bursts in one series. As long as you do not fill the buffer completely, you can start a shorter new burst. It therefore only becomes an issue when shooting several long bursts within a short time. If the buffer fills up, however, the camera’s stop-and-restart requirement is awkward, to say the least. Every other camera intended for bird shooting lets you shoot continually, as in “for a very long time”, even if its fps rate may drop to a crawl when the buffer is full. On the G9II, that fps rate could be about 3 per second, still not great but better than nothing, if it did not have to keep releasing and re-pressing the shutter button. With the faster PNY card, the OM-1 drops down to about 14fps, its image write speed with this card, once this body’s smaller buffer is full – and keeps shooting at about that rate as long as you still press the shutter button and the card isn’t full yet.
High-speed Shooting III: Rolling shutter
With cameras spec’d to shoot at 120fps, I don’t worry much about rolling shutter. To get them to 120fps, their respective sensor readout times must be 8.3milliseconds or less, which is plenty fast for everything this side of a hummingbird. Just kidding: hummingbirds can move their wings about 40-50 times per second, so 120 fps is even fast enough for these little fellers. J As always, however, checking is better than assuming. My standard test for this involves flying my drone in our living room and taking a few shots to see how much rolling shutter that gives me, so I did just that. Here are two shots I picked from several more, as I feel they are fairly representative (G9II on the left, OM-1 on the right):

We see motion blur but little to no warping in the blades, which would be the tell-tale sign of rolling shutter. (If you’d like to see some REAL rolling shutter, take a look at this report I published on my website a while ago, and scroll all the way to the bottom: you see examples with the Nikon Z7ii [horrible], Canon R5 [not too bad, but not great either] and OM-1 [best]. The OM-1 shot there looks just like the one I am showing here.)
My experience in the field confirmed this. I shot a gazillion of hummingbirds in Colombia, for example. Those guys move their wings so fast that rolling shutter can become an issue even with the OM-1 with its very fast sensor readout speeds, as the next image illustrates. However, out of thousands of shots, I found VERY few with both cameras where this played much of a role.
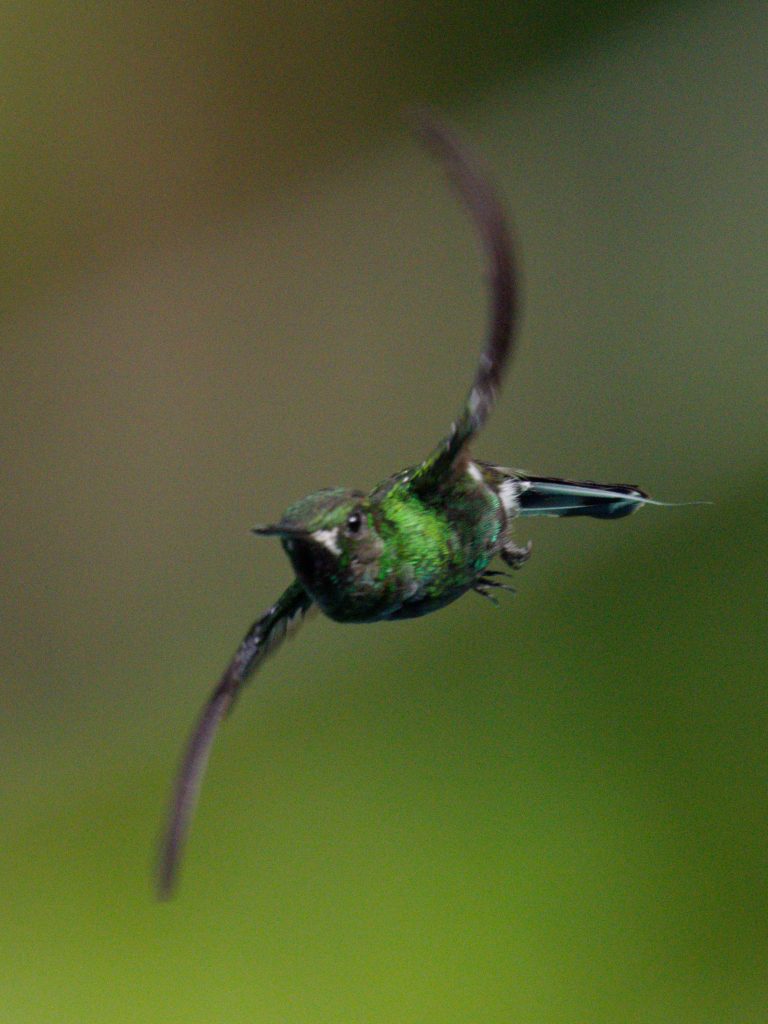
In fact, there were so few of them that I consider rolling shutter a complete non-issue with either body.
Practical field experience
Reliability-wise, both bodies strike me as well built. Neither heat nor humidity caused any issues so far, and though my experience with the Panasonic is still too short to tell for good, while my OM-1s already got plenty such opportunities, I doubt that either of them will ever give me reason to be concerned.
Once more, I need to apologize for raining on the parade of those who are fully satisfied with the OM-1’s AF. It is a solid performer, but with respect to AF acquisition and tracking, my experience again says it is not perfect and would benefit from some improvements (which a few recent reports indicate the OM-1II might be bringing). Compared to my Canon R5, the OM-1 hunts more in certain situations, struggles more with branches and twigs, and performs less well in low light.
My comments in the previous sections probably already gave it away: I feel that the G9II does not get me any closer to the kind of R5-like performance I’d love to be able to combine with the remarkable capabilities of the stellar Olympus 150-400 lens. Worse, with the exceptions I mentioned, the Panasonic lags the OM-1’s AF performance, not by much, but by enough to matter.
While discussing practical aspects, I need to bring up the biggest nuisance I experienced with the G9II, one I have come to dislike quite a bit: the OM-1 allows me to configure its custom modes such that everything, including drive and focus modes, will be set as I want it by simply rotating a single dial or pushing a button, which I can do with my right hand. Accordingly, it takes a fraction of a second to reconfigure the OMDS body from shooting a perched bird in S-AF, at a slow shutter speed and shooting single images, to shooting that same bird taking off, at a much higher shutter speed and at SH50 using Pro-Cap.
On the G9II, that same transition from one shooting mode to the other normally requires using TWO, sometimes THREE control elements: I have to turn the dial on the upper left of the camera to switch between single shooting, SH and PreSH modes, while I also need to turn the dial on the upper right to switch to another custom mode in order to adjust shutter speeds and several other settings. In addition, I MAY have to move the AF selector between S-AF and C-AF. No matter how much you practice this, it takes WAY longer than it does on the OM-1, since you need to use both hands and take your gear down in order to rotate both dials. Shooting with the 150-400, or the even heavier new 150-600, you cannot merely keep the camera in its normal shooting position, as in doing so, you won’t be able to support it any longer and the lens’ full weight would be pressing on the bayonet. (I once cracked a bayonet by accidentally doing this. Won’t do it again.) If you use one of the lighter MFT lenses, this may strike you as a minor issue, but with the big lenses, a change that takes far less than one second on the OMDS takes several seconds with the Panasonic, so you end up losing shots. This has happened to me several times during my testing. Because I am no longer used to having to set all these control elements separately, I also lost burst shots with the G9II here and there because I failed to realize it was still set to single shot. That’s obviously part of my learning curve, but once you got used to the convenience the OM-1 offers, it becomes hard to go back.
To be fair, I should mention that the G9II allows you to map the burst mode setting on a button, as well as to set it via the Q menu. Configuring your camera this way will cut down the time a bit. It still takes more time than I like, though. On top of that, you can train yourself to do the custom mode change on the OM-1 almost instinctively, since all t takes it a short twist with the index finger. Regardless which method you use on the G9II, you still need to execute a series of control changes that distract for a while, meaning that you have to concentrate on the EVF display rather than the bird. That in itself already takes more time, plus it means you may have to ‘reacquire’ the bird in the viewfinder, which at long FLs and with small birds can be tricky and add a further delay.
Mind you, none of the above are showstoppers. Taken together with the mode switching issue I mentioned under “Setup and customization”, they do suggest, however, that in spite of the body’s much improved AF, Panasonic seems to have given less thought to high-speed shooting than Olympus/OMDS did, as well as brands such as Canon, Nikon and Sony.
Anyway, let me share a few more shots, now all edited, to illustrate that both bodies are competent enough to take plenty of shots worth keeping. Just don’t expect either of them to be perfect. But then, which camera is?
OM-1
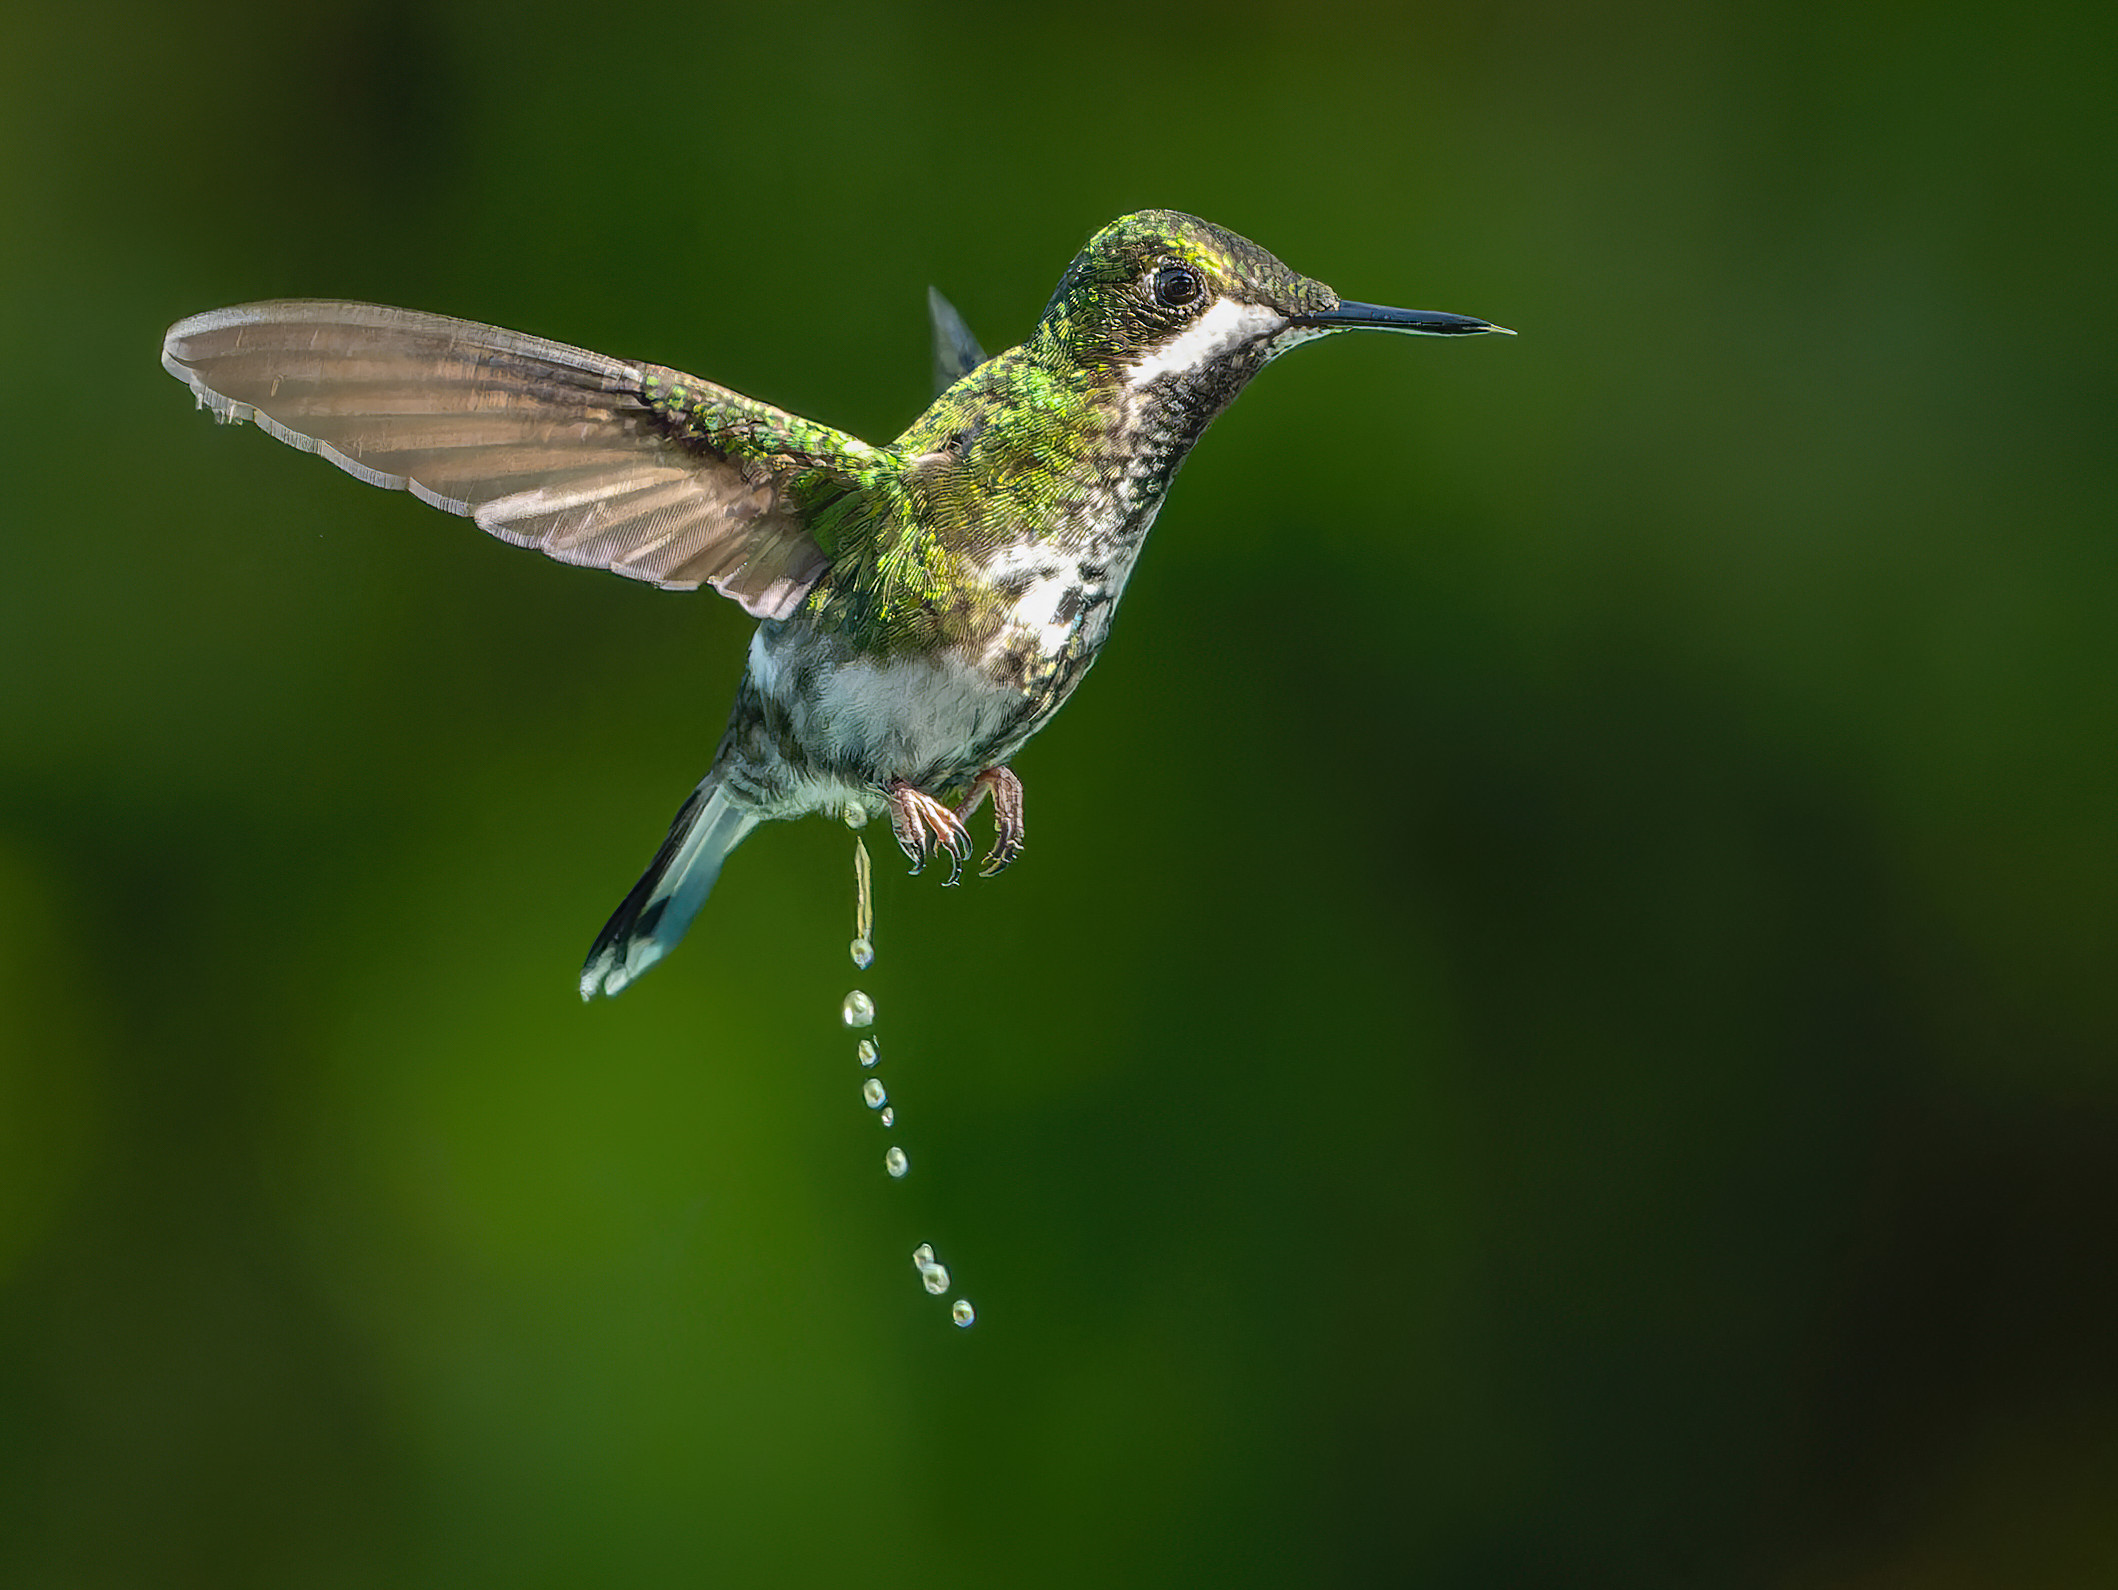

G9II
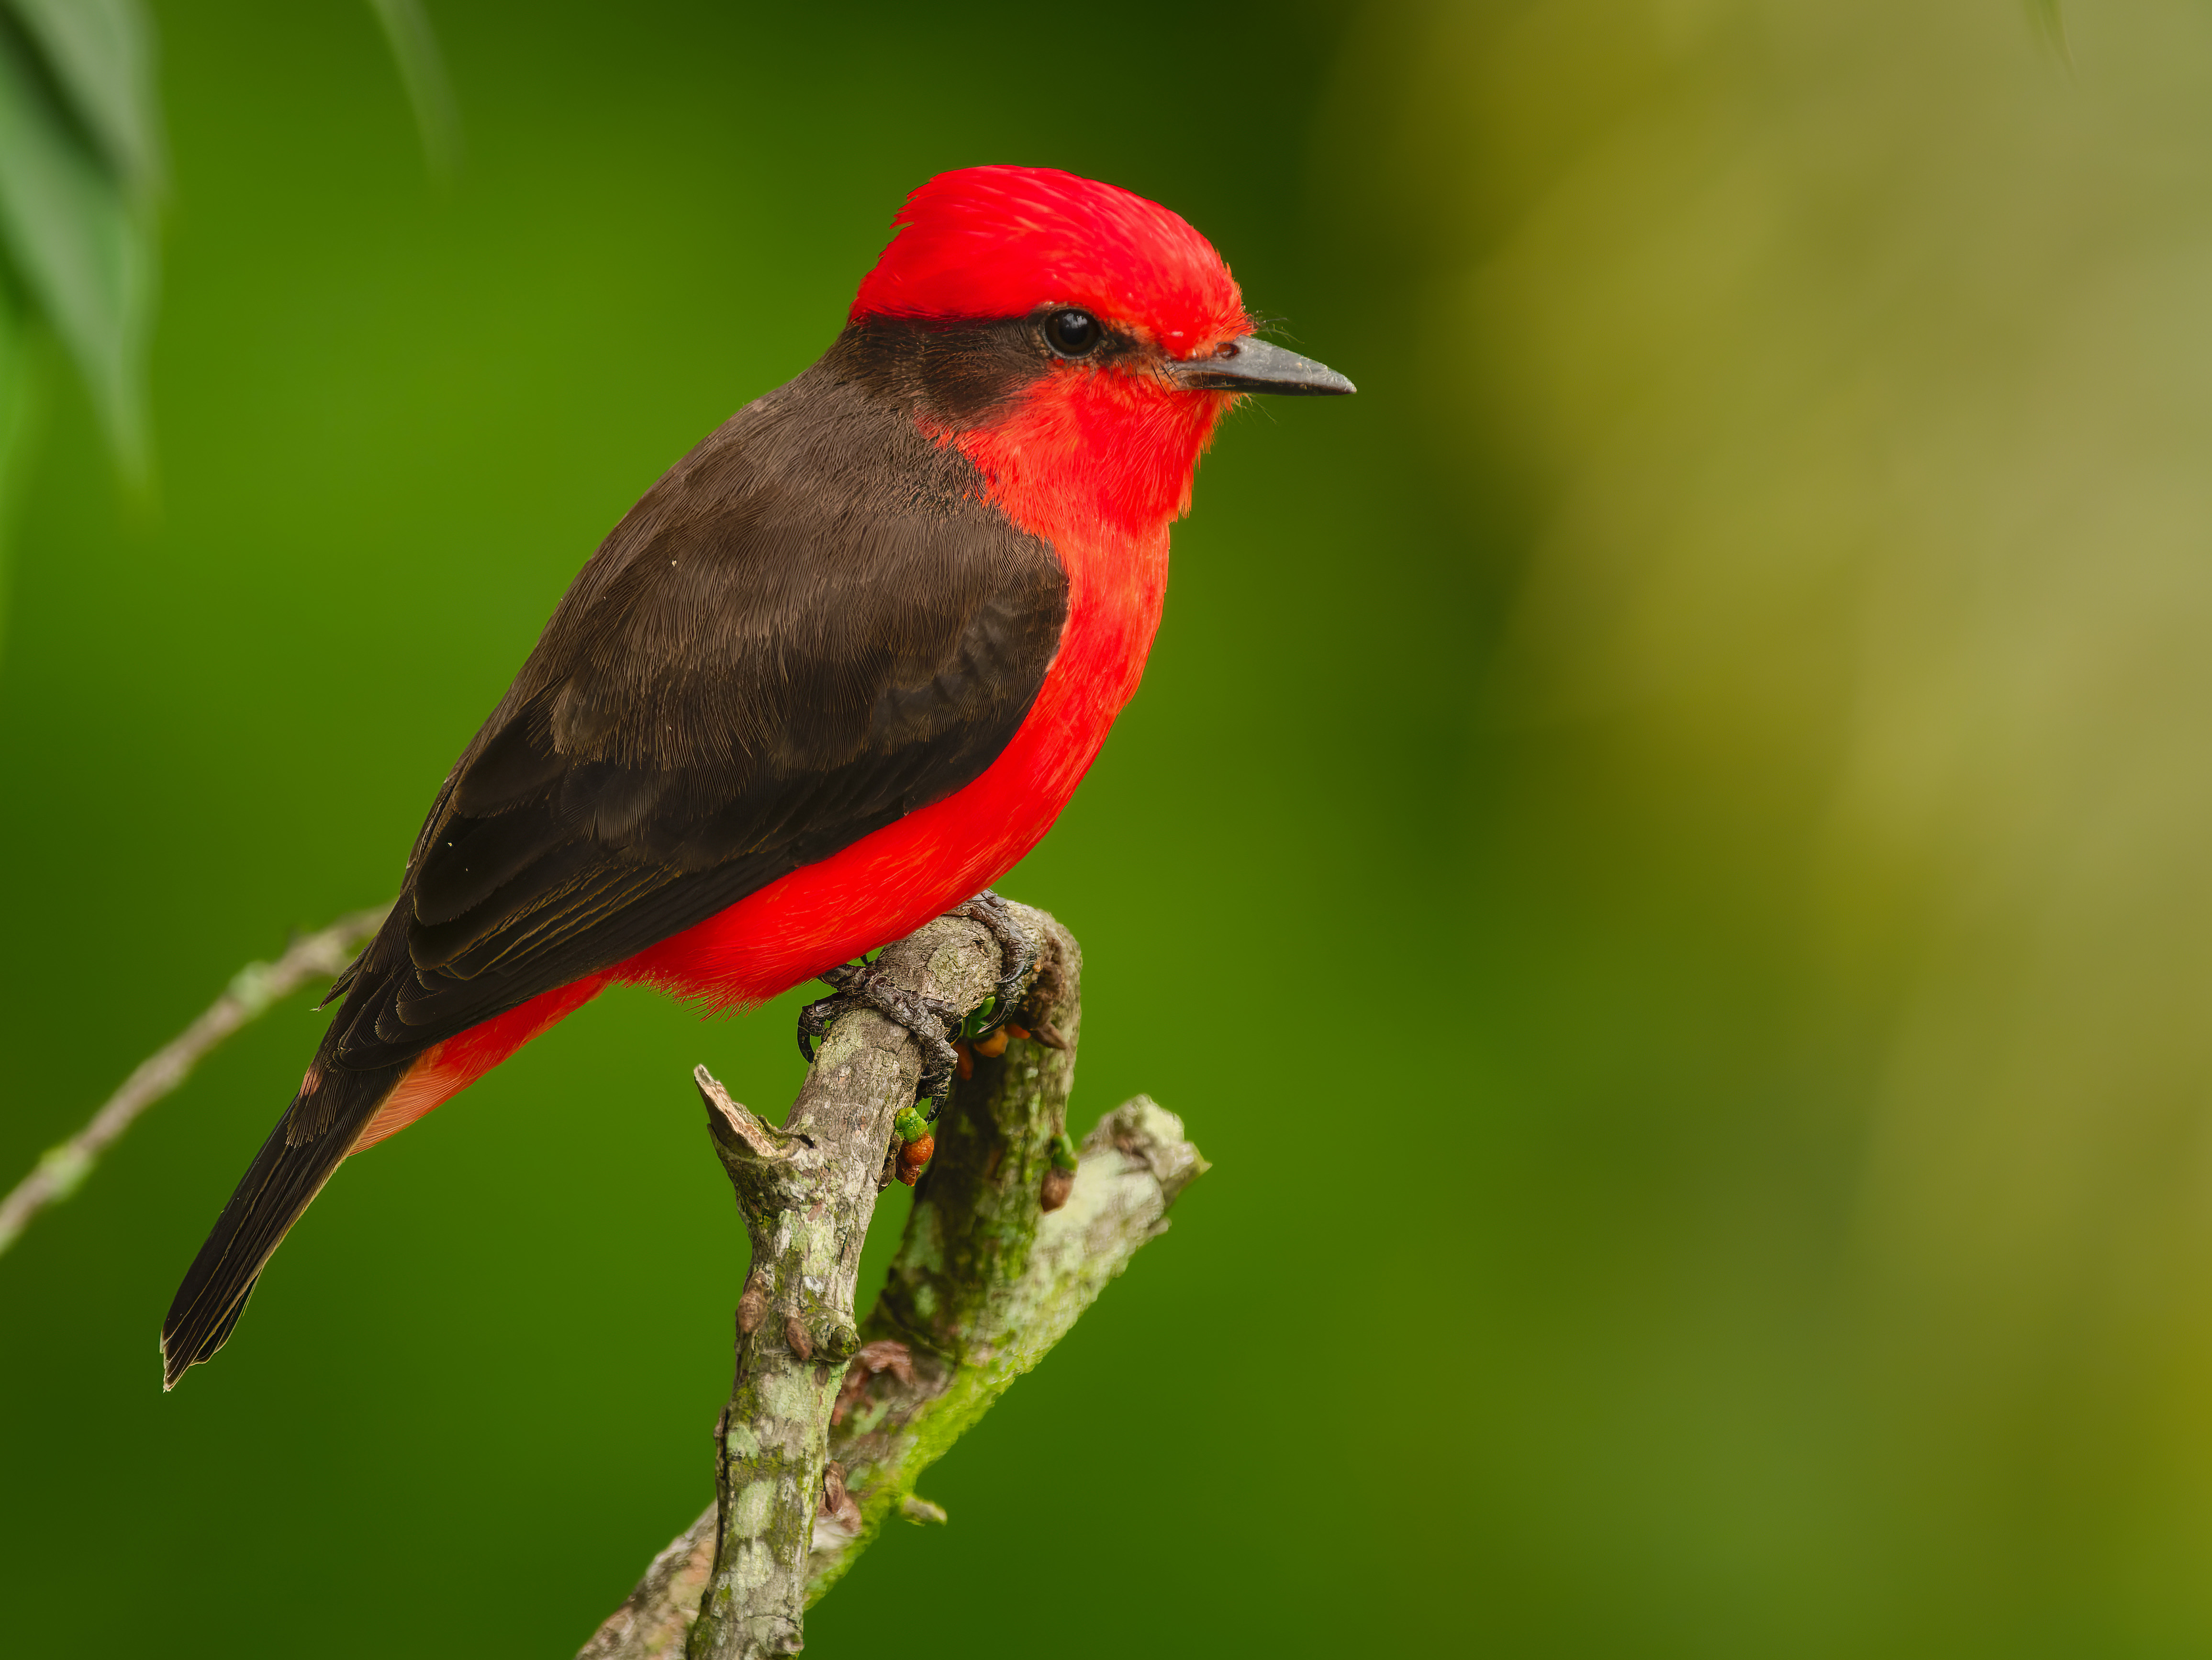
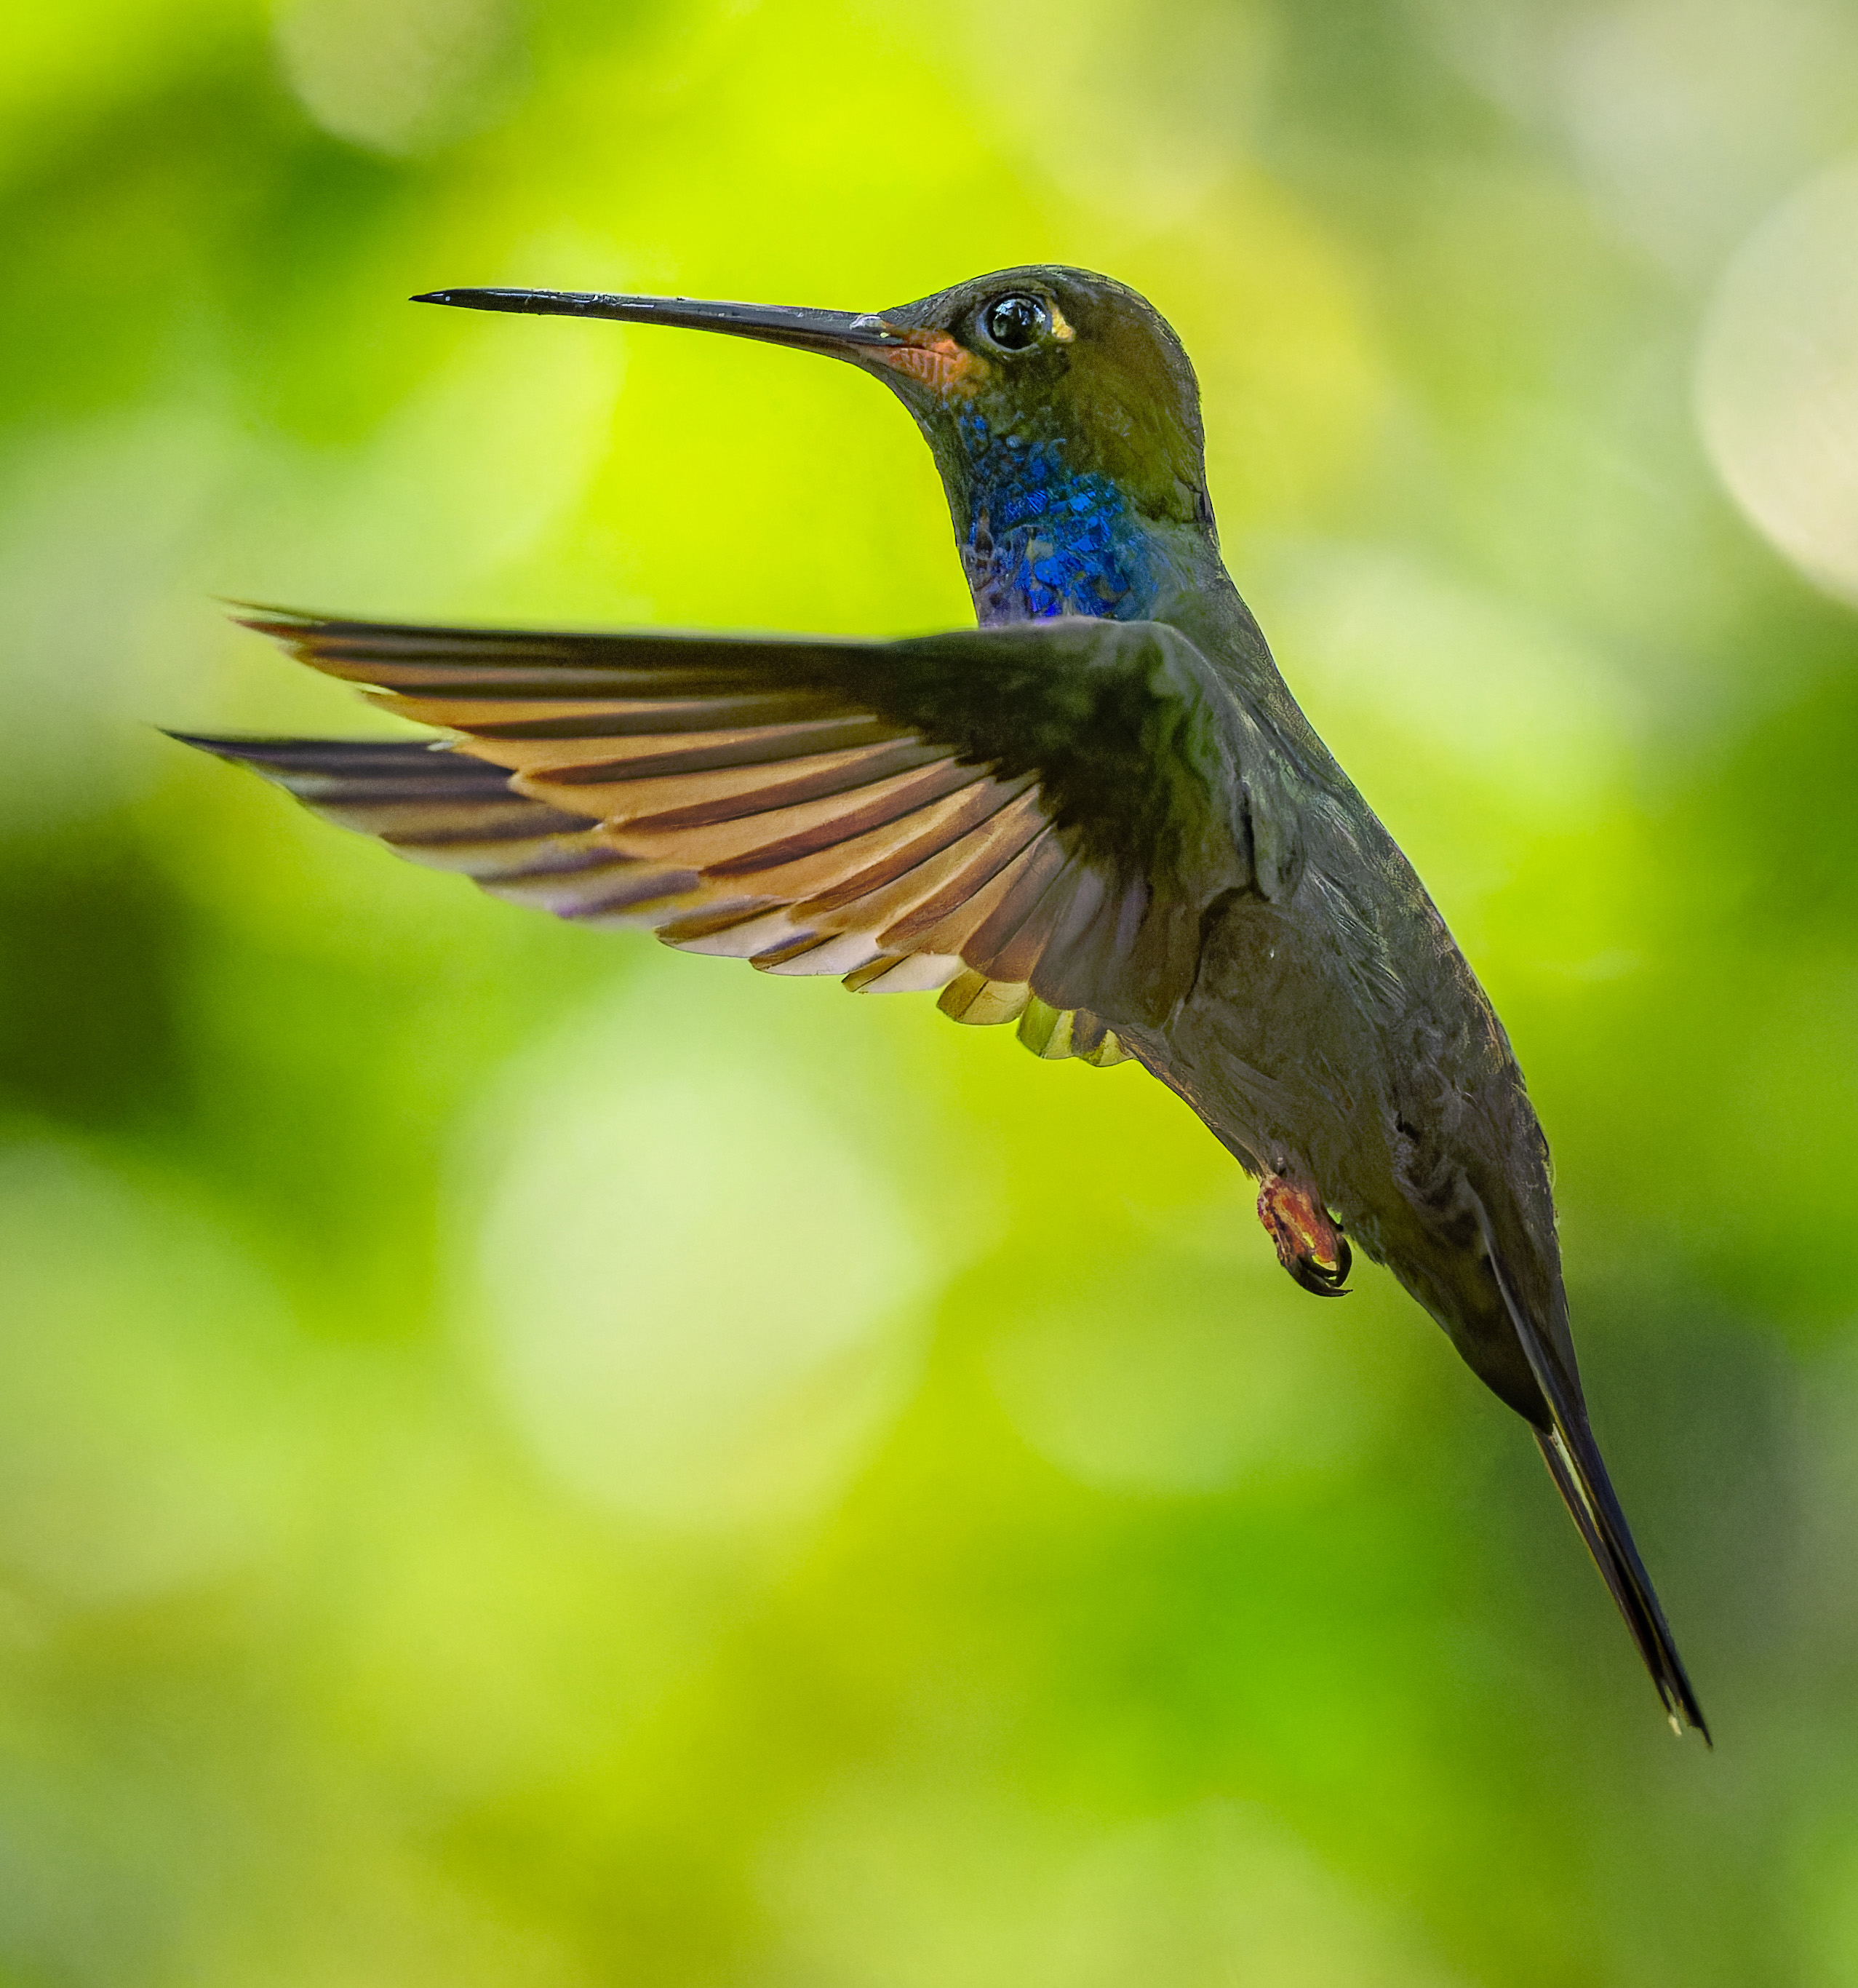
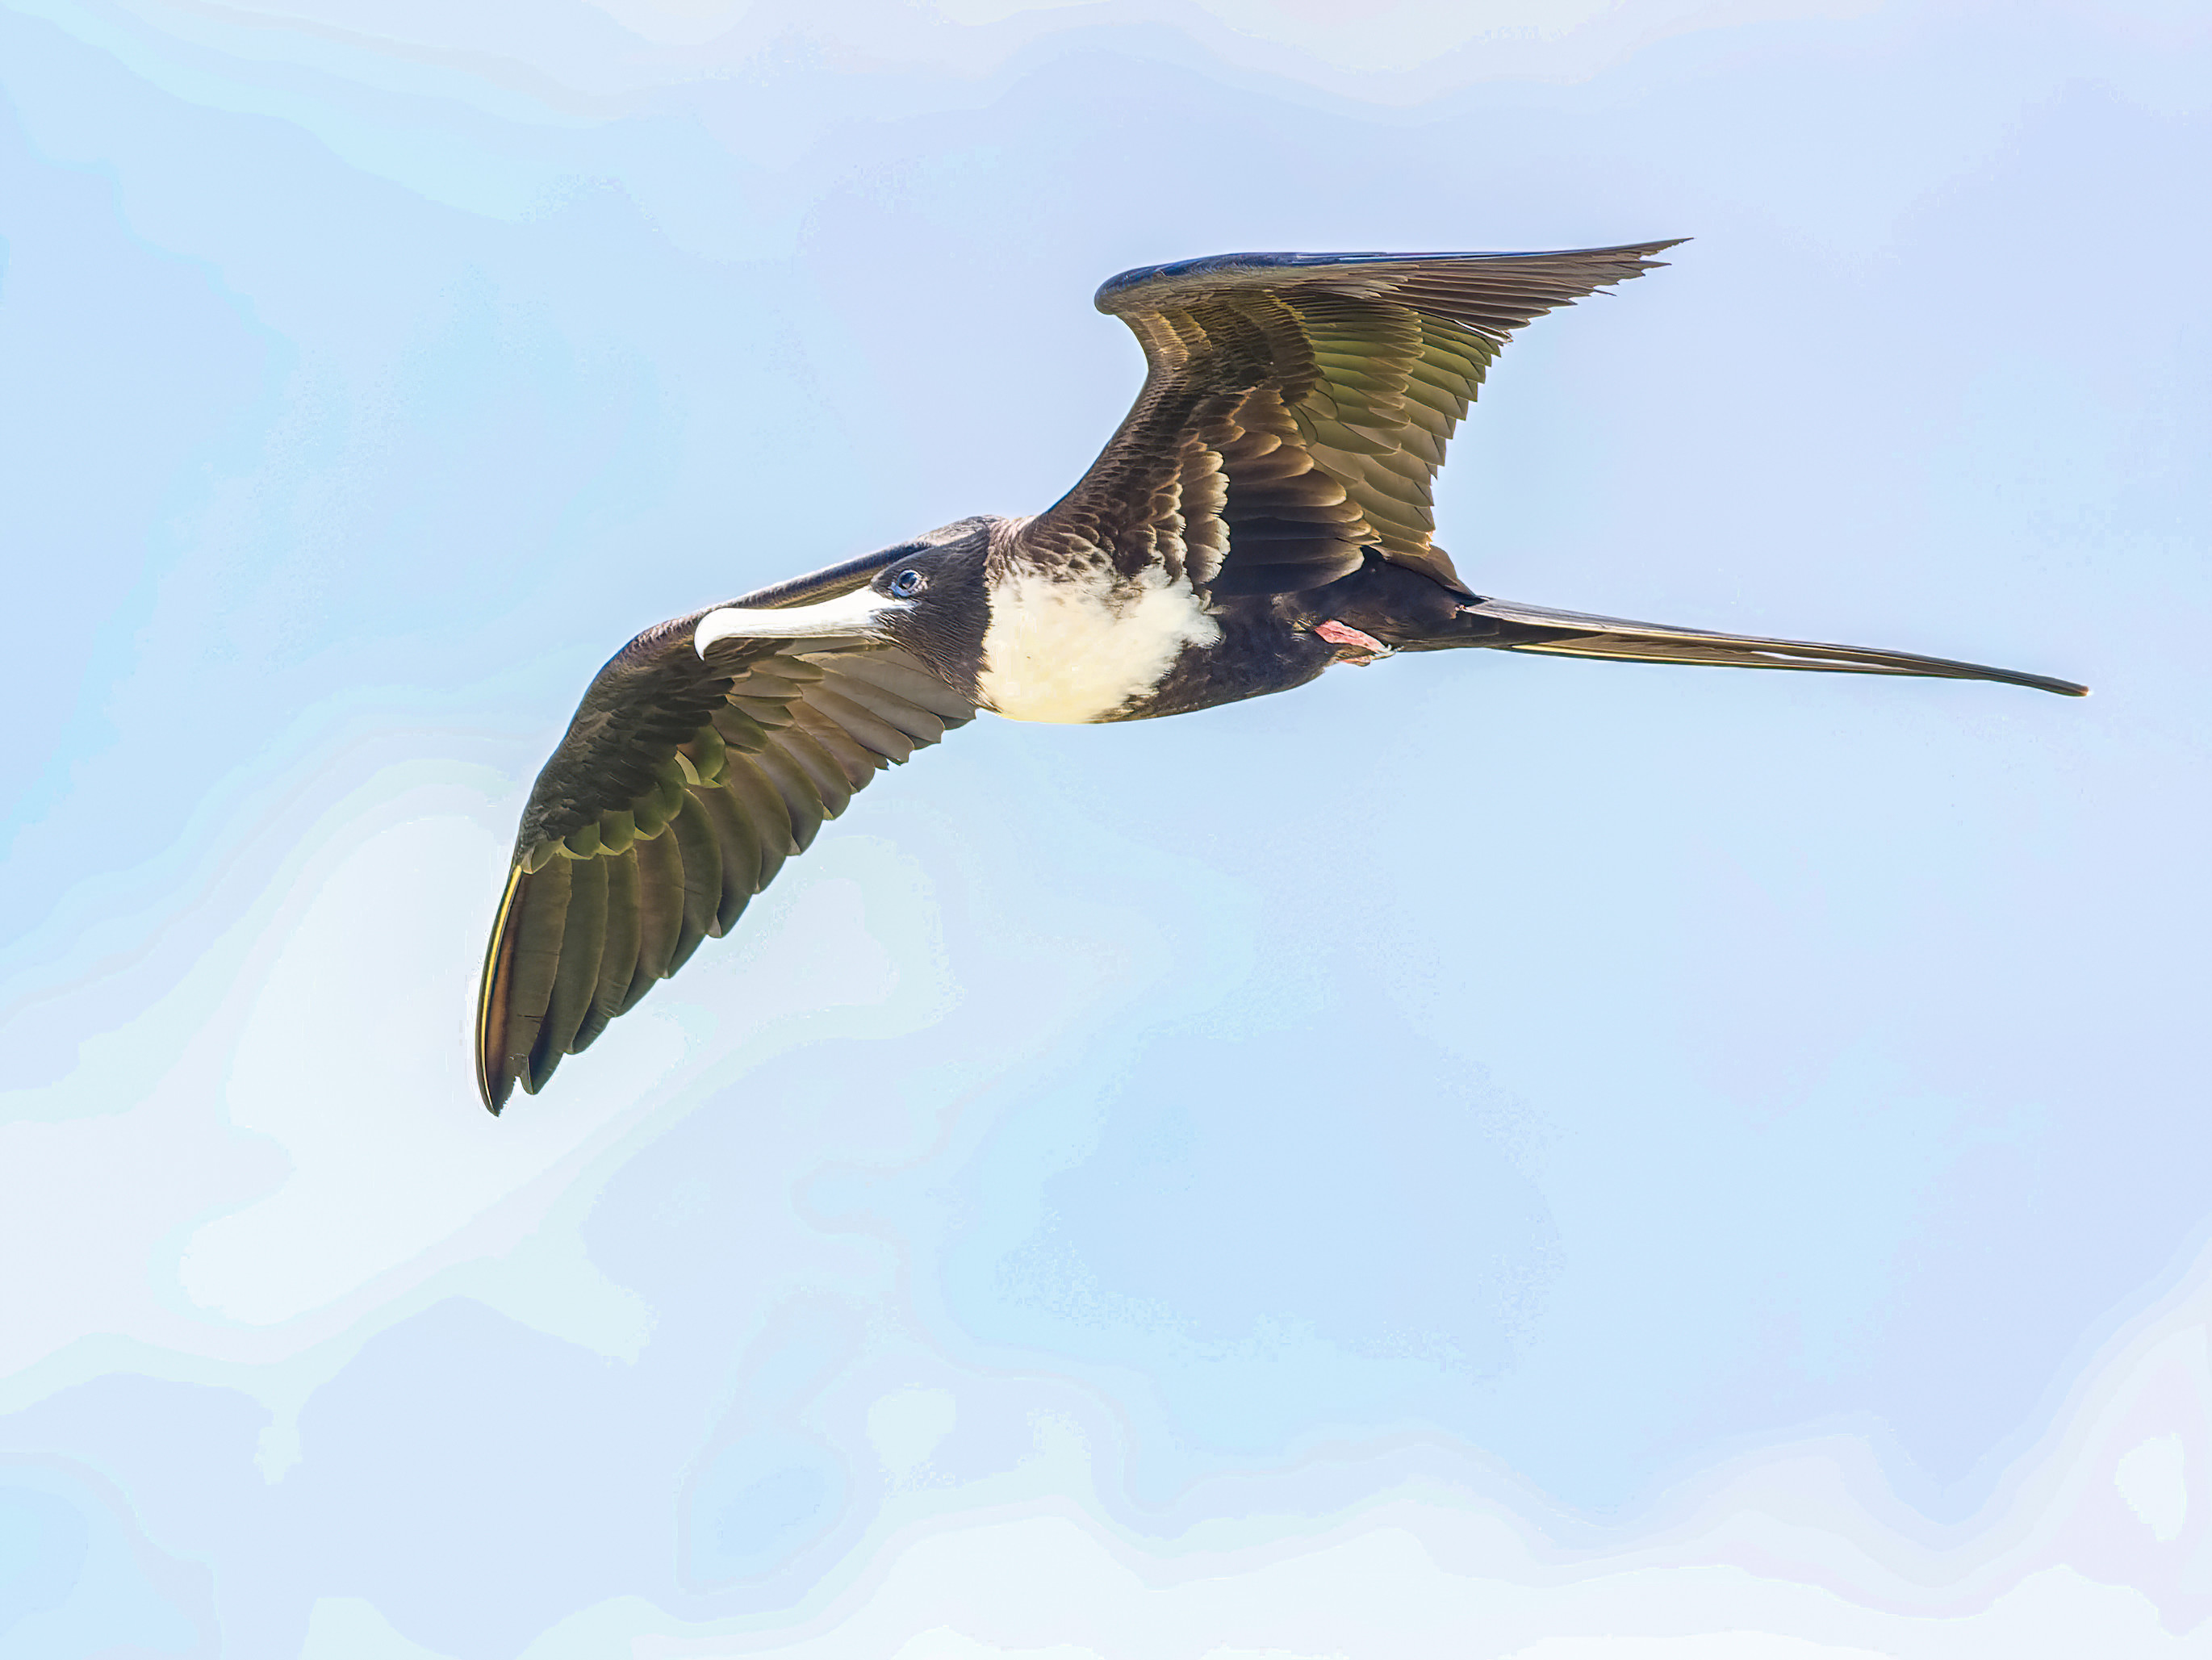
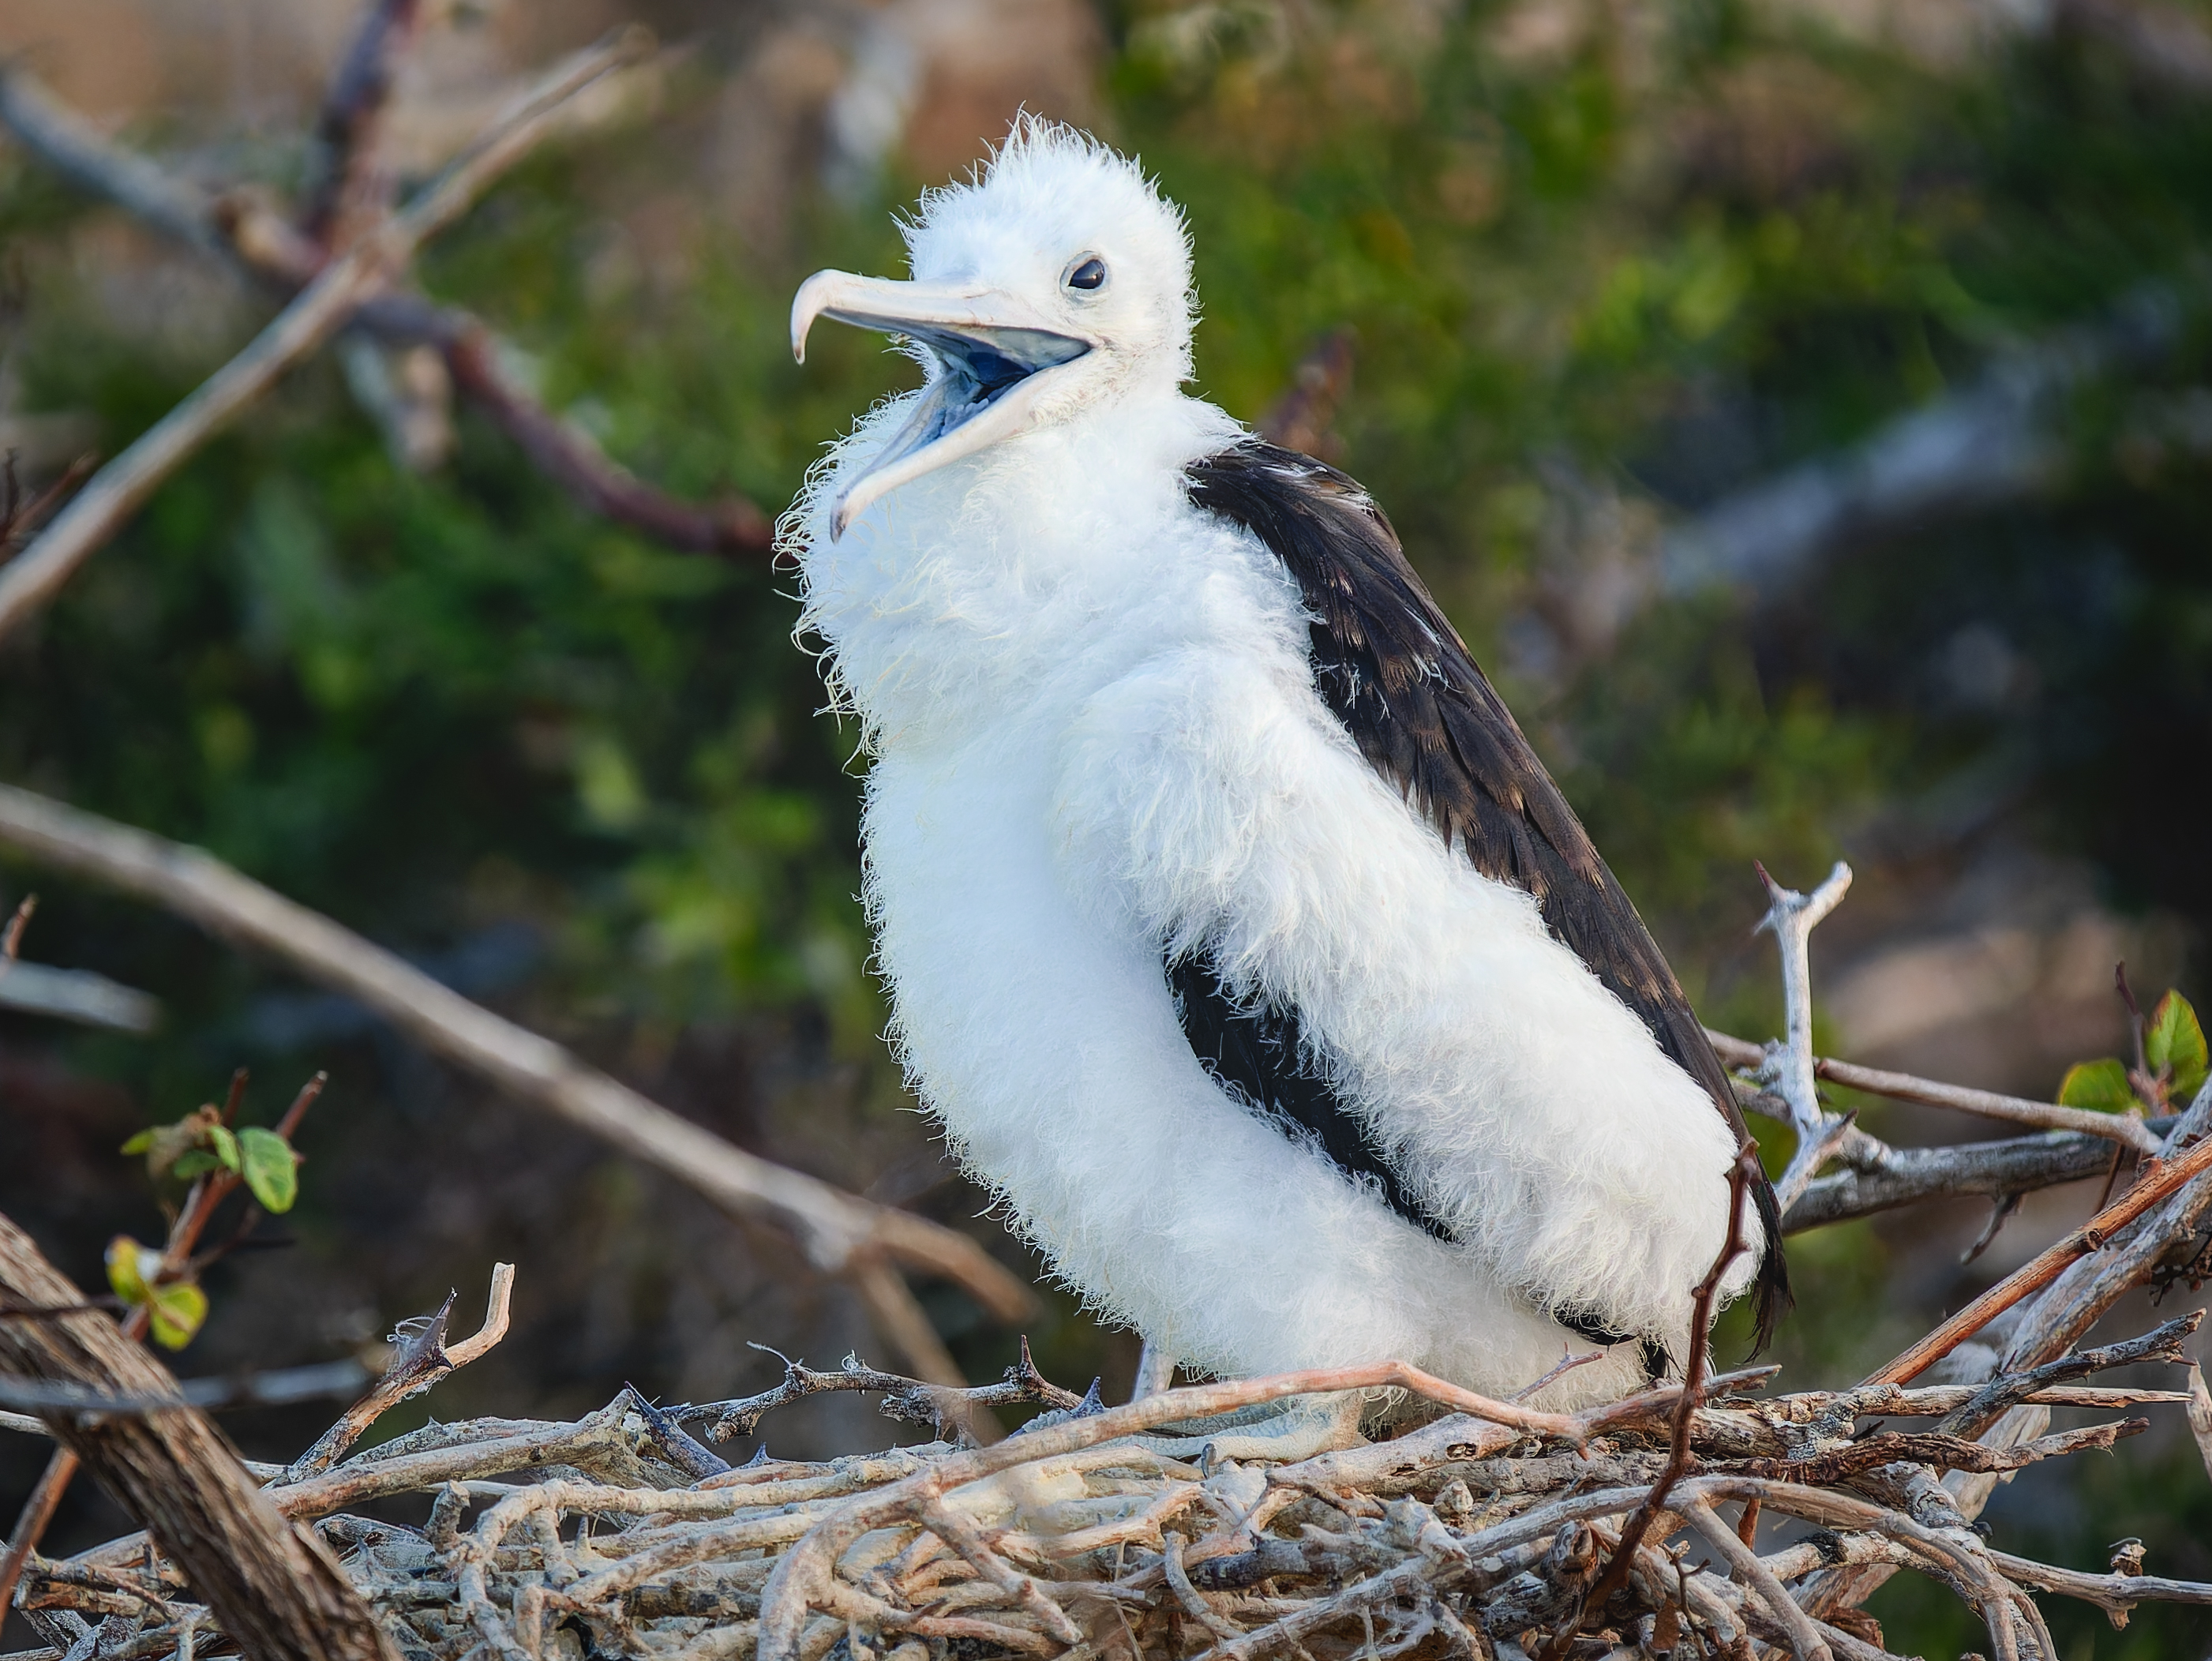
Things I particularly like about the G9II from a bird shooter’s perspective, sorted in order of importance to me
#1 Very good low-light performance, with good, though slow, AF acquisition.
#2 Pleasing colors and great overall image quality, with manageable noise even at ISO 6400 and beyond.
#3 Continuous autofocus at frame rates of up to 60 fps.
#4 About twenty-five percent more megapixels than the OM-1.
#5 A huge 200 image buffer allows for shooting long bursts.
Things I particularly dislike about the G9II from a bird shooter’s perspective, sorted in order of importance to me
#1 The slow and gradual approach to acquiring focus, which takes quite a bit longer than the OM-1’s.
#2 The need to operate dials on both sides of the camera when changing from perched bird shooting to Pre-burst or BiF shooting.
#3 AF tracking that is decent but a half-notch below the OM-1’s.
#4 The pickiness of the body as far as setting the AF Area size goes, which needs frequent adjustments.
In my opinion, #1-3 are substantial flaws that make the G9II less appealing for bird shooters. #2 may be less of an issue for owners of lightweight lenses, but it is huge when shooting with the 150-400 or the new 150-600. None of these issues are show stoppers, but they add up, making the body less attractive for bird shooting than it could be. #1 and #3 could be fixed with firmware updates, so there is still hope. J
Note that I am NOT listing the G9II’s rather awkward stop-when-buffer-full burst shooting behavior here. It strikes me as needless and irritating, but in all my shooting sessions with the camera, I did not run into it being a real issue. If you shoot many LONG sequences, so this characteristic becomes an issue for you, I hope not to hurt your feelings when pointing out that maybe you are relying a bit too much on “spray and pray”? 😉
The Bottom Line I: How do these two bodies compare for bird shooting?
The G9II is as solid a camera as the OM-1 is. With this, I mean “a great general-purpose body”. Please allow me to digress a little in order to explain this term:
Some of you may not even remember it, but it hasn’t been that long ago that camera bodies weren’t general purpose. I was still deeply in Nikon territory back then, so I’ll use Nikon examples: “You shoot landscapes? Get a D810!” “You want good low-light performance? Buy a D750!” “You’re a bird shooter? The D500 is your darling!” Back then, no single body performed well enough to make most shooters happy regardless of their favorite subjects and specializations. The same was true with other brands: nobody offered a body that was good enough across the board. In my view, the first camera to change this was the Nikon D850. It combined high resolution with fast speed, excellent AF, low noise and other aspects that weren’t necessarily best-in-class but close enough to the top performers to satisfy the needs of all but the most demanding customers. Other brands followed. Sony’s A1 and Canon’s R5, for example, are solidly planted in the “good enough across the board” category.
As are the OM-1 and the G9II.
Both of them are strong performers across many, I dare say all, categories of photography. I emphasize this because it is important to keep in mind that my mini-series here looks at a specific photographic niche neither of these bodies was explicitly designed for. When finding one of them to be more apt for bird shooting, I ignore aspects not relevant to this particular application, even though they might matter a great deal to folks mostly shooting other subjects. Heck, I myself also shoot other subjects every so often.
My biggest personal heartburn with the G9II for bird shooting is what, when combined with the somewhat disappointing AF performance, kills it for me as an Olympus 150-400 companion: the ergonomics issue I list as #2 on my above ‘dislike’ list. I often shoot a perched bird and then immediately switch to ProCapture/Pre-burst in order to take a burst of the same bird taking off. (Assuming that it will. You can’t imagine how many times my arms got tired because the bird just wouldn’t do me the favor, staying put in spite of me remaining ‘shooting ready’ for a long time. 😉 )
Seriously, switching modes in these situations takes less than a second with the OM-1, while even with practice and custom configuration, getting it below two is hard with the G9II, more than that if you then have to find the bird again since your had to concentrate on the mode change. This has caused me to lose precious shots, especially of small, active birds. I respect those telling me it’s a non-issue for them. (Hey, we are all different). But for my shooting style, it is a real issue. AF performance and ergonomics make the G9II inferior to the OM-1 for bird shooting. The Panasonic is not a slouch but, as we say in German, “Better is Good’s enemy.” The OM-1 is better for bird shooting. Here, I said it.
The megapixel difference, by the way, is not significant enough to matter much. Having more megapixels is nice, but a mere 12 percent increase in pixels on either axis just doesn’t make that much of a difference. Throughout my evaluation, I hardly noticed the Panasonic’s resolution advantage in my bird shots. I can crop a little more, and/or I’ll have a few more ‘pixels on the bird’, but this is nice-to-have, not essential. On its own, it isn’t enough in my opinion to pick one body over the other.
Which brings me to my real bottom line:
The Bottom Line II: Which one will I keep?
Well, the real question here is “Which of the two bodies will have to go?”, isn’t it? (I am not a collector.)
The answer is: (The suspense must be killing you… Hold on to your chair now!) The OM-1 will need to go. Well, so much for dramatic effect. 😉
Wait, now: What?
You read correctly. I have indeed decided to sell one of my two OM-1s, keeping the G9II instead. The one that will remain glued to the 150-400, my primary bird shooting tool, is the other OM-1, however, as I’m sure you guessed anyway. Instead, the G9II replaces one OM-1 whose primary function was to perform as a landscape and architecture camera. This change is owed to the Panasonic’s great IQ and low-light capabilities. “An excellent general-purpose body”, right?
However, the G9II is unlikely to ever get close to my Big White Oly again. 😉
The Monkey Wrench: What’s my initial take on the OM-1II?
Rarely have I seen such a negative initial reaction to a new photographic product as the one the OM-1II received on our forum. Many comments were along the lines of “This is just a minor upgrade”, “This camera is a rip-off”, “OMDS should simply have offered a firmware upgrade with the same features for the OM-1”, and other broad comments that seemed driven by disappointment, not to say rage, more than by rational reflection and actual information. This was especially vivid when the 43rumors pre-announcement was the only available information, but it lingered on for much longer and still seems to be going on to a degree. More detailed discussions allowed me to get a somewhat balanced read on what little is known so far. My initial take was nevertheless that the OM-1II did not seem to offer enough to warrant upgrading.
Thomas Eisl delivered his hour-long video on the OM-1II (https://www.youtube.com/watch?v=O795tk3bFcg) with so much fanfare and praise for the camera that several viewers, me included, got a bit leery. Nothing is as perfect as we would like it to be. His review also does not really address bird photography in more than superficial ways, so it left several of my own questions about the new body unanswered.
Petr Bambousek, the very talented Czech wildlife photographer, published his own initial review on his website, at https://www.sulasula.com/en/om-system-om-1-ii-first-impression/. It is based on him having used the camera for three months. His report strikes me as ‘much closer to home’ for bird photographers. Petr’s overall impressions stimulated me to rethink my initial take. In fact, taking Petr seriously, which I always consider sound to do, made it likely that I will end up buying an OM-1II. I will look for further reports and evaluations, plus I am still traveling in Latin America and won’t be back home until mid-March anyway, so I have time left before making the call.
Who knows, maybe I’ll publish a “OM-1II vs OM-1 compared for bird shooting” series in a few months. (Well, it could actually be “… for bear shooting”. I’ll be doing that in Slovenia in late 2Q. J )
.